Watermark multiple photos online in one batch. Add a text or logo watermark, customize its size, opacity, position, and tiling, then download the finished images in minutes — no installation required.
This app makes it easy to add a watermark to photos online without installing software or dealing with a complicated workflow. It runs in your browser, so you can upload your images, customize the watermark, and export the results in just a few steps.

Easy watermarking, even for first-time users
The interface is simple and uncluttered, so you can start watermarking photos right away. Whether you need to protect product images, social media posts, or photo previews, the workflow is straightforward and intuitive.
You can:
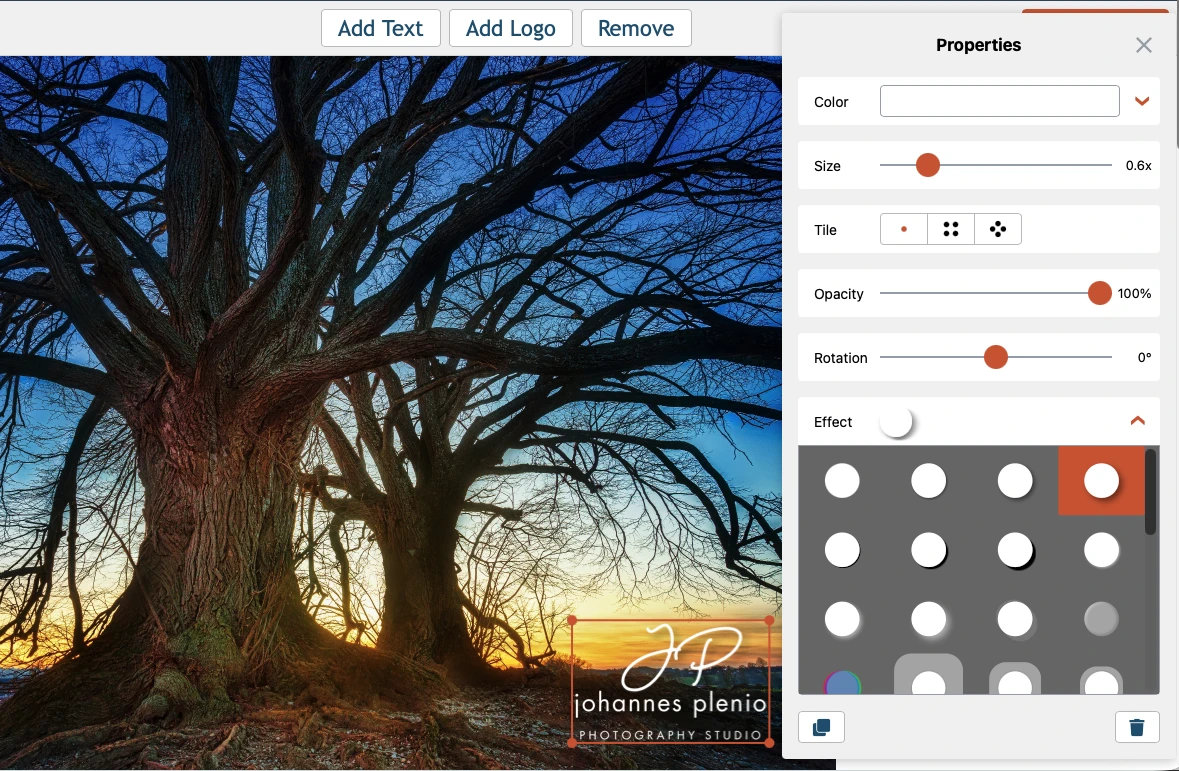
Flexible watermark customization
Create a text or logo watermark that fits your photos and branding. Adjust the look of your watermark, preview the result, and save your settings for future use.
You can:
Private and ad-free
Your images are processed in your browser and are not uploaded to external servers, so your files stay private. You do not need to sign up to watermark photos online, and there are no ads or pop-ups to interrupt the workflow. Just drag your images into the app window and start watermarking in seconds.
Step 1. Upload One or More Photos
Start by uploading the photo or set of photos you want to watermark. You can drag and drop your images from your device or import them from cloud storage. You can upload multiple photos at once and work with large image files without worrying about file size limits.

Step 2. Add a Text or Logo Watermark
Choose the type of watermark that fits your goal. A text watermark works well for a name, signature, copyright notice, or website URL, while a logo watermark is better for visual branding and consistency. If you are using a logo, a PNG file with a transparent background usually works best.

Tip:
Don’t have a ready-made logo? You can create a simple one in the app or remove the background from your existing image before using it as a watermark.

Step 3. Adjust the Watermark
Customize the placement, opacity, size, and style of your watermark so it matches the image and stays visible. If your priority is protection, use options such as tiled or embedded watermarks to make removal or cropping more difficult. If branding is your priority, keep the design cleaner and more subtle so your logo looks professional without distracting from the image.
Step 4. Preview & Export
Preview the results before saving or downloading the images. This step is especially useful when you are working with a larger batch, since you can still make final adjustments and check that the watermark is readable, well placed, and not too distracting.

The best place for a watermark depends on what matters more to you: protection, branding, or a clean visual look. A watermark placed in the center is harder to remove, while one placed in a corner is less distracting and works better for subtle branding.
Center Placement
A centered watermark is the hardest to crop out without damaging the image. It works best when your main goal is to protect photos from unauthorized use, especially previews, proofs, or images shared online before delivery. For client proofs, a centered watermark is often one of the safest options.

Corner Placement
A corner watermark is more subtle and usually looks cleaner, which makes it a better choice for branding. This placement works well when you want the watermark to stay visible without drawing too much attention away from the photo. For social media branding, a corner watermark is often the most natural choice.

Across the Main Subject
Placing the watermark across the main subject offers stronger protection than putting it in an empty area. This makes removal more difficult, especially if cropping would damage the most important part of the image. For product shots or portfolio previews, placing the watermark closer to the main subject usually offers better protection than leaving it near the edges.

Tiled Watermark
A tiled watermark repeats across the image and gives the strongest visible protection. It is a good option for previews, stock-style images, or any content you want to share publicly without making it easy to reuse. For client proofs and other preview images, a tiled watermark can work especially well.

A good watermark should be visible enough to do its job without taking too much attention away from the image. The right balance depends on how you plan to use the photo, where you want to publish it, and whether your goal is branding, protection, or both.
Keep It Readable
Your watermark should stay easy to read at a glance. Avoid fonts that are too thin, decorative, or low-contrast, especially if the image has a busy background.
Match the Watermark to the Image
The same watermark will not work equally well on every photo. On darker images, a light watermark is usually easier to see, while brighter images may need a darker or more defined design.
Do Not Make It Too Small
A very small watermark may look clean, but it is often easier to ignore. If you want it to be effective, make sure it remains noticeable even after the image is resized or shared online.
Lower Opacity Instead of Hiding It
If you want a more subtle look, reduce the opacity rather than making the watermark tiny or placing it where nobody will notice it. A larger watermark with lower opacity often creates a better balance between protection and appearance.
Keep the Style Consistent
Using the same watermark style across your images helps create a more recognizable visual identity. This is especially useful if you publish photos on your website, portfolio, marketplace listings, or social media.
You can watermark multiple photos online in just a few steps. Upload your images, add a text or logo watermark, adjust the settings, and export the results. The tool is free for a limited number of photos, which makes it a convenient option for small batches and quick tasks.
The fastest way is to use saved watermark templates and batch processing. Instead of creating the same watermark again and again, you can reuse a template and apply it to multiple photos at once. This helps keep your workflow consistent and saves time when you work with larger sets of images.
Yes, if you want to protect your images or make your work easier to identify online. A watermark can discourage unauthorized use and help viewers associate the photo with your name, brand, or business. It is especially useful for previews, portfolio images, product photos, and content shared on social media.
A text watermark is easier to create, edit, and adapt to different images. It works well for adding your name, website URL, copyright notice, or social media handle. It is also the simplest option if you do not have a logo yet or do not want to spend time creating one.
A logo watermark is better for consistent branding and a stronger visual identity. It often looks more professional across multiple images, especially if you already use the same logo on your website, store, or social media.