
 by
by Good quality means more information is stored in a file. And more information usually equals a bigger size. Pixel dimensions of an average photo are around 4032 x 3024 px. One picture is somewhere between 1.2 to 4 MB. This number can go slightly higher if you utilize the HDR feature. If you often take photos on your iPhone, don’t be surprised if your images take up more than 50% of your memory storage.
Here are the most common reasons to make a picture smaller on your iPhone:
- To free up some space in your memory storage. This might be especially important since iOS devices have a limited amount of memory and there is no slot for an SD cards.
- To send images via instant messaging apps or email without a significant loss of quality. As you may know, nearly all email services have a size limit of attachments. Therefore, you might face a problem when sending multiple images at once. On the other hand, in most instant messaging apps like WhatsApp, Telegram, and Facebook Messenger, you’ll be able to share a batch of photos easily. But there’s a catch. They will be compressed, which may lead to a noticeable loss of quality.
- To optimize images before uploading to a website or social media. Keep in mind that large-sized images can slow down the loading speed of a page, especially in the mobile version. As a result it can negatively affect your SEO and reduce the website’s traffic. Some social media networks, like Instagram, also have certain size requirements. Thus, you might want to change the size of your images before posting them.
Knowing how to resize an image on an iPhone will help you deal with the issues mentioned above. Let’s take a look at different ways of resizing and compressing images on your Apple device.
How to Check Image Size on iPhone
It is super easy! Go to the Photos app on your iPhone, select the photo which you want to learn more information about, and then tap the “info” icon (ⓘ).
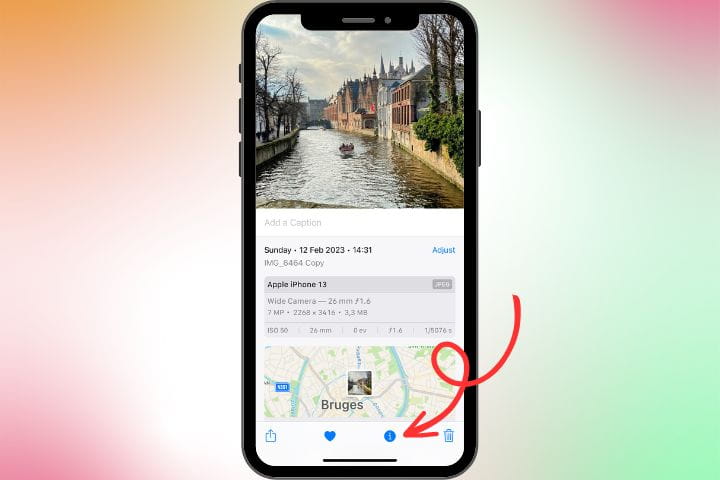
A small box with all the image metadata will appear underneath the image. You will see the size of the photo in pixels and MB.
Please note that devices running on iOS 11 and above automatically save your images in High-Efficiency Image Format (HEIF) instead of usual JPEG. This format produces images of good quality, yet smaller size. The main drawback of HEIF is that it’s compatible with a very limited number of devices. Unlike JPEG. So you might need to convert your photos to JPEG or some other image format to share them easily.
How to Resize an Image on an iPhone with Shortcuts App
There is no built-in app for resizing your images on an iPhone. But what you can do is utilize Apple’s visual scripting app - Shortcuts. Naturally, this app might be intimidating for you. You need to know what steps to take and how to set the settings to make everything work properly.
Not to mention that the process of mastering this app will probably be somewhat time-consuming. But once you learn what to do, you will be able to resize a single or several images on an iPhone in a matter of minutes.
So, let’s see how to make a picture smaller on an iPhone using Shortcuts step-by-step:
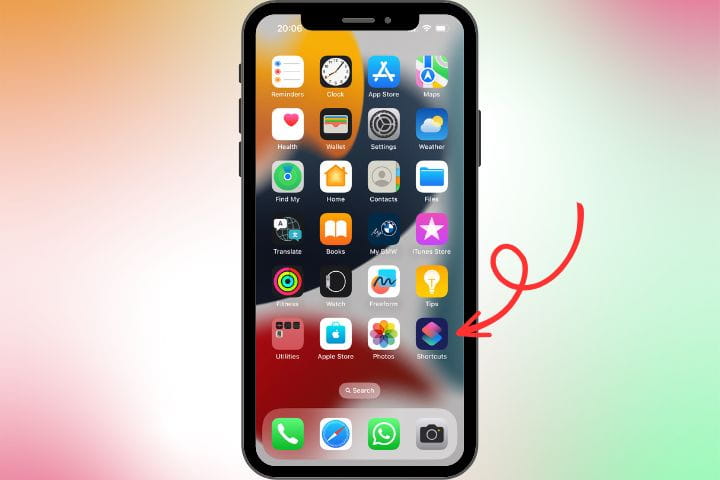
- Open the Shortcuts app on your iPhone.
- Go to “My Shortcuts”, tap the “+” button in the top right corner of the screen to create a new shortcut.
- Search for “Resize Image” and then add this action to your Shortcut.
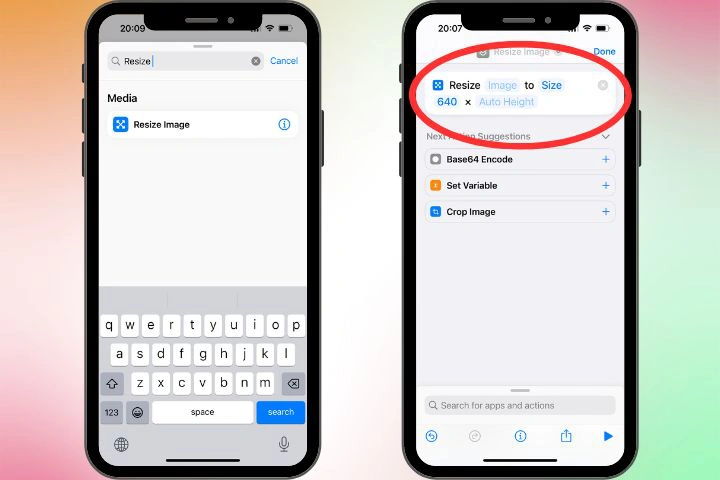
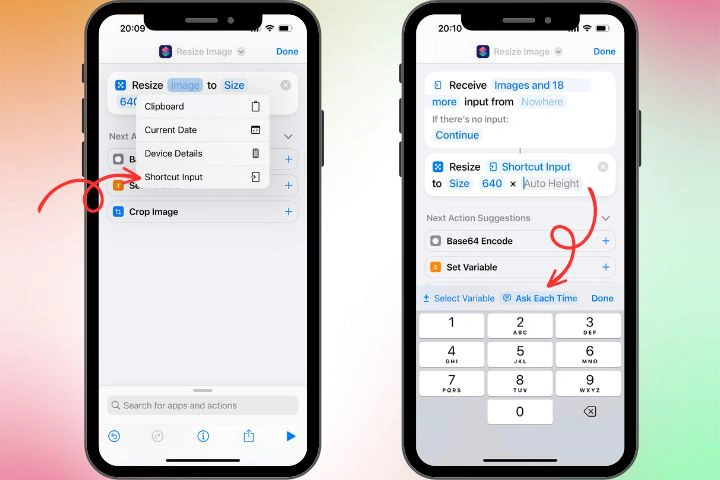
- Adjust the settings. Tap on the “Image” and choose “Shortcut input” option. The shortcut will resize any picture that you send to it. By default, your resized images will have the width of 640 px, and the height will be changed automatically. If this isn’t what you need, switch to the “Ask Each Time” option. This will allow you to enter the number of pixels you want your images to be resized to.
- Tap the “+” button again to add the next action which will allow you to save your processed files.
- Search for “Save to Photo Album” and then add it. By default, this action will save the resized images to the “Recents” album. Tap the “Recents” button and change the album if necessary.
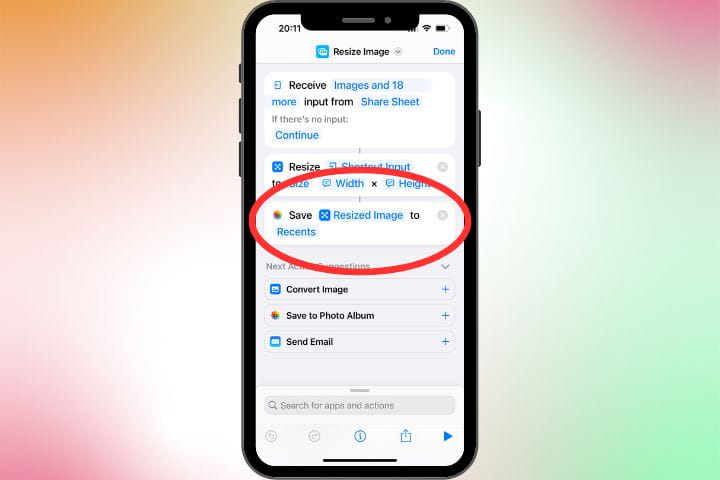
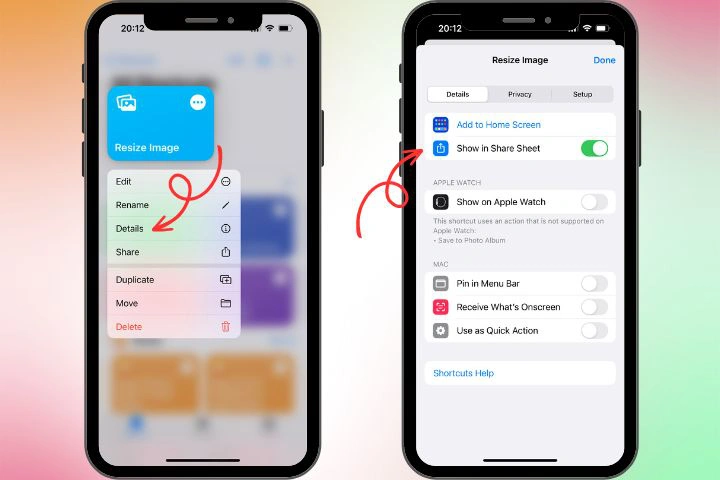
- You’re done! To make it work, you need to enable the “Show in Share Sheet” option. To do this, hold down the “Resize Image Shortcut” button for a few seconds, then choose “Details” in the pop-up and turn on the option. Edit the name and the icon of the shortcut if you want.
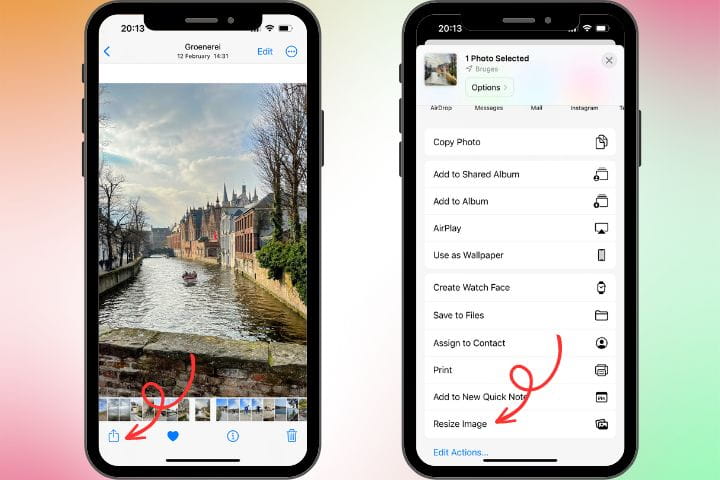
- Next go to the Photos Gallery, select one or several images and tap the “Share” button in the bottom left corner of the screen. Scroll down the Action menu and choose the shortcut you’ve just created. It may be called “Resize Image” or have a different name, depending on your choice. Enter the width and the height and tap “Done”. The resized images will be saved next to the originals in your Recents album or in the album of your choice.
What’s great about this method? It is free and you already have this app on your device. It means that you’ll be able to resize multiple images right on your iPhone without sending them elsewhere and downloading anything else.
However, using Shortcuts can be somewhat inconvenient if you need to resize your images differently every time. You’ll need to create a couple of separate shortcuts – a shortcut for resizing with certain width and auto-height (or vice versa), then a shortcut for resizing with exact width and height and maybe even a shortcut for resizing your images by percentage.
Besides the Shortcut only allows you to make a picture smaller by resizing. The compressing option is not available.
How to Make a Picture Smaller on an iPhone Using Apple Mail
Another option to resize an image on iPhone without any third-party tools is to send them via Apple mail. This time, when you tap the “Share” button, select “Mail” from the list of options. You will see a notification telling you that you can reduce the message size by resizing your images before sending them.
If, for example, your original photo is about 3 MB in size, it can be changed to Small (about 40 KB), Medium (about 100 KB) or Large (about 900 KB) size or remain unchanged.
This method is also free and useful, but the list of Mail’s options on how you can make your pictures smaller is very limited. In addition not every iPhone user has an email account on iOS.
How to Resize an Image on an iPhone with Online Resizer
If you want to have more control over the process of resizing, you should try one of the third-party apps, Visual Watermark Image Resizer. It works online, so you don’t need to download and install anything. You can upload your photos right from the Photos library. By default, the “Recents” album is the first one that will show up, but you can definitely pick a different one.
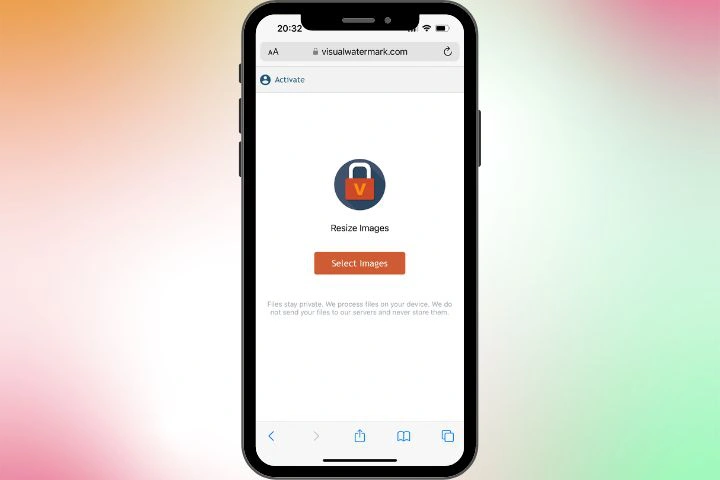
Once your photos are uploaded, choose one of the following resizing options: “Exact width”, “Exact Height”, “Exact Width & Height”, “Maximum Width & Height” or “Percentage”. It is worth mentioning that every time you make changes to the settings, you’ll see not only the size of the original image, but also the width and height of the resized image that you’ll get as a result.

You can convert your images to JPEG as well as choose different levels of quality. Once you tap the “Resize Images” button, the processing of photos starts immediately regardless of how strong your Internet connection is. You can resize up to 2000 images at once.
Note that all the files are processed right on your device. The app is absolutely safe and secure, because it doesn’t send your images to the company’s servers or store them there.
Visual Watermark Resizer offers everything you’ll need for making pictures smaller on your iPhone. Unlike Shortcuts, it doesn’t require you to create new actions. The app is very simple and user-friendly. You won’t even need any tutorials to master it!
You can use Visual Watermark Resizer for free but be aware that the watermark with the company’s logo will be added to your processed files. Consider purchasing the paid version of the app to remove it.
You should also bear in mind that this app saves the resized images to the “Files”, not to the Photos Gallery as the Shortcuts app does.
How to Make a Picture Smaller on an iPhone with Online Compressor
If your main goal is to reduce the file size in MB, it’s better to compress your images, because with this method, you won’t lose quality significantly. There are no built-in options on iPhone for that, but you can easily use your mobile browser to compress images online.
Let’s take a look at how to make your pictures smaller using Visual Watermark’s Image Compressor tool:
- Go to Visual Watermark and click on More Tools < Compress Photos.
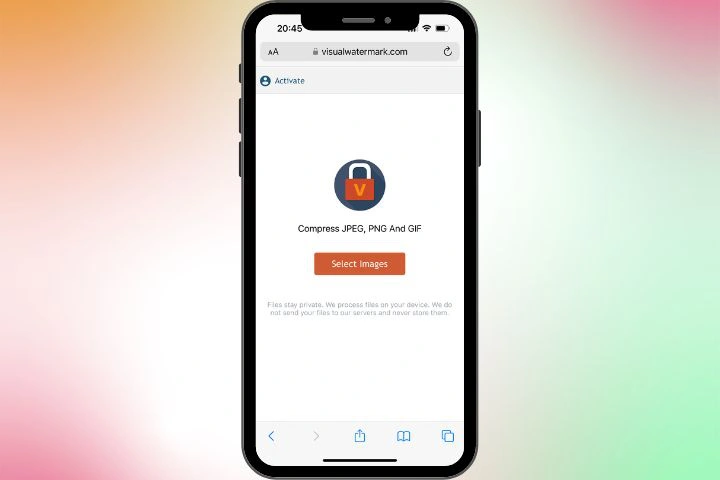
- Select images from your Photos library.
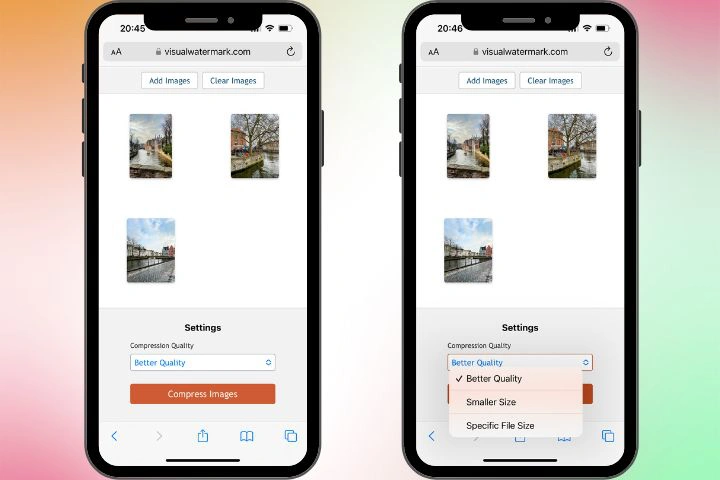
- Choose the quality you need (better quality or smaller size) or enter a specific size in KB/MB.
- Click on “Compress” and export your compressed copies.
In Visual Watermark’s Compress Image tool your images will be automatically converted to JPEG while compressing. It will make it easier to upload them to any website or social media platform you need.
Once your files are processed, you will see by how many KBs and percentages your images were reduced.
You’ll find compressed images in the “Files” folder on your iPhone.
The main advantage of this option is that your compressed images will be of excellent quality, yet their file size will be notably smaller. The difference between the original photo and its copy will be hardly noticeable.
Visual Watermark’s Compress Image tool has no limits on how many images you can upload. But the free version of the app adds the company’s logo to the processed files. It is worth mentioning that by purchasing one of the paid versions of this tool, you will be able not only to get rid of the logo, but also get a full access to another useful apps, such as online tools to watermark images on iPhone and any other device, as well as watermark videos, watermark PDF, crop photos, add text to picture, add logo to an image, watermark creator and much more.
FAQs
How do I reduce the file size of an iPhone photo?
You have a few options for that. The Shortcuts app on your iPhone will allow you to resize an image to a particular size. You’ll be able to the pixel dimensions of your photos. The iPhone’s Mail app will reduce the size of your files in KB. You can also make your images smaller by resizing or compressing them using free online tools, such as Visual Watermark Resizer. They have a wider list of options for resizing and compressing in comparison with built-in apps, and you’ll be able to convert your files to JPEG.
What is the best way to reduce the size of a picture on my iPhone?
It depends on your needs. If you resize images a lot and use the same settings over and over again, you can easily opt for the iPhone’s Shortcuts app. If it’s too complicated for you, try to resize pictures online with Visual Watermark Resizer which is very straightforward and easy to use. If you need to reduce the pictures size in MB while preserving excellent image quality, use Compress Photo tool that works online on any device.
How to resize an image on an iPhone for free?
iPhone has the Shortcuts and Mail apps that are built-in and free. Each of them allows you to make a picture smaller in a different way. But they aren’t the most convenient options due to their limitations. This is why you should give a try to free online tools. There are plenty of them with various options for resizing and compressing images. Some of these apps are mentioned above.
Let’s recap
You might need to resize images on an iPhone if you want to free up some space on your phone, send your images over an email or post them on social media. It is possible to change the size of your photos right on your phone with the help of built-in apps like the Shortcuts or Mail. Alternatively, if you want more control and flexibility, you can use third-party online services like Visual Watermark Resizer. Try all of these tools and see which one of them suits your needs best.