 by
by How to Add a Logo as Your Watermark in Photoshop
This is the easiest and fastest way to watermark your images, but it also requires you to already have a watermark. In other words, a designer has already created a logo for you, or, perhaps, you’ve designed it yourself. Either way, you already have your logo file – all that is left is to apply it.
Your logo file should be either in PNG or PSD format since they tend to be more flexible. But it is possible to use a logo in JPEG. Just keep in mind that JPEG doesn’t support transparency, so your watermark will have to have an opaque background.
Another thing to remember is that resizing your logo can be tricky. If your logo is initially big-sized, then you will be able to scale it down without losing its quality. However, if you import a small-sized watermark and try to make it bigger, then it will look blurry, pixelated and overall, not very appealing or professional. Therefore, you need to make sure that your watermark is of a big enough size.
Once you decide on your logo, but before you import it into Photoshop, you will need to start recording a new action. This will make it easier for you to add your logo to other images with just a couple of clicks!
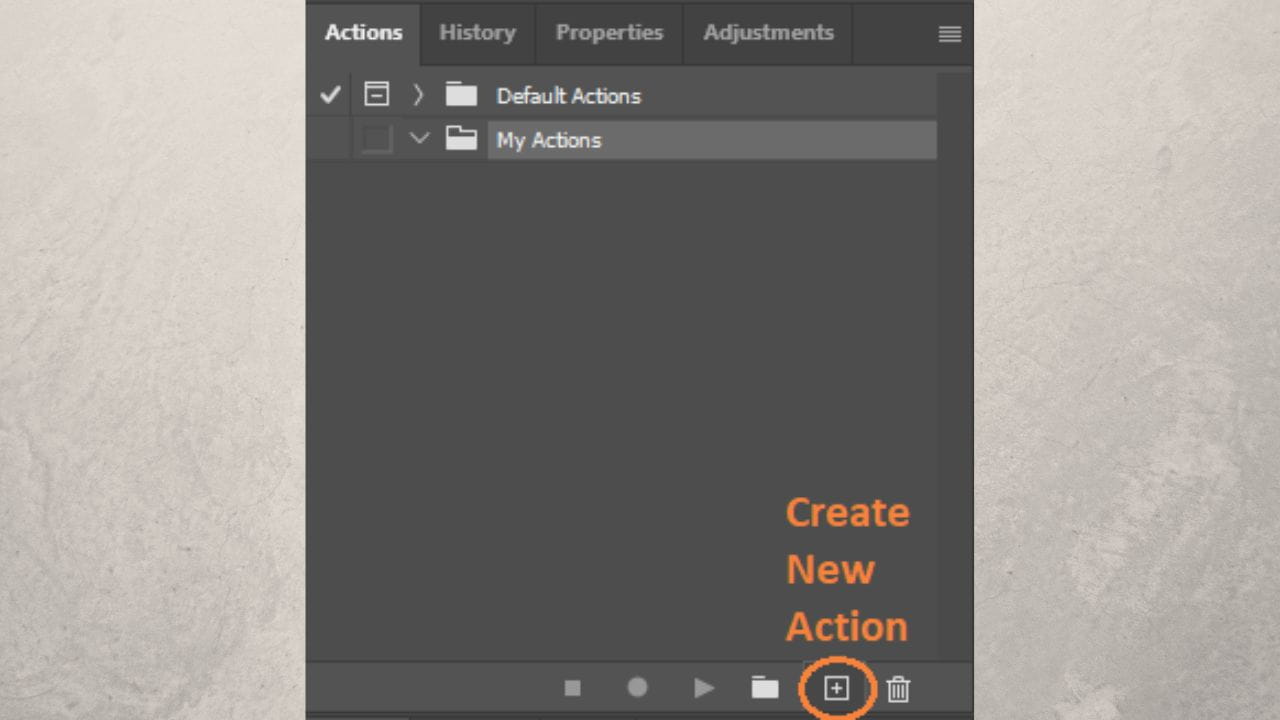
1.Go to the “Actions” panel. If you don’t see it, click on “Window” > “Actions”.

2.In the Actions panel, click on the little plus icon to create a new action.
3.Name your new action however you want. For example, it can be “Watermark” or “Logo Watermark”.
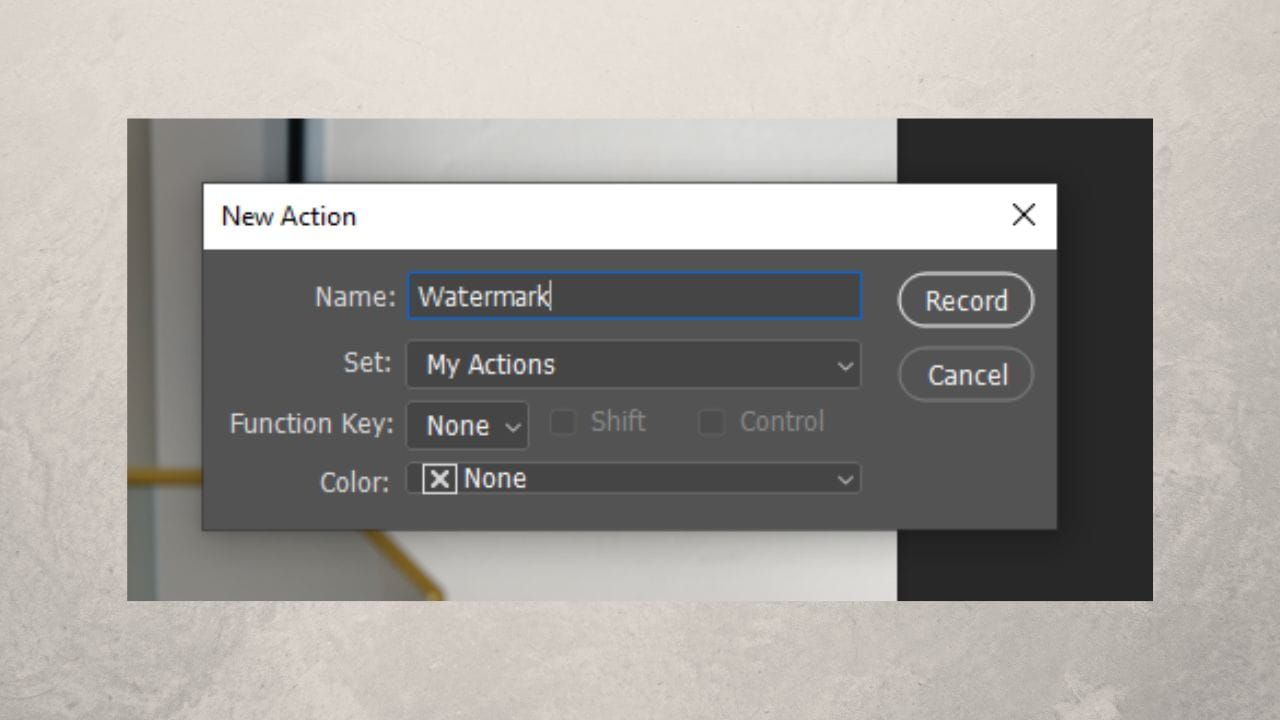
4.Hit “Record”. You will see a red circle at the bottom of the Actions panel. It means that the recording has begun.
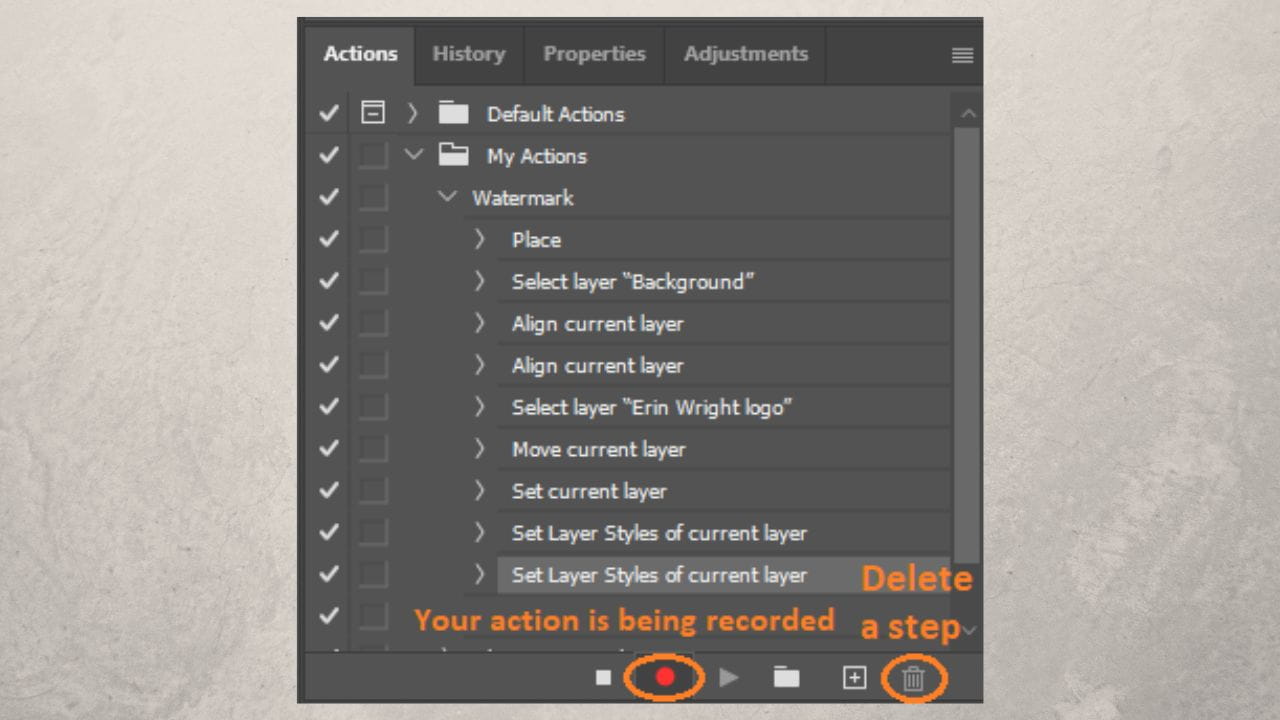
If by accident you performed a step that you don’t want to be recorded, you can delete it. To do this, simply click on the square icon to stop the recording, select the step that you don’t want and click on the trash can icon to delete it. Hit the circle again to resume the recording.
Now that the recording of the action has started, it’s time to import the logo.
Go to “File” > “Place Embedded”.
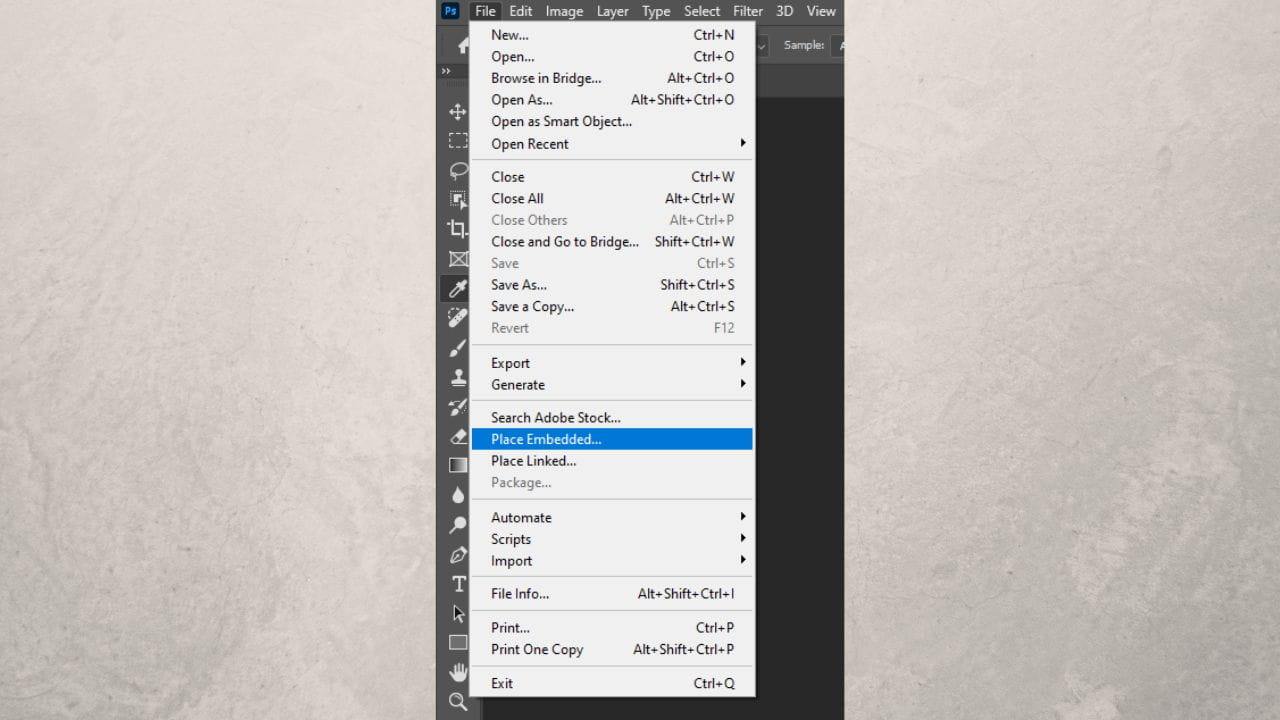
In the dialog box, find the file, select it and click on “Choose”.
Please note, that once you do this, you won’t be able to move your logo file to a different folder.
Otherwise, when you try to run the recorded action on different photos after you move your logo file to a different location, Photoshop will get confused and throw an error at you. If you realize that you do want to move your logo to a different folder, you’ll need to delete your current action and rerecord it, while sourcing your logo file from a new location.
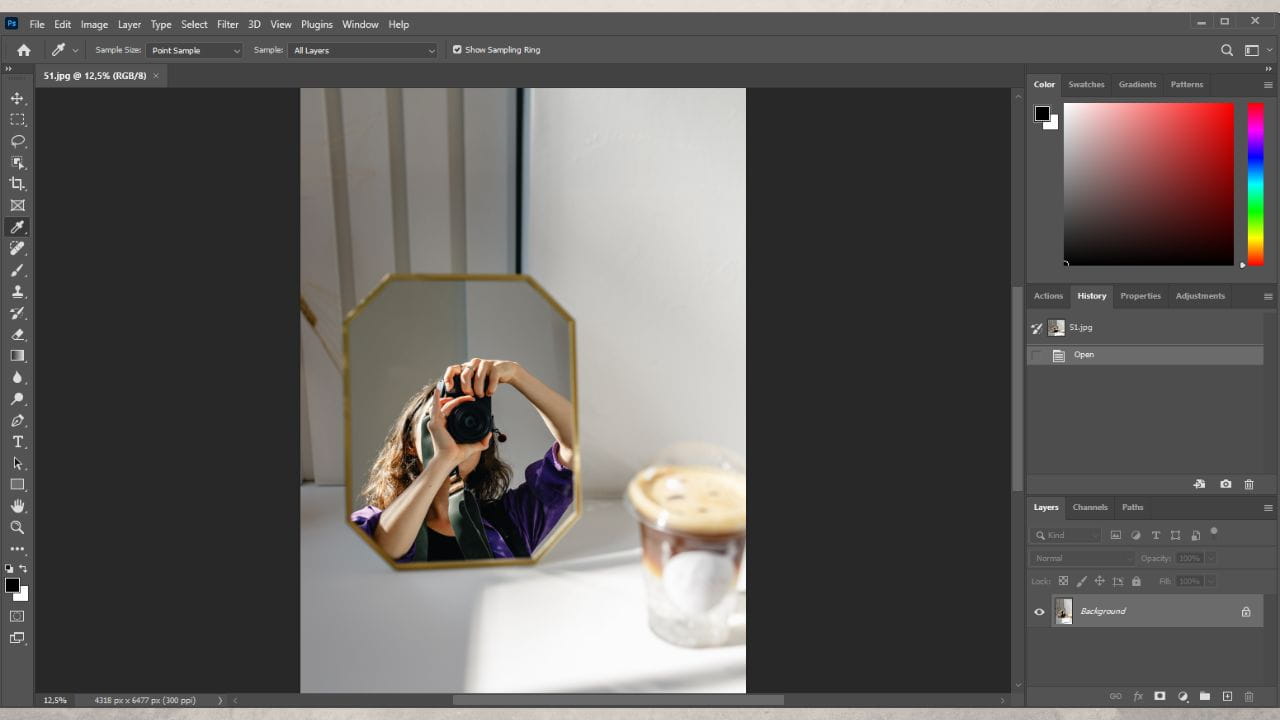
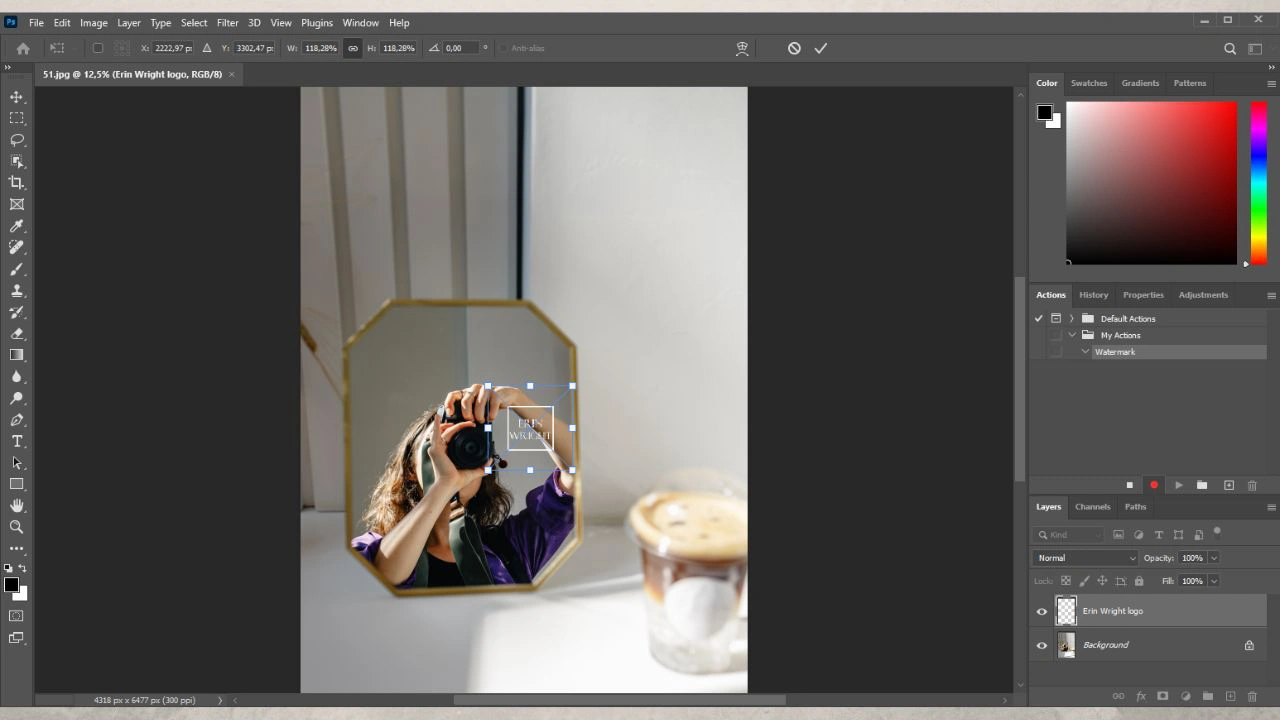
Your logo will show up in a box like this – you can resize and rotate your logo by grabbing and dragging the corners.
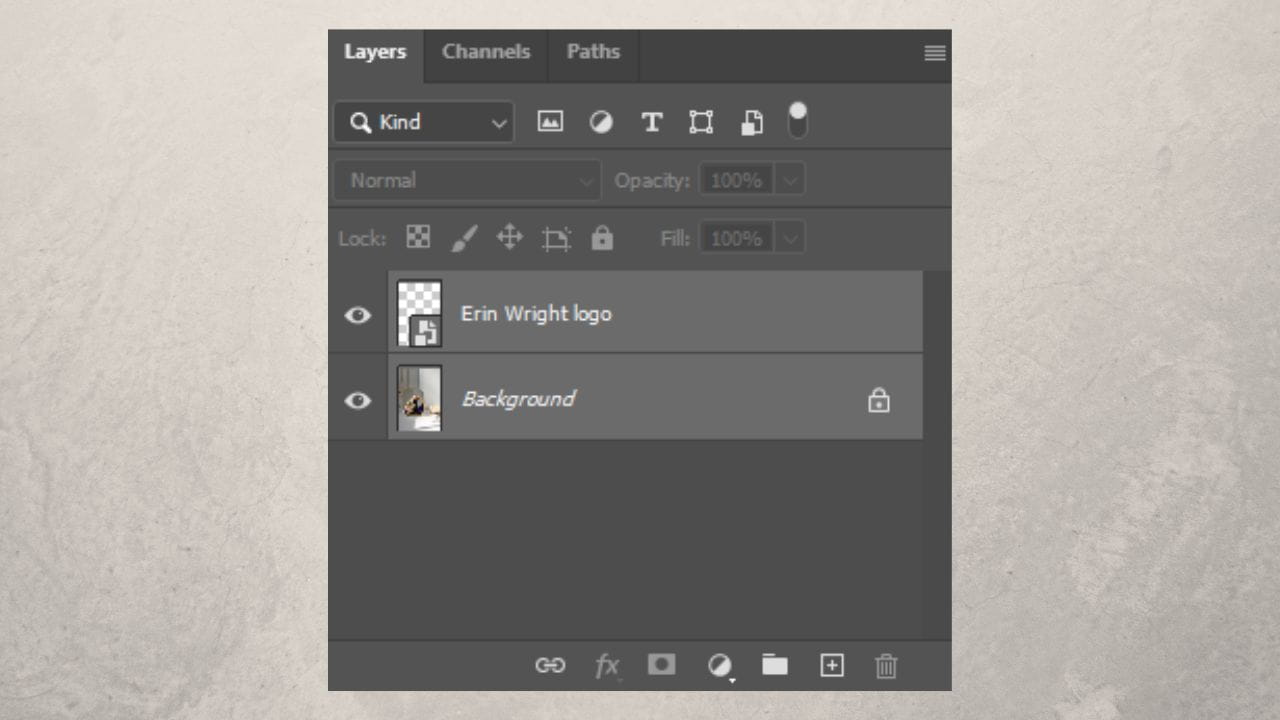
Press Shift and select both layers in the Layers panel.
Then pick the Move Tool and use the alignment buttons to reposition your watermark. You can drag your logo to a different place with your cursor, as well.

If you feel like your watermark is too close to the edges of your frame, select only the logo layer, then hold Shift and press the arrow keys on your keyboard. For instance, you can hit two times on the right and two times on the up.
If you want to change the size or angle of your logo, press “Ctrl + T” or “Command +T” to enable the Free Transform. When you’re done, hit “Enter”.
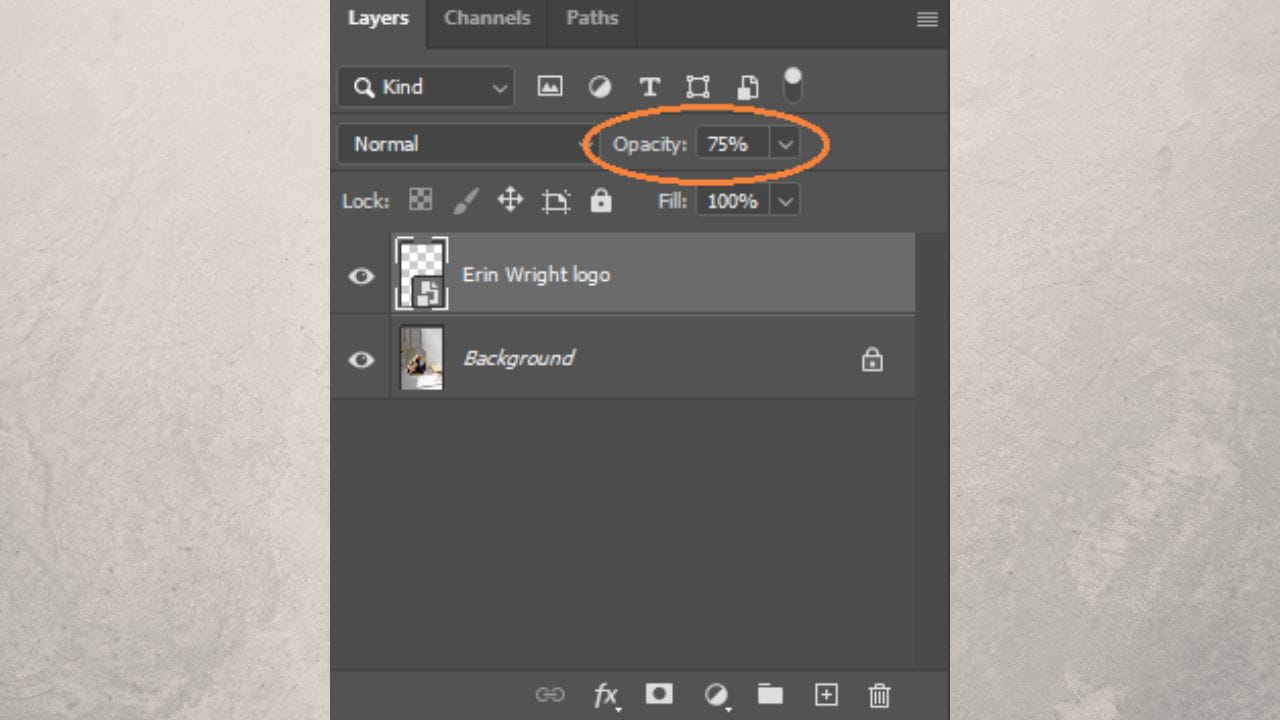
You can lower the opacity of your logo by going to “Opacity” in the Layers panel and typing in the necessary values.
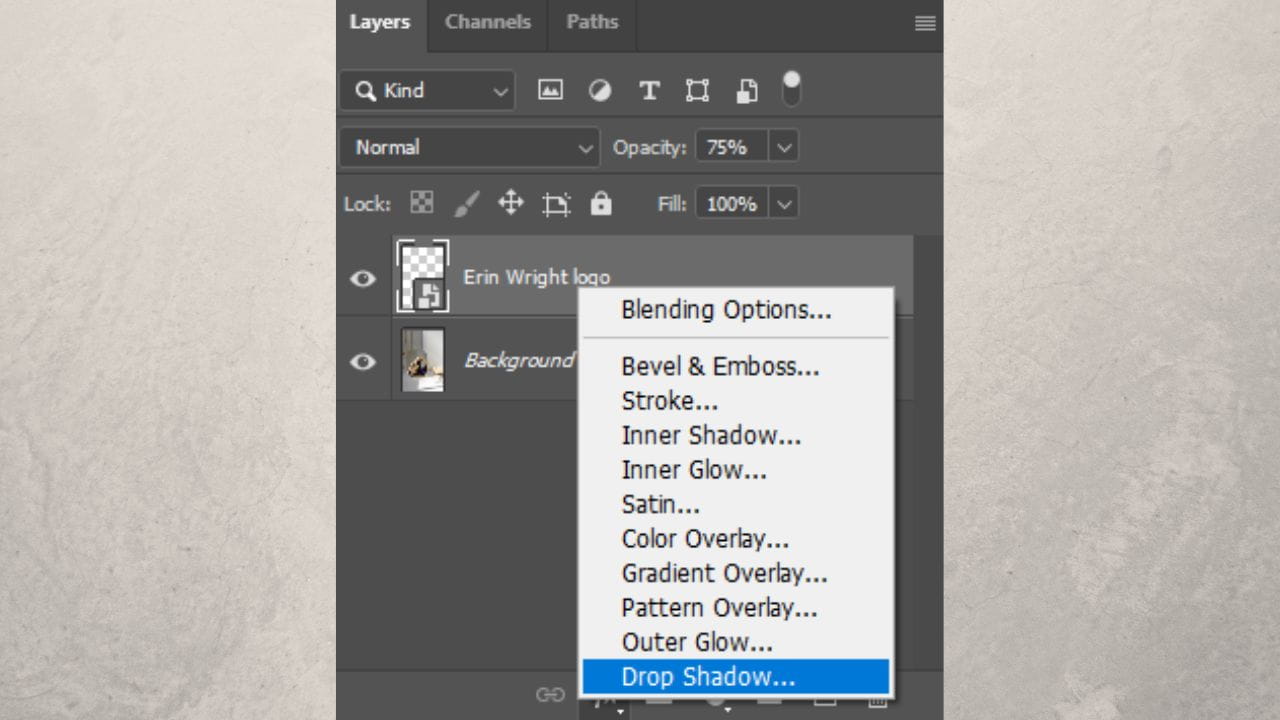
You can also add a shadow effect to your watermark. Once again, make sure that only the watermark layer is selected, then go to “Layer Style” or press the “FX” button in the Layers panel.
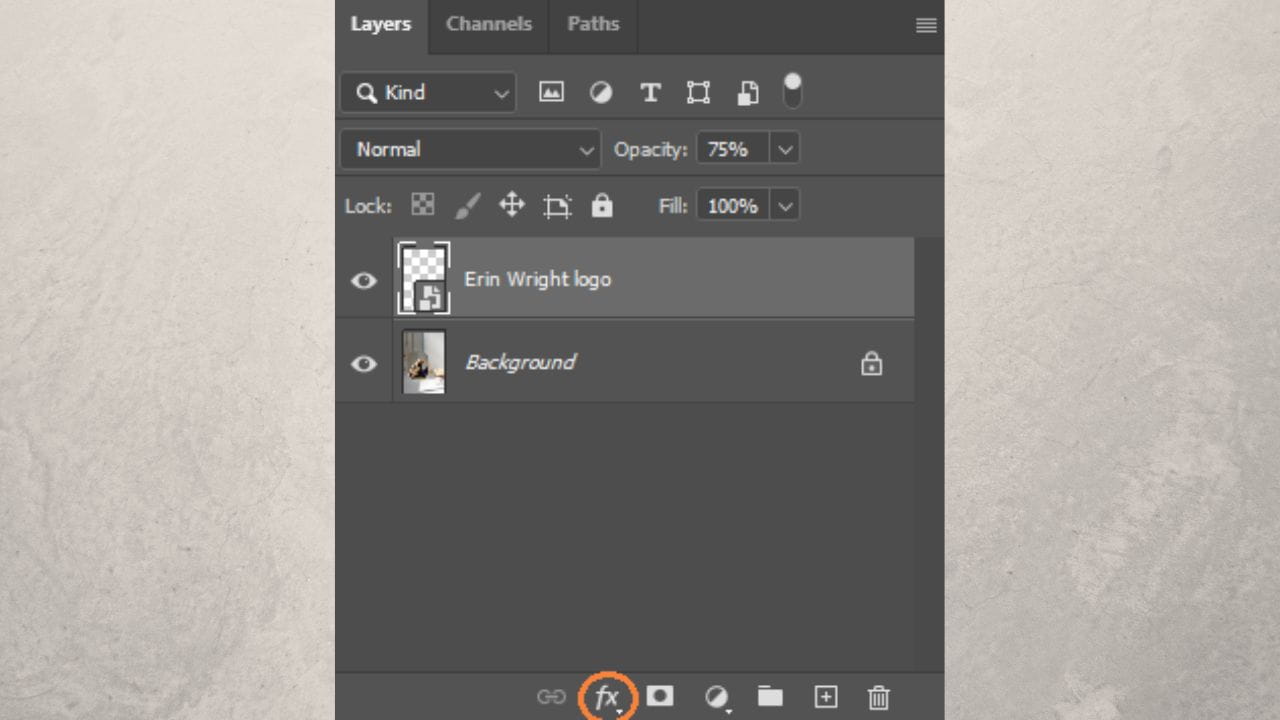
In this drop down menu, select “Drop Shadow” to add a shadow to your logo.
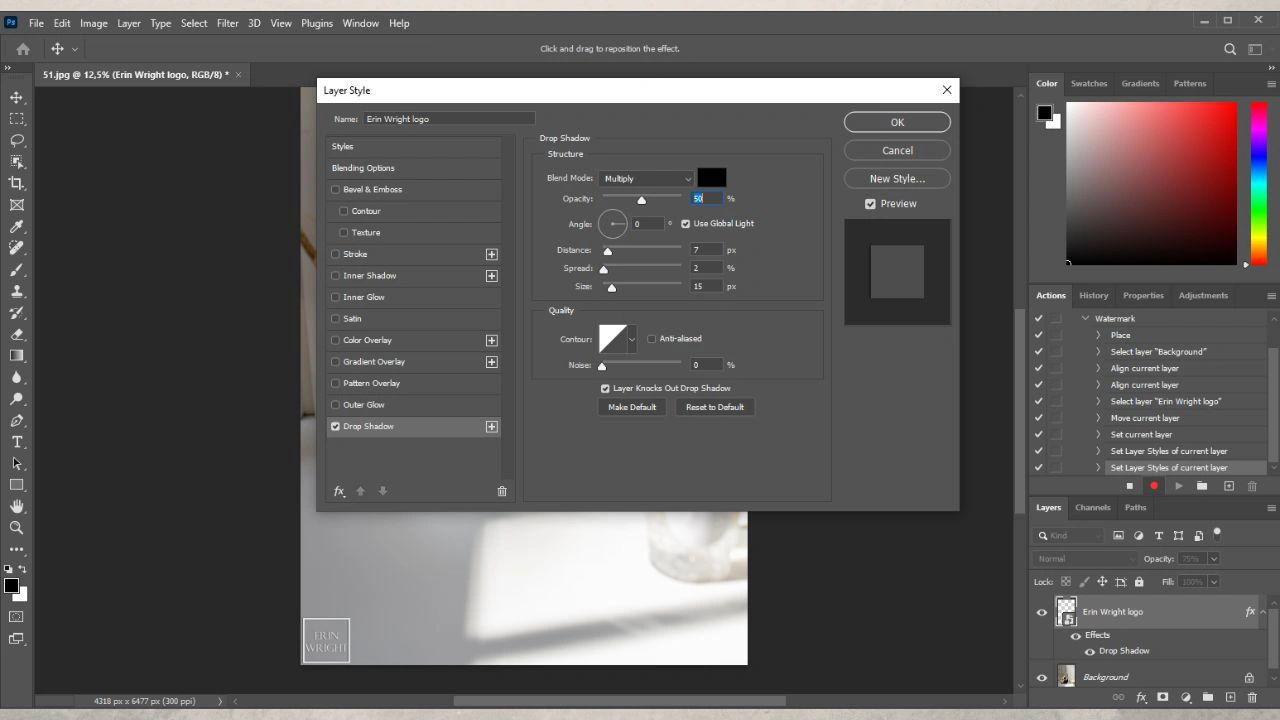
Experiment with the settings to see what looks best.
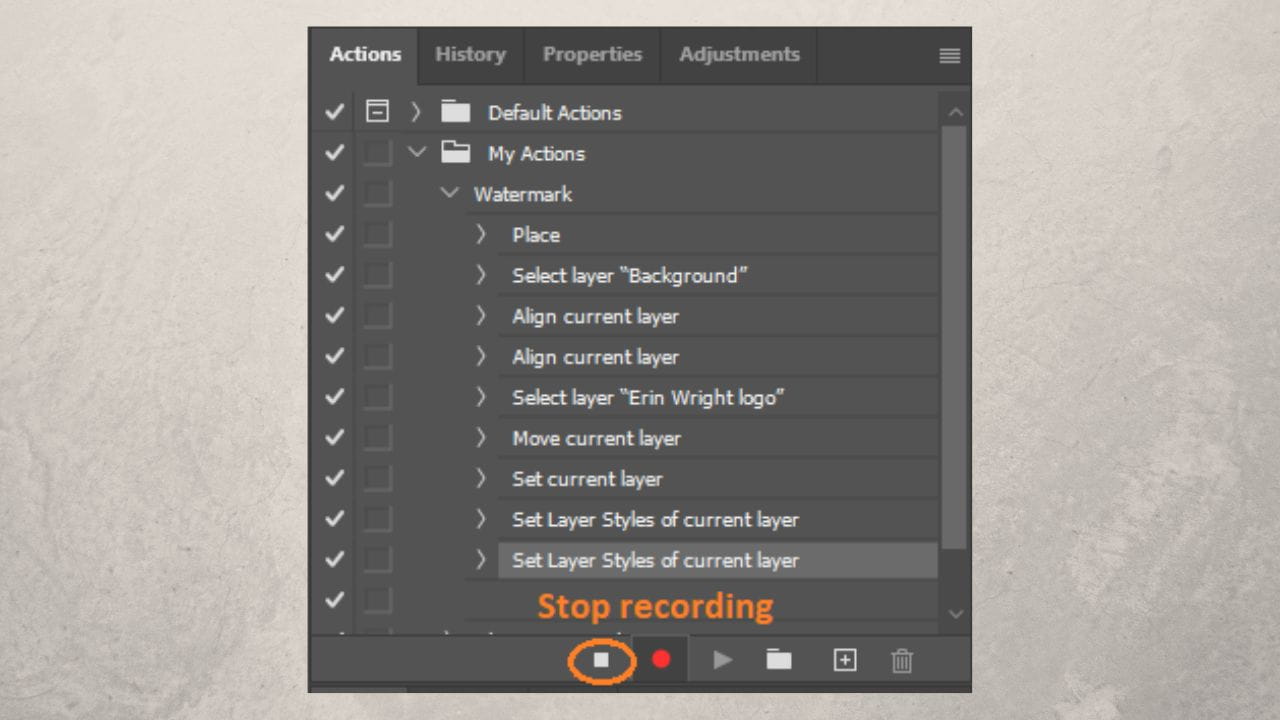
Now, go to the Actions panel and stop recording your action.
Now, you won’t need to perform these steps all over again. Instead, you can apply your logo to different photos by simply running this action.
Most people are under the impression that watermarking images in Photoshop is complicated and time-consuming. But it really isn’t! Especially if your logo has already been designed for you. In case you don’t have a logo and hiring a designer for this task is too expensive, you can use one of the online logo makers.
How to Create a Tiled Watermark in Photoshop
Select the “Horizontal Type Tool”, pick the color, click anywhere within the frame and write the name of your brand or anything else that you want to use as your watermark.
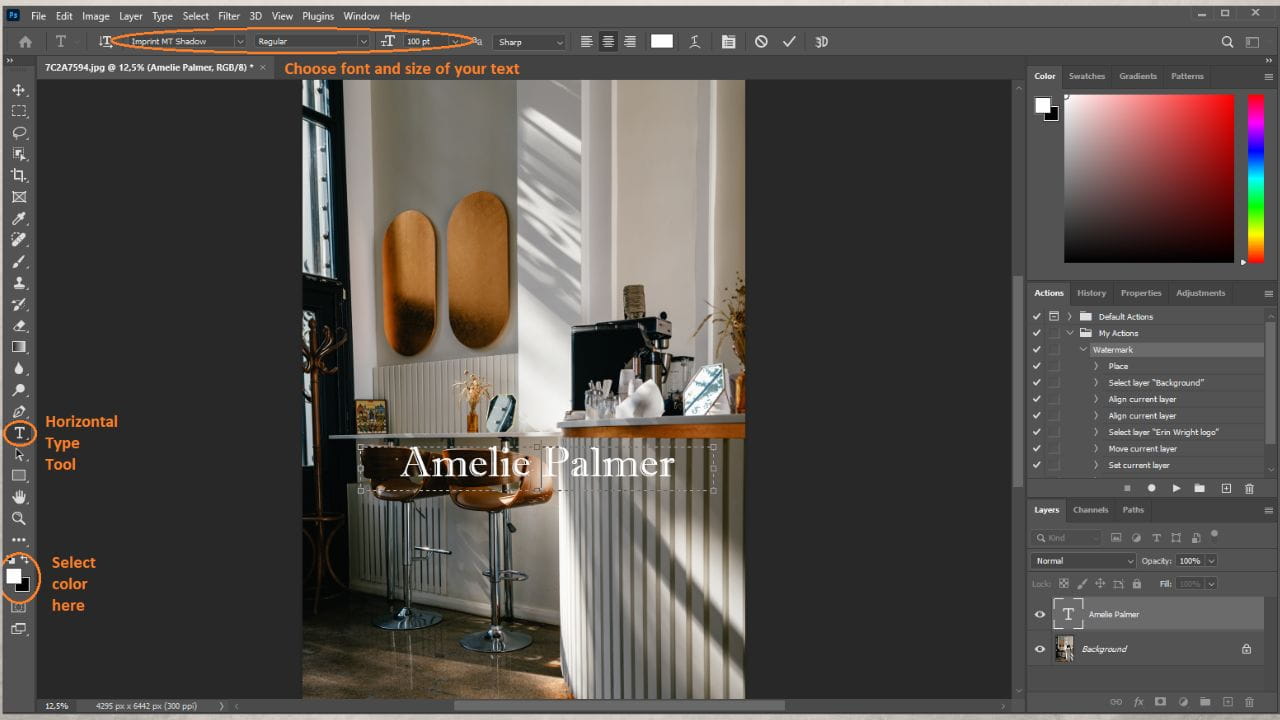
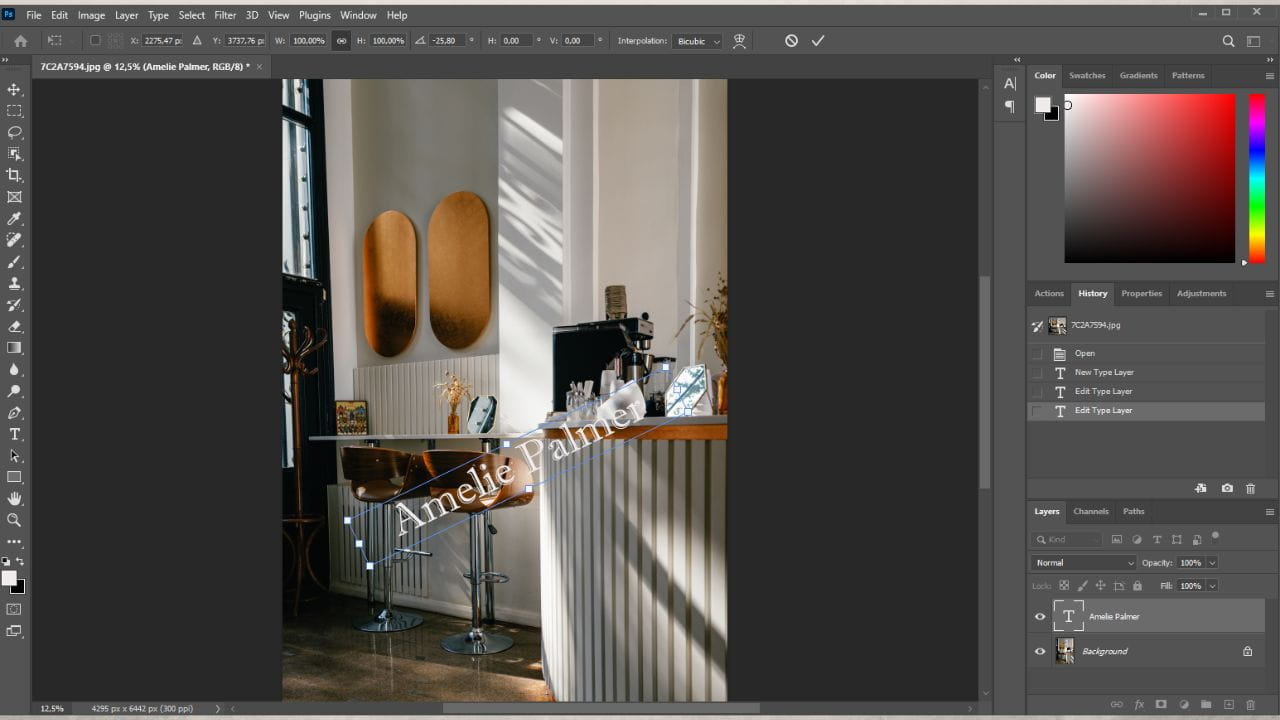
Press “Ctrl + T” or “Command +T” to enable the Free Transform. This will allow you to make your text bigger or smaller as well as rotate it. Transform your text and press “Enter” to save the changes.
To add an effect to your watermark, click on the “FX” button under the list of Layers, then select “Drop Shadow” to create a shadow or experiment with other tools in this menu. Also, you can take a look at how a glass-like watermark is created further down in this post – it is possible to make your tiled watermark look the same.
Next, select only the background layer and hit “Delete”.
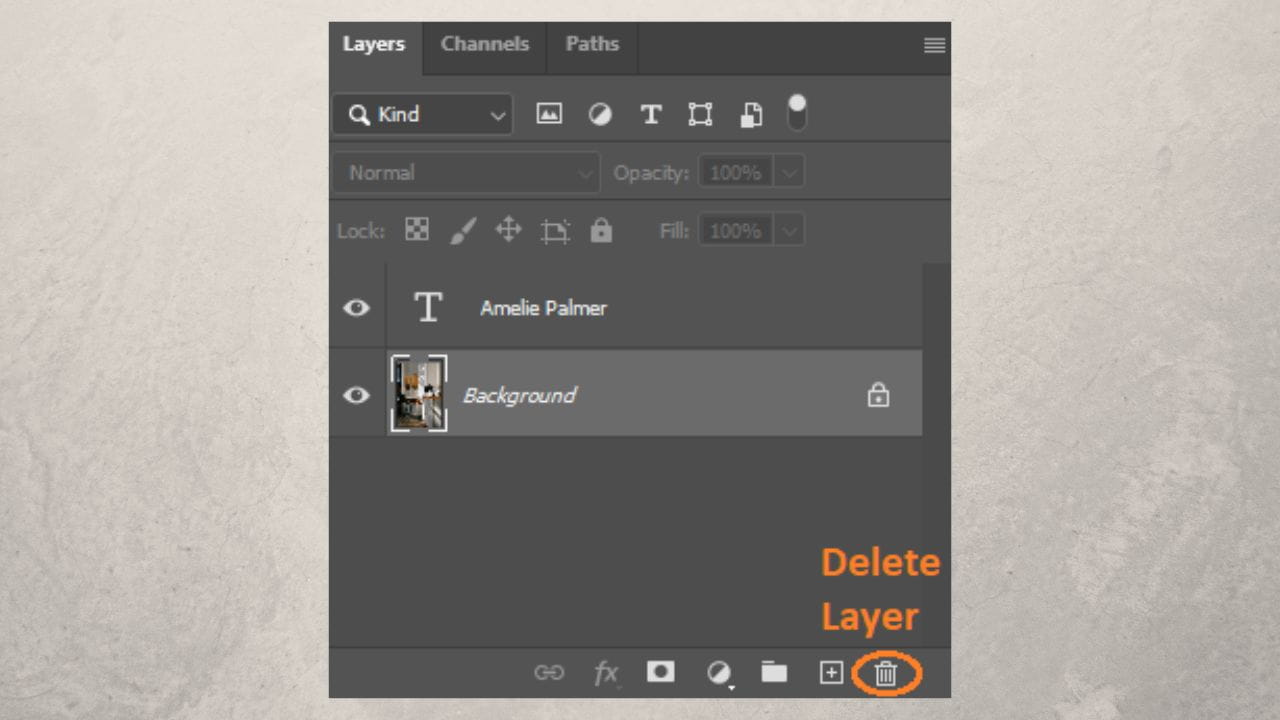
You will be left with your textual watermark on a transparent background. Use the Photo Crop Tool to crop out all the unnecessary extra space around your watermark. Press “Enter” to save the changes.
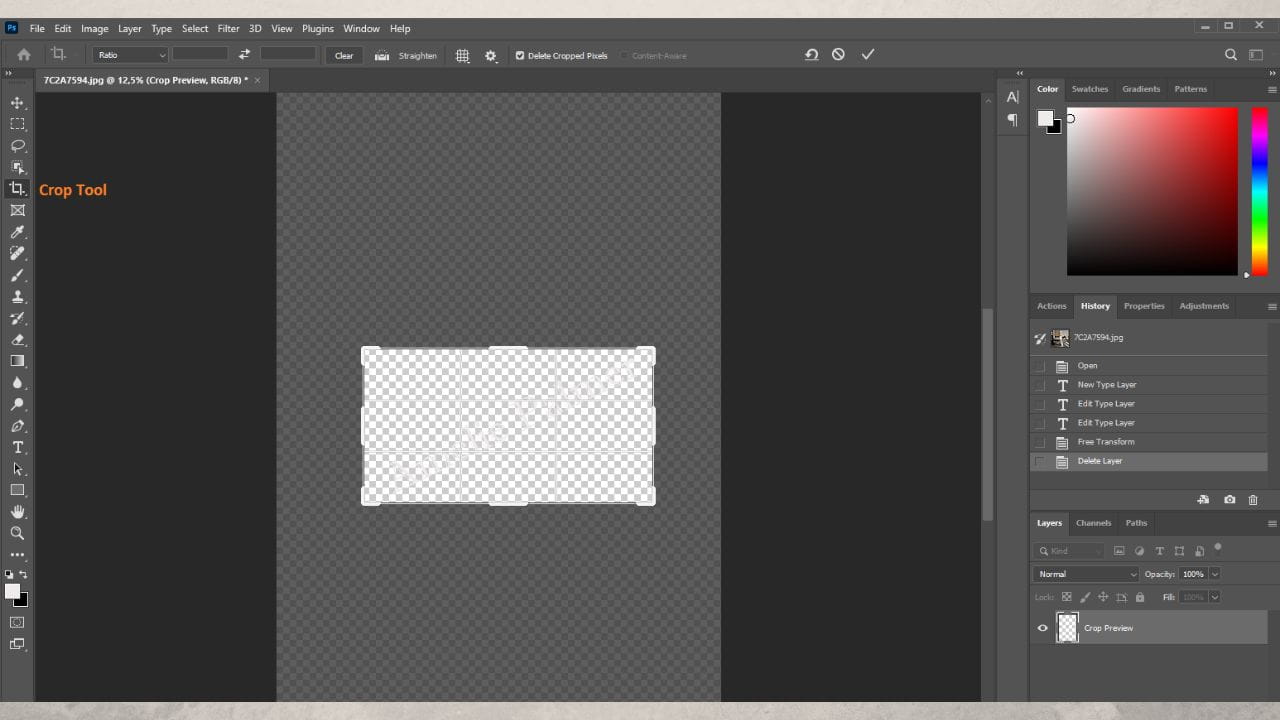
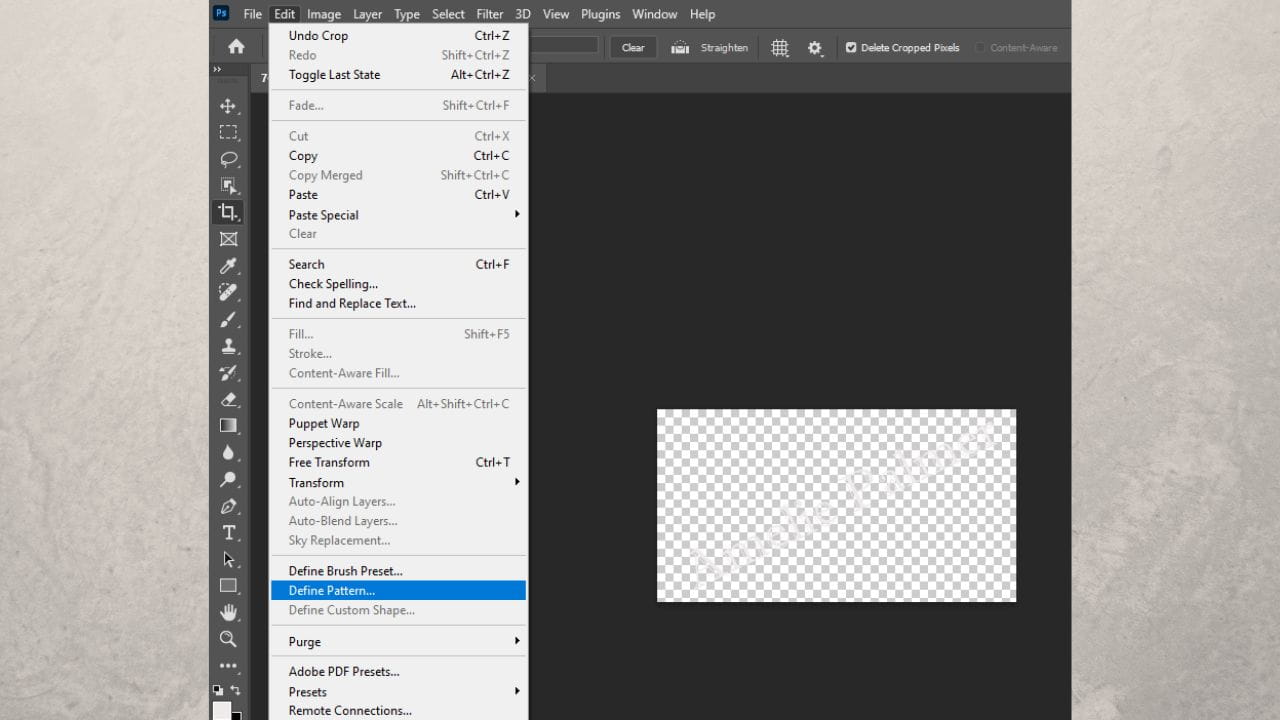
Now, create a pattern. Go to “Edit” > “Define Pattern”. Name the new pattern and click “OK”.
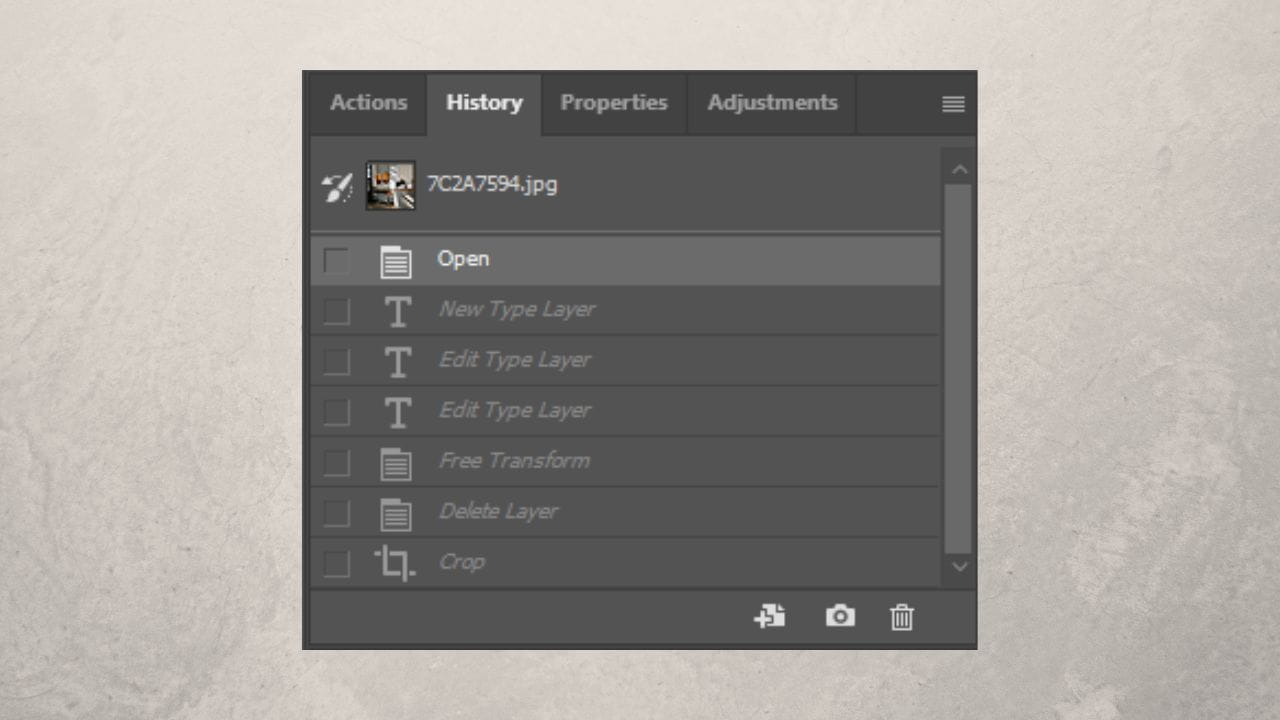
In the History panel, select and delete all the steps before “Open” – this way you will be left only with the photo. To delete the steps, click on the trash can icon.
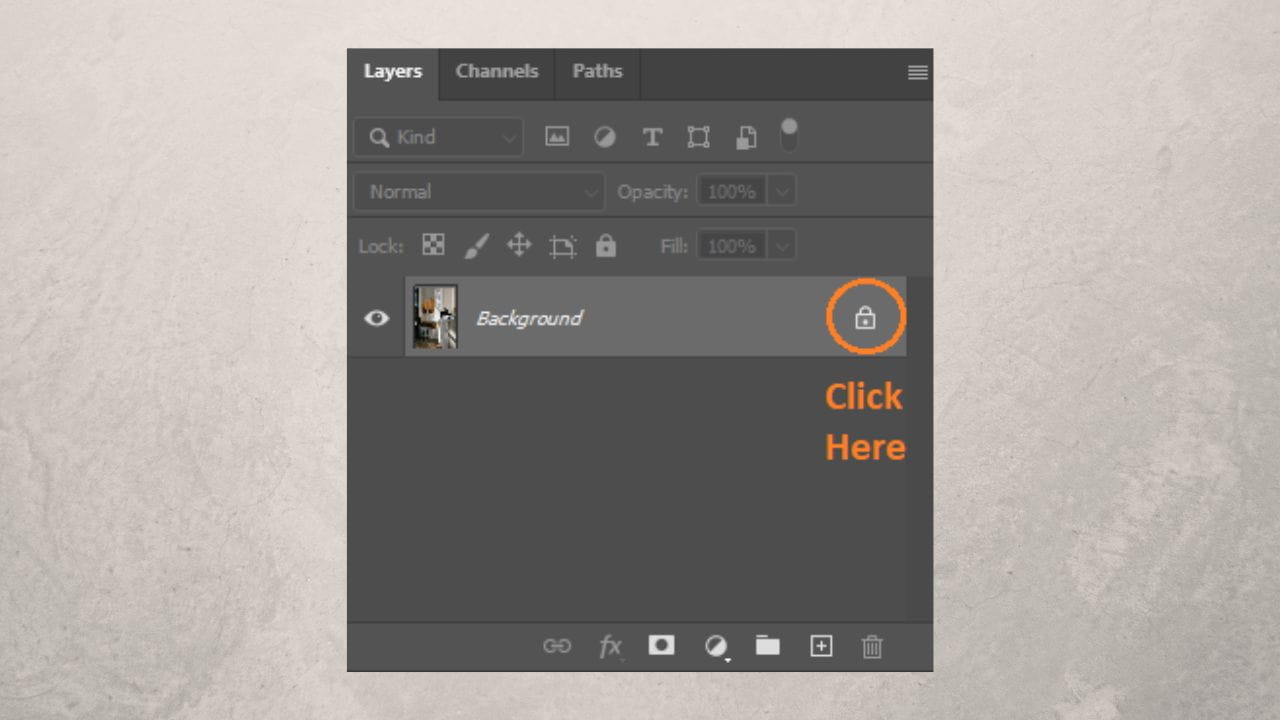
Go to the Layers panel and click on the lock icon to make a layer out of the background.
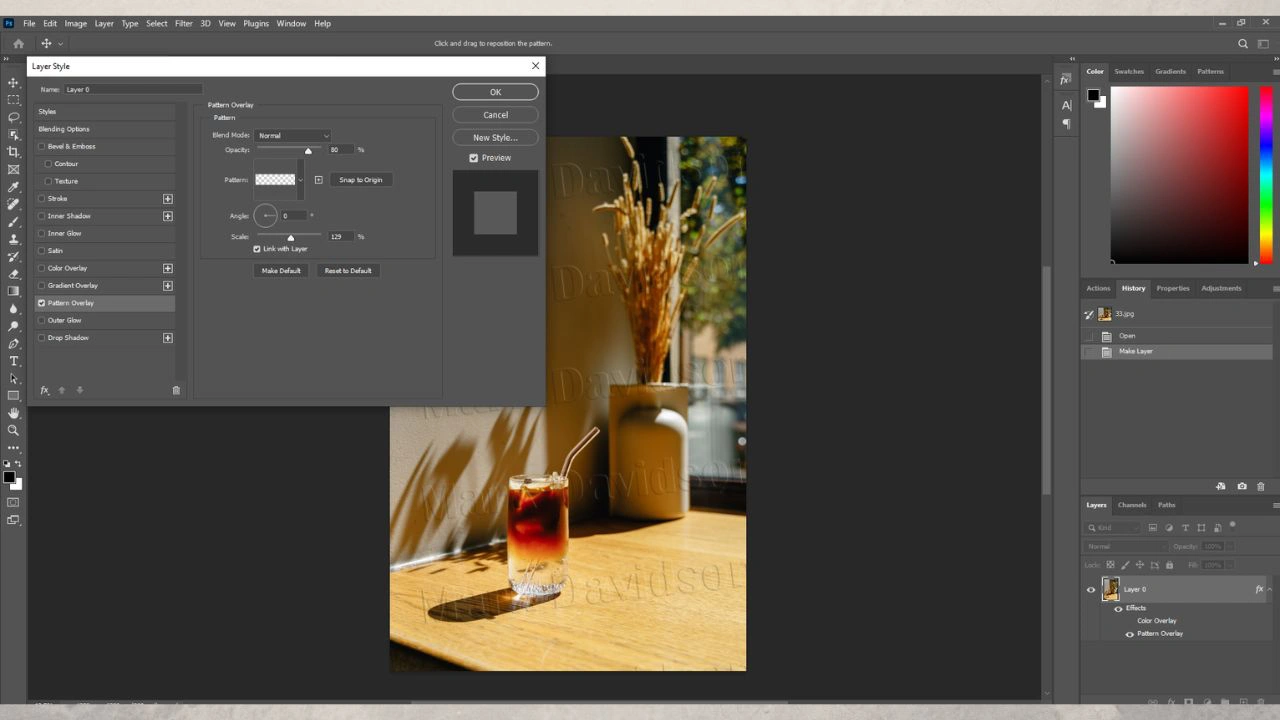
Then double-click on this layer to open the Layer Style dialog. Here, enable the Pattern Overlay.
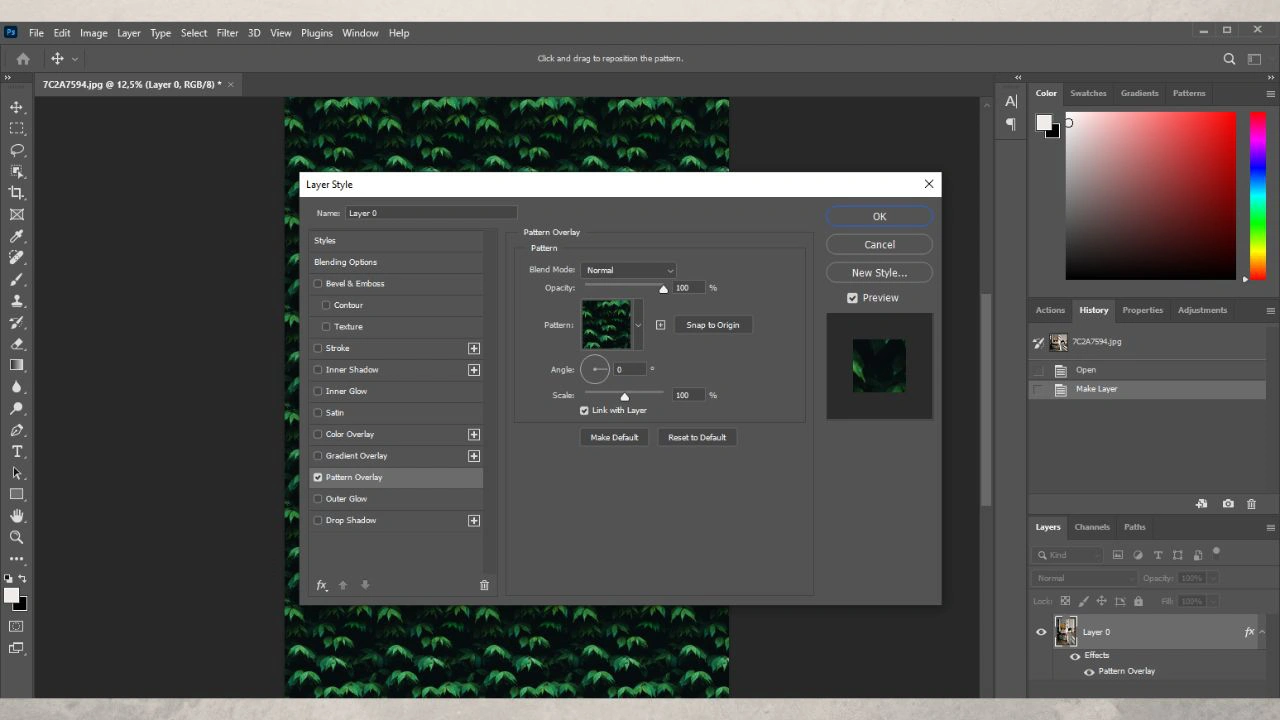
In the Pattern Overlay section, open the library of Patterns – it’s hidden in the “Pattern” drop down menu – and select the pattern that you’ve just created. Adjust the opacity level, the scale and the angle. Click on the pattern itself and drag it to a different location with your cursor.
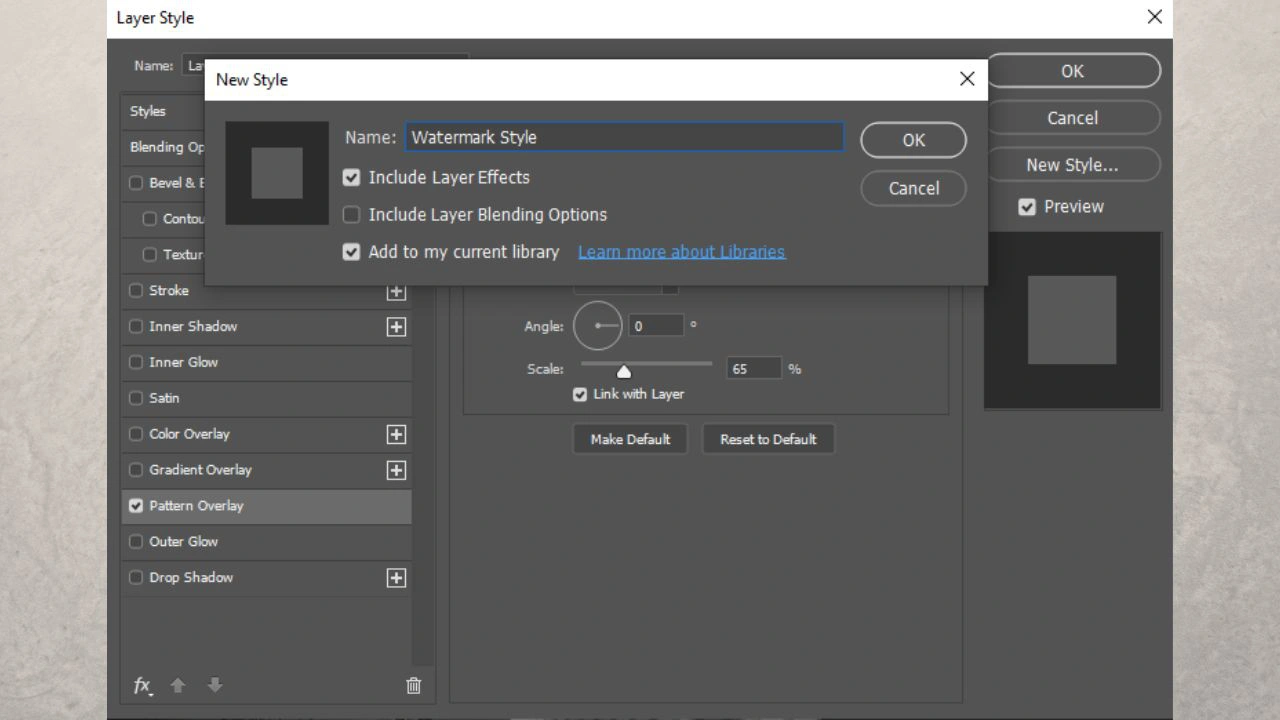
Click on the “New Style” button. Name your style and click “Ok”. Hit “Ok” again to apply the layer style.
In the History window, erase all the steps before “Open”.
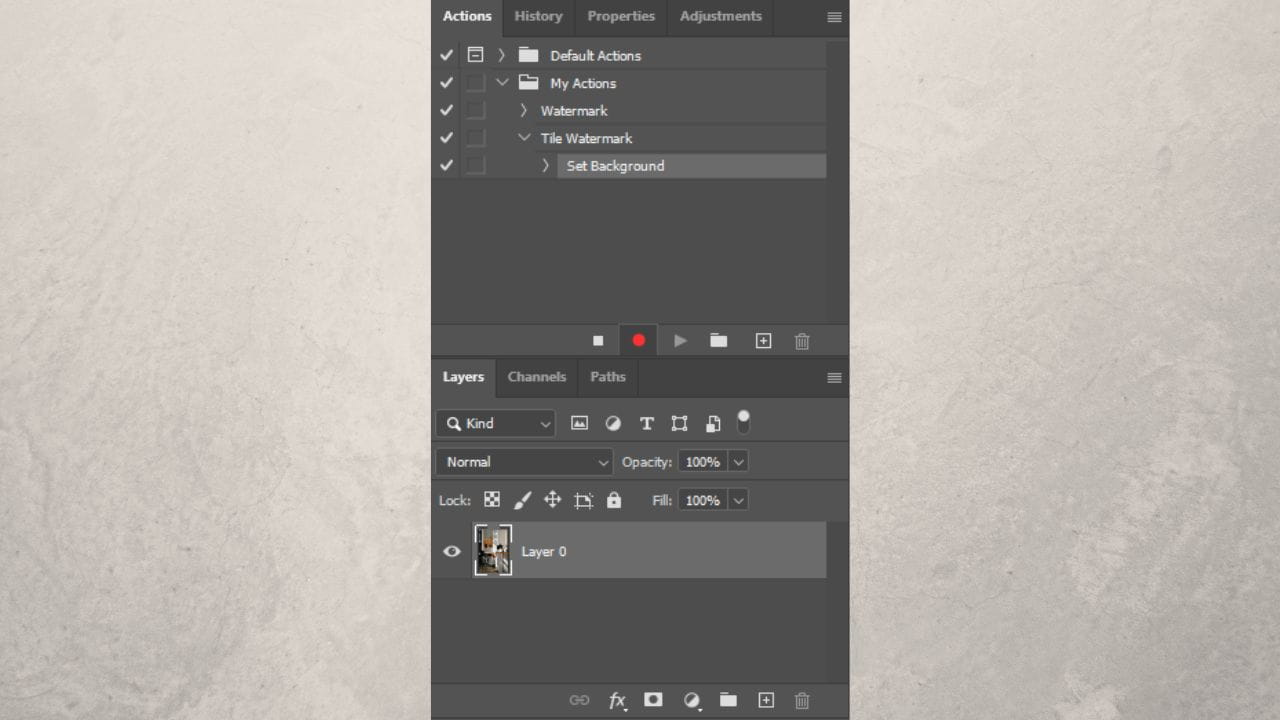
You need to create a new action. Open the Actions window and click on the plus icon to start the recording. Name your action and hit “Record”.
Click on the lock icon to set background.
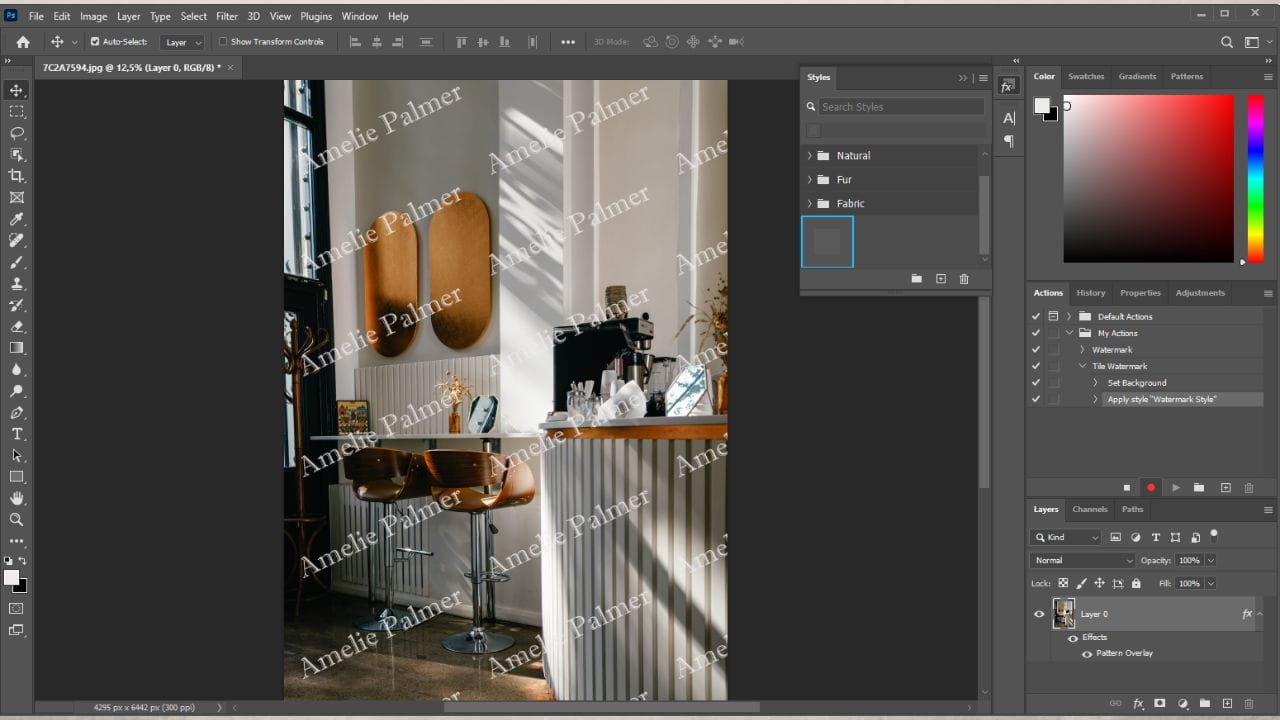
Go to “Window” > “Styles”.
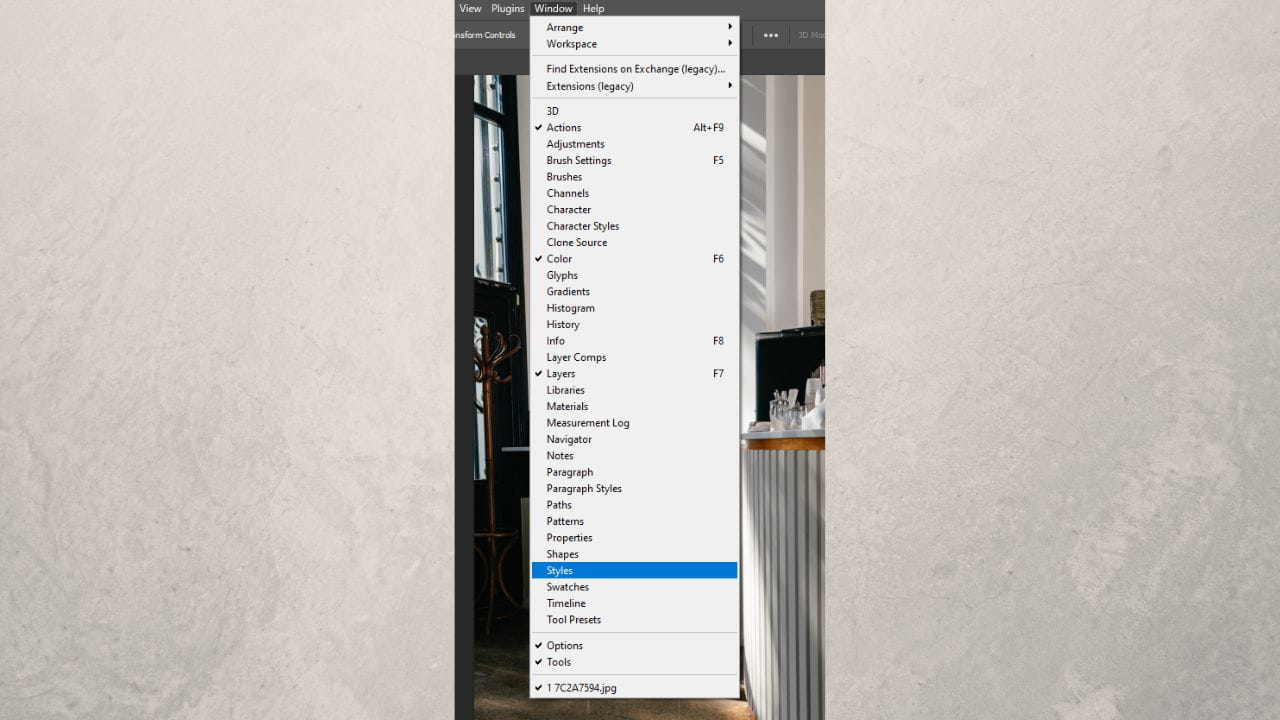
Select the style you’ve just created. Your tiled watermark will appear on the image.
Close the Styles panel, then go to the Actions panel and stop the recording. Your new action is ready and can be applied to other photos!
How to Create a Textual Watermark With a Glass-like Effect in Photoshop
Unlike the previous option with the tiled watermark, you will need to start recording a new action right away.
Open the Actions window, then click on the “Create new action” button. Enter the action name – for example, “Glass Watermark” – and hit “Record”.
Select the “Horizontal Type Tool” (shortcut “T”) and click anywhere within the photo to add a string of text to image. Type anything you wish. It can be the name of your brand, your website address or both. You can add a copyright symbol, as well. On Windows hold Alt and press numbers 0, 1, 6 and 9. On Mac hold Alt/Option and press G.
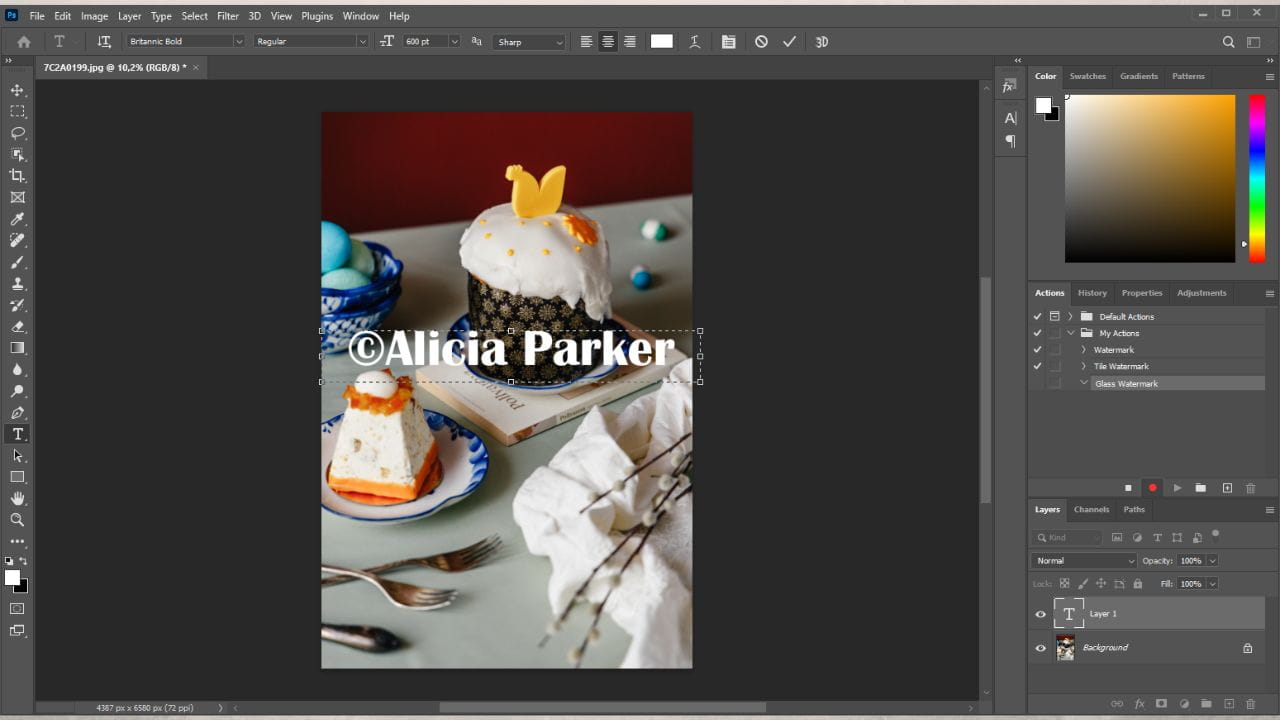
Press “Ctrl + T” or “Command +T”, then change the size and angle of your text. Press “Enter” to save the changes.
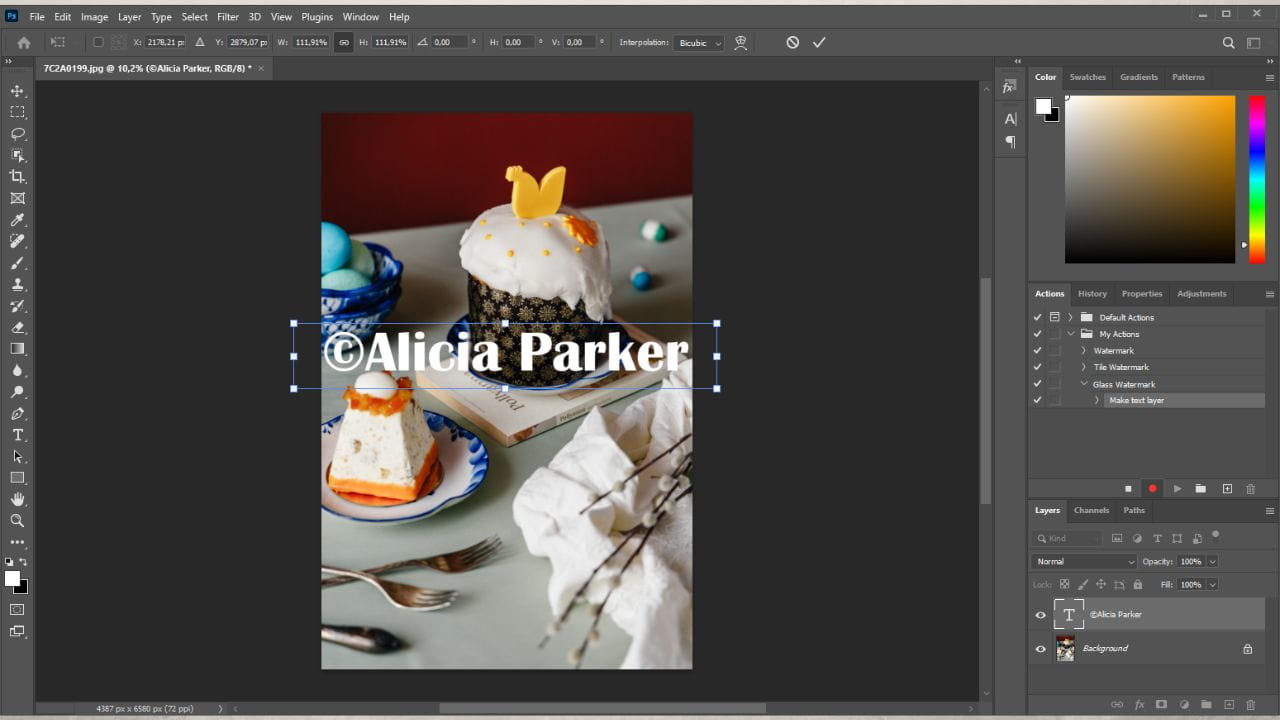
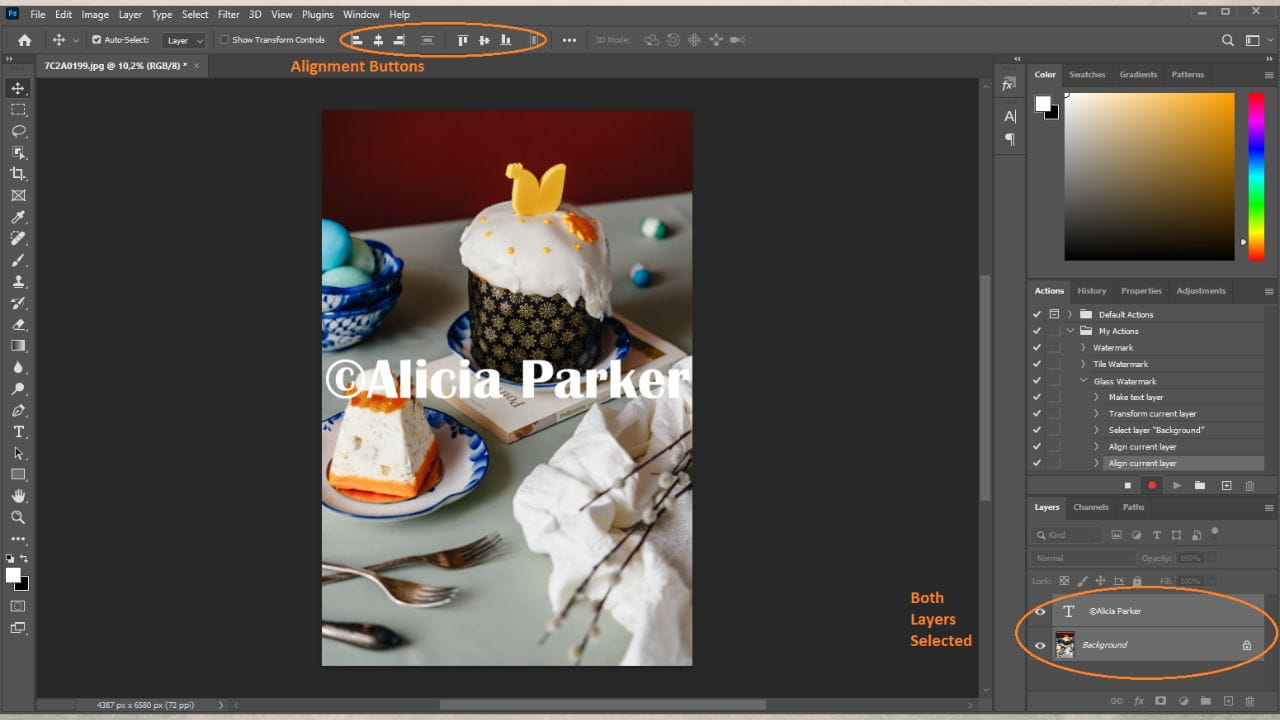
Select both layers by pressing “Shift” and clicking on the second layer. Choose the Move Tool and make use of the alignment buttons in the main toolbar. Alternatively, you can simply reposition your watermark with your cursor.
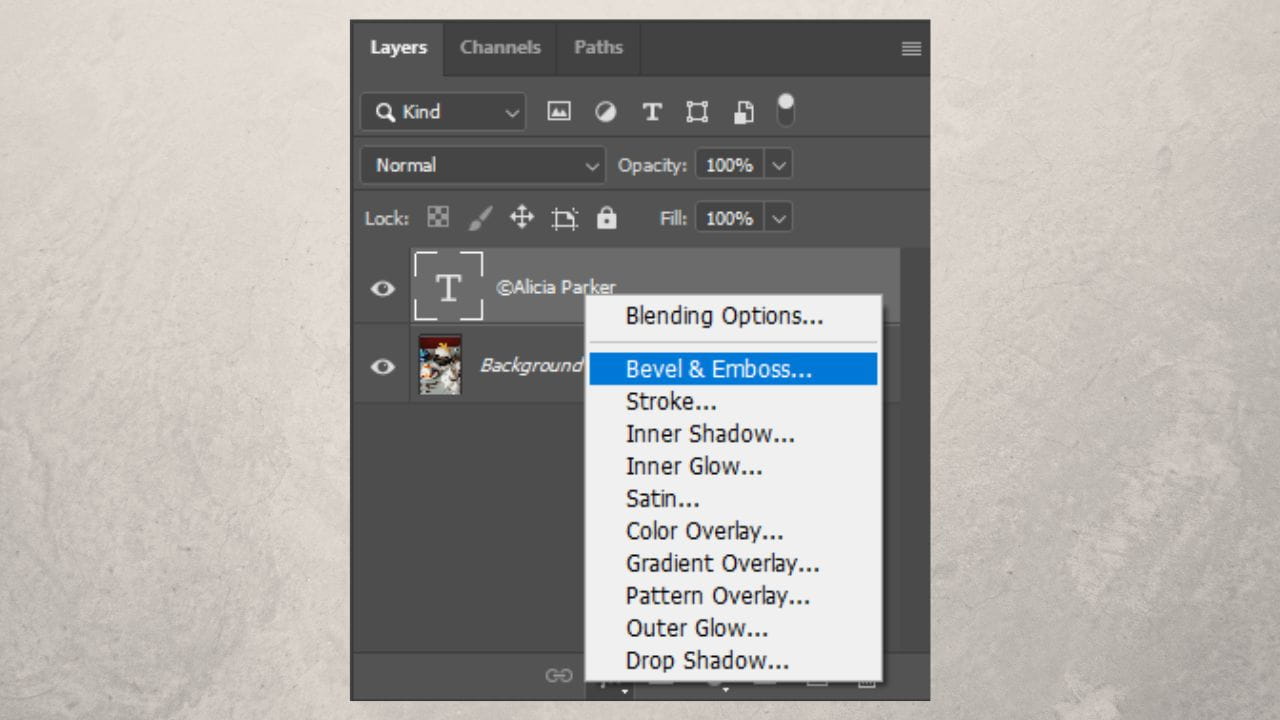
Select only the text layer and click on the “FX” button, then choose “Bevel & Emboss”.
There’s no need to tweak or change anything here, so click “OK”.
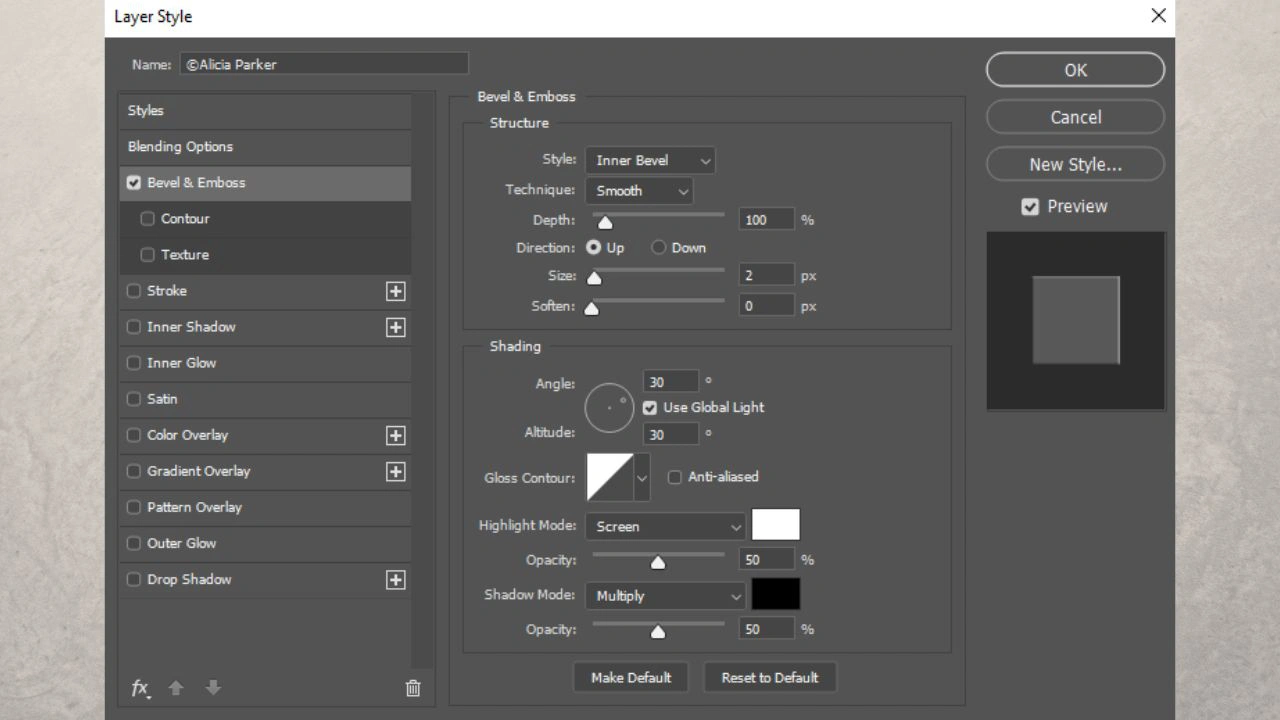
In the Layers panel, set “Fill” to 0 – now, you will have only the Bevel effect.

Open the Actions panel and stop recording. All done!
To export your watermarked image, you need to go to “File” > “Export” > “Export As”. Specify the settings, make sure that the right image format is selected, then click on “Export” and choose your export folder.
Add a Watermark. Photoshop vs Visual Watermark
Even though creating a watermark in Photoshop isn’t as difficult and time-consuming as many people might think, it still involves quite a few steps.
You need to make a watermark from scratch if you don’t already have it. You need to record a new action. Photoshop is amazing for editing your photos and adding watermarks.
But Visual Watermark can make it so much easier and quicker to both design and apply your watermark to one or several images. And it doesn’t require recording any new actions!

You can easily pick any shade and hue of any color. Select the font that you like. You can toggle the slider to adjust the size and opacity of your watermark – be it text or logo. Yes, you can create a textual watermark and upload your logo in Visual Watermark.
If you want to create a tiled watermark, there’s no need to create a pattern.
In Visual Watermark maker, all you have to do is open the drop down menu next to the word “Tile” in the toolbar, then choose whether you want your watermarks to be parallel to each other or positioned checker-wise.
Yes, that’s right. You can pick between two different types of tile – straight or diagonal! It is also perfectly possible to make your tiled watermark bigger or smaller.
And, this is another difference from Photoshop, you can even increase or decrease the amount of space between your tiled watermarks. On top of that, your tiled watermark doesn’t have to be textual. You can upload your logo and enable the tile – straight or diagonal. You will achieve great results with only a few clicks.
There are no alignment buttons in Visual Watermark, but you can position your watermark anywhere within the frame. Just click on it to select, then drag it with your cursor. There are purple guiding lines that will help you align your watermark properly. For instance, they will show you when your watermark will be positioned exactly in the center. You can use the arrow keys on your keyboard to move your watermark, as well. So, you can drag your watermark to a new position with the cursor, then fine-tune it with the arrow keys.
All the effects that you can create in Photoshop can be found in Visual Watermark, too; except applying them doesn’t involve performing several steps. You simply go to the Effects section, then choose the effect. If you liked the glass effect, you won’t have to add the Bevel & Emboss style, then decrease the amount of fill.
In Visual Watermark, you can simply click on the glass effect, and it will be applied to your watermark. Moreover, you can actually add two effects at the same time. So, for instance, you can add a gradient and a shadow to your watermark. No need to go through and tweak various settings – just click and apply!
Everything that you can do in Photoshop, you can do in Visual Watermark, but it will take you fewer clicks and less effort.
More Watermarking Tutorials
How to Add a Watermark in Word