
 by
by One of the most commonly asked questions in regards to post-production of professional photography is how to enhance a blue sky without getting an unrealistic result. First of all, we need to decide on a software, since tools for performing the task will differ depending if we are working in Lightroom or Photoshop.
In my personal opinion, working in Lightroom is preferable for this type of task, since in Photoshop you will need to work with Layer Masks in order to avoid affecting the entire image when applying a desired effect. Lightroom, on the other hand, is the natural tool for the dedicated photographer – it offers presets, brushes, tools and sliders for enhancing your images without losing your personal style. Complex adjustments can be handled in mere seconds, if you happen to have the proper set of tools for the task.
Since the sky is a very prominent feature in most landscape photographs, it should be enhanced with quality adjustments, so we can ensure that our image will not be ruined. Common errors that can ruin a photograph are:
- Dull skies
- Unrealistic detailing in skies (too much Clarity slider if you are working with Lightroom)
- Unrealistic tint in skies (too much Saturation)
Prior to making any kind of adjustment, please consider the lighting conditions, since this will affect the tint and feeling you are trying to get – post-producing a sunset scene will not be the same as post-producing a picture of a clear day.
Method #1 – Graduated Filter tool
The first obvious option to accomplish this task is using Lightroom’s Graduated Tool, since this is intended as a selective adjustment tool.
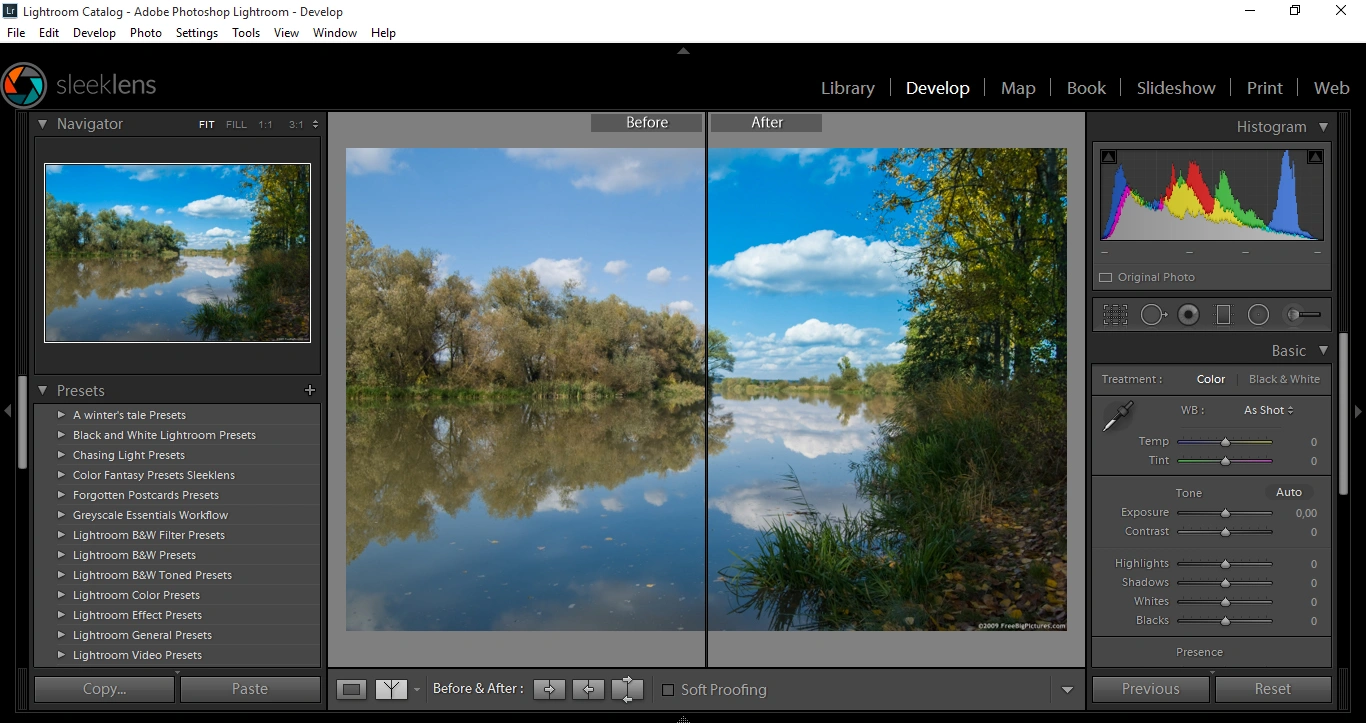
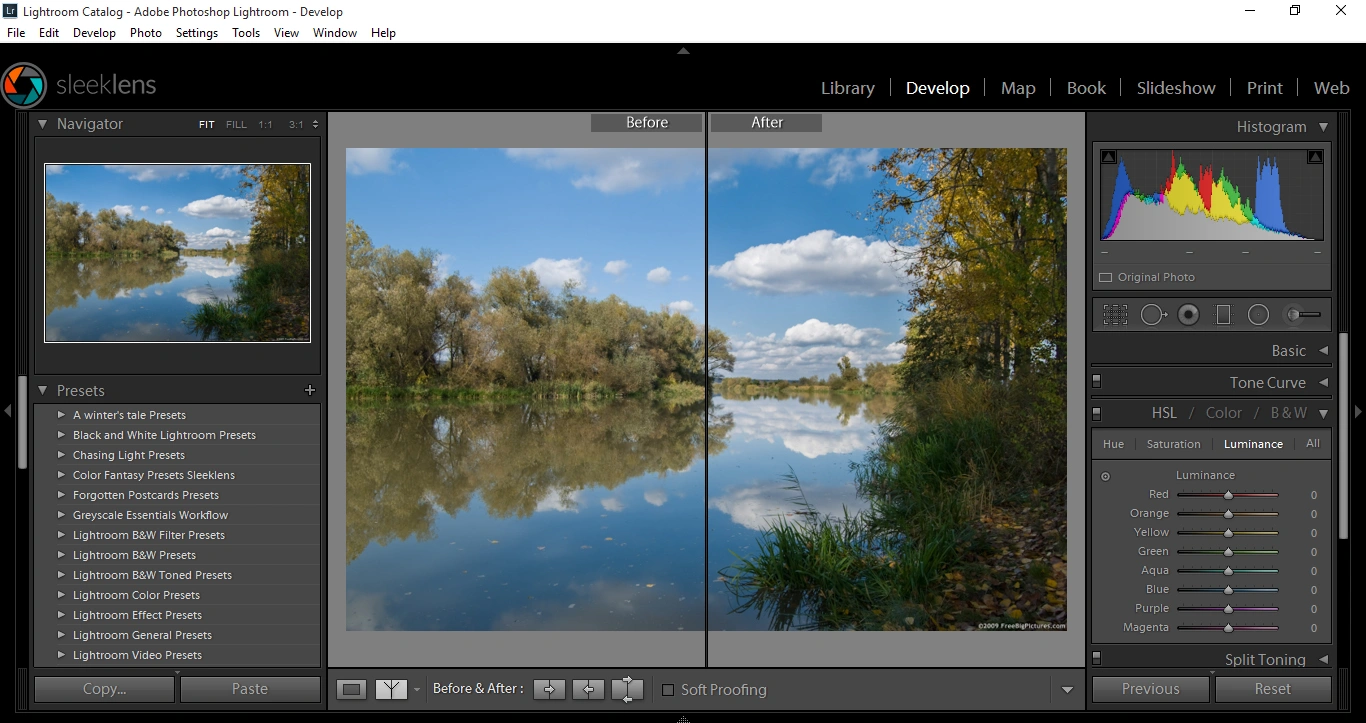
For the purposes of this tutorial, I will work with this picture from freebigpictures, since it illustrates the most common scenario – A dull sky reflected in water, which appears to represent a lake/river in the image.
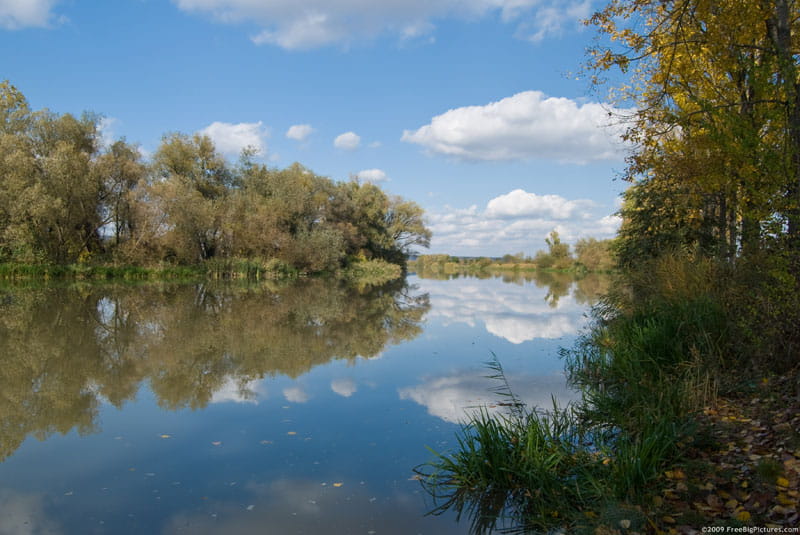
Import your image into Lightroom and immediately switch to the Develop Module.
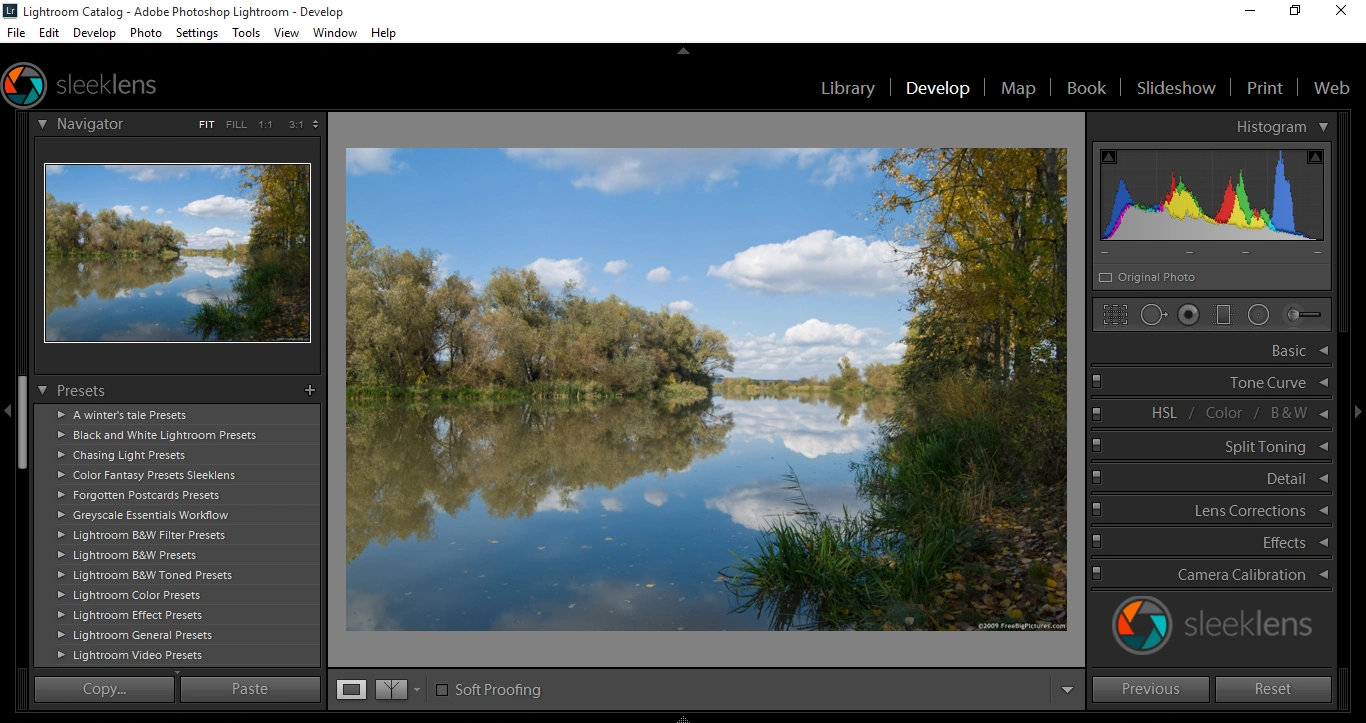
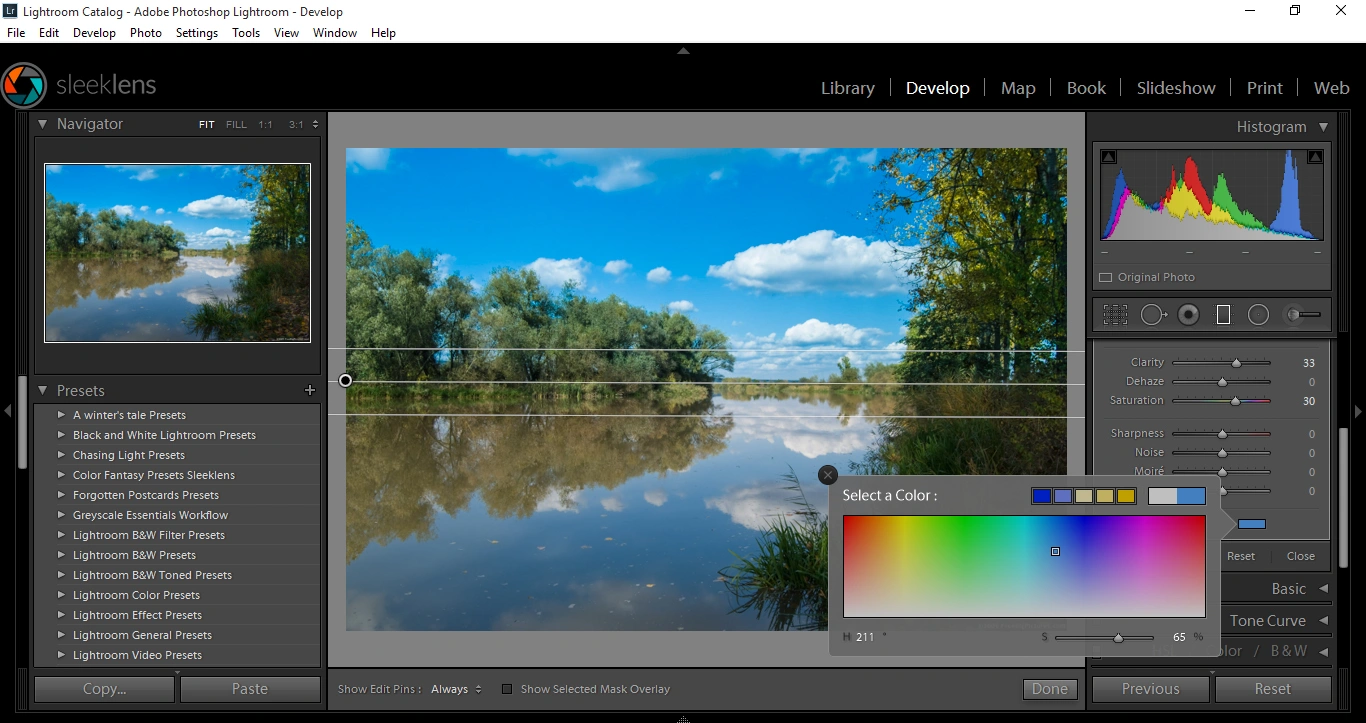
Select the Graduated Filter tool and place it right where the horizon line appears to be, prior to making any kind of adjustment.
Take special care to note which direction the Graduated Filter is facing, as you need the preview to show an effect in the top half of your image. Again, you can see this easily, if you click the “Show Selected Mask Overlay” option.
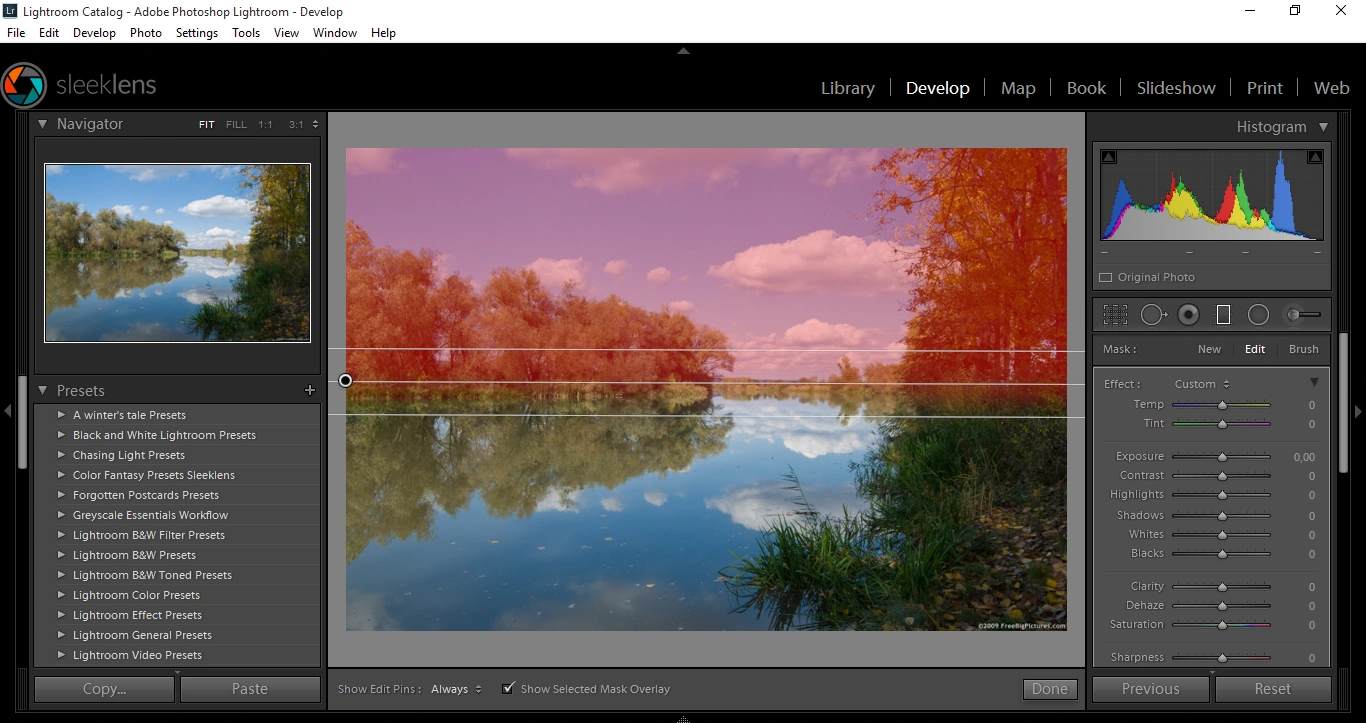
Increase the Contrast adjustment by 40-60, depending how strong you want the effect to be, and reduce Highlights to a value of -20. Clarity should be between 30 and 35, and Saturation should have a value of 30. Hide the Mask Overlay to appreciate how much your image is changing.
Finally, assign a color to the Graduated Filter adjustment you applied without choosing values that are too strong, especially if you want to work with cyan tints on a clear sky, since the result will look unrealistic.
You can quickly compare the Before/After of this image, thanks to Lightroom’s preview mode.
Method #2 – HSL Adjustment
Another option, which may be even faster than the previous method, is to work with the HSL panel. All you need to do is to increase the slider value at Luminance area, which means you will be moving the slider towards darker values.
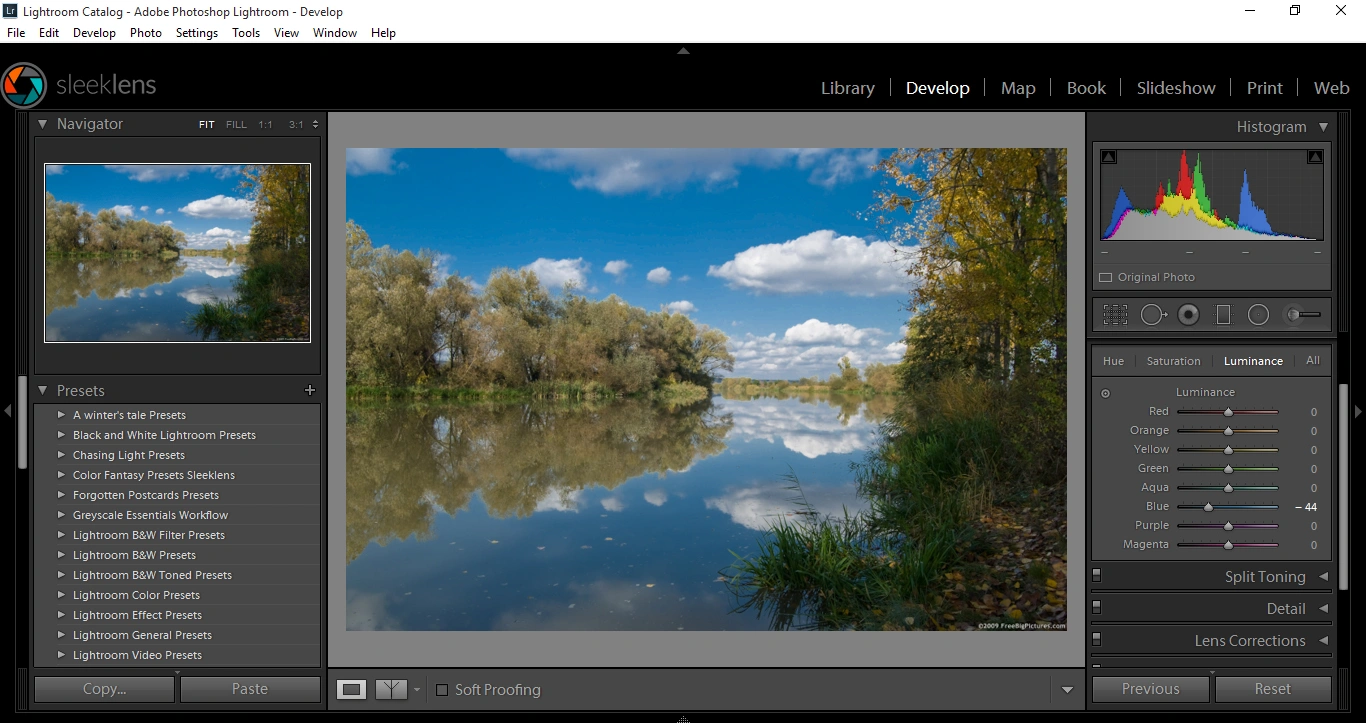
Values around -50 should work well for almost every type of image. Not only are you boosting your sky color, you are also creating a little more contrast with the clouds.
Keep in mind that this adjustment will affect every single hue that includes the blue tinted highlights, so for images like the one I am working on, you must be very careful, as you will also be affecting the lake.
Method #3 – Brush tool
The last option for accomplishing this task is to grab your Adjustment Brush tool and apply it over the area, where you want to make the adjustment.
In my case, I am going to work with this brush from the ‘Out of the Shadows HDR Workflow’ by Sleeklens, and I will paint only the sky area
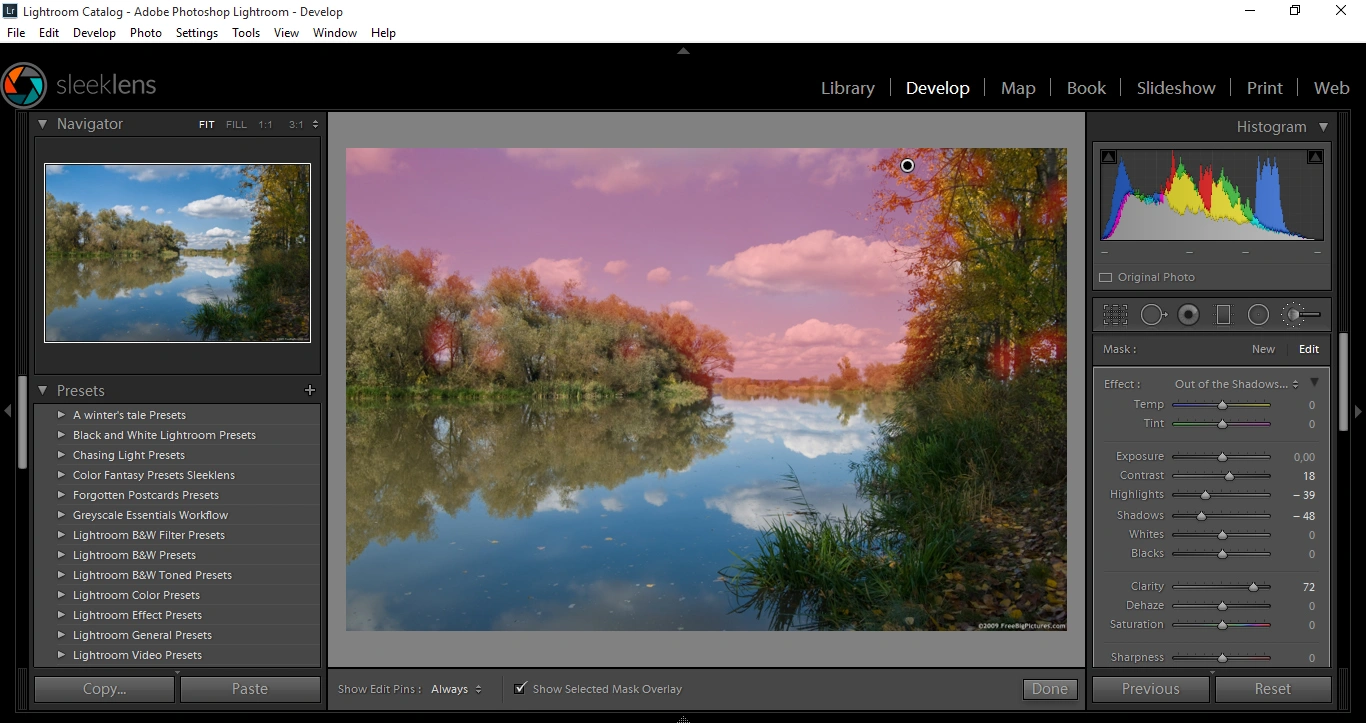
After you finish the adjustment, hit ‘Done’ and compare the results.
As you can see, your image now looks more vivid, merely by applying a quick adjustment over the sky area. Use the resources you’ve seen here today to improve the quality of your post-production.
Good luck, and keep editing!