 by
by To watermark or not to watermark photos? This is an endless debate between photographers. Why do photographers use watermarks? Indeed, visual watermarks protect your ownership and copyright from online theft. In some instances, photographers use watermarks for self-promotion, recognition and advertising purposes. You can watermark photos using professional software such as Visual Watermark.
It’s obvious however, that visual watermarks (like logos, large stamps or texts) carelessly placed, distract from the overall look and feel of a photo. When you see such a watermarked photo, all you think about is the watermark.
If you want images you share online to be attractive and cohesive, you should tastefully and unobtrusive integrate watermarks. Your watermark shouldn’t impact the overall look and feel of a photo. Instead, the watermark should be a part of a photo. Carefully integrated watermarks are hardly noticeable. Their removal is a labor intensive process.
This is the subject of this tutorial. I’ll demonstrate you how to blend a watermark into a photo using Visual Watermark app. Note this is a time-confusing process and cannot be suited to all types of photography.
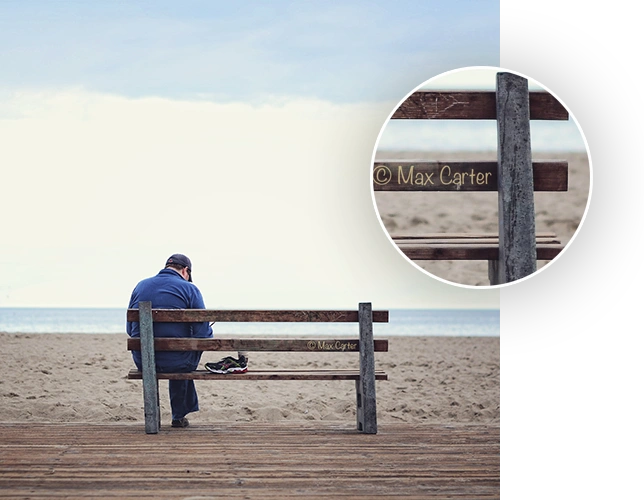
Image copyright Bogdan Khartchenko
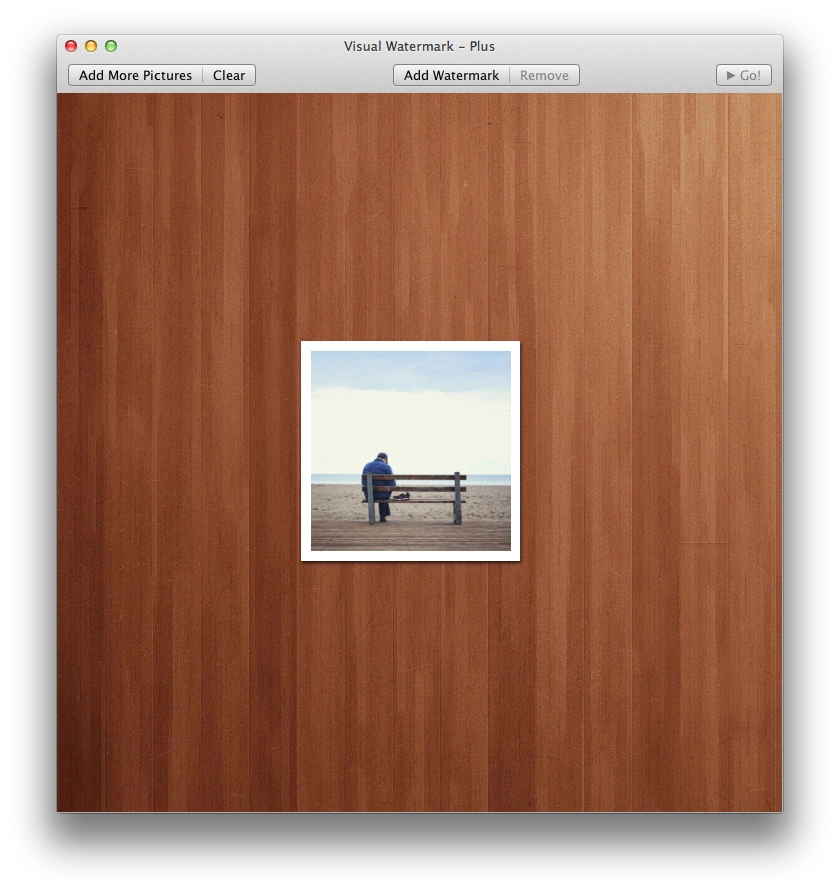
- Import your images into the program. Mac: Drag them into the program screen, or click the Select Pictures button. Windows: Drag photos into the left side of the program, or click the Add Images button.
Fit your watermark into the right place within a photo.
Open watermark editor. Mac: Click any of the photos you’ve just imported. Windows: Click the Create New Watermark button.
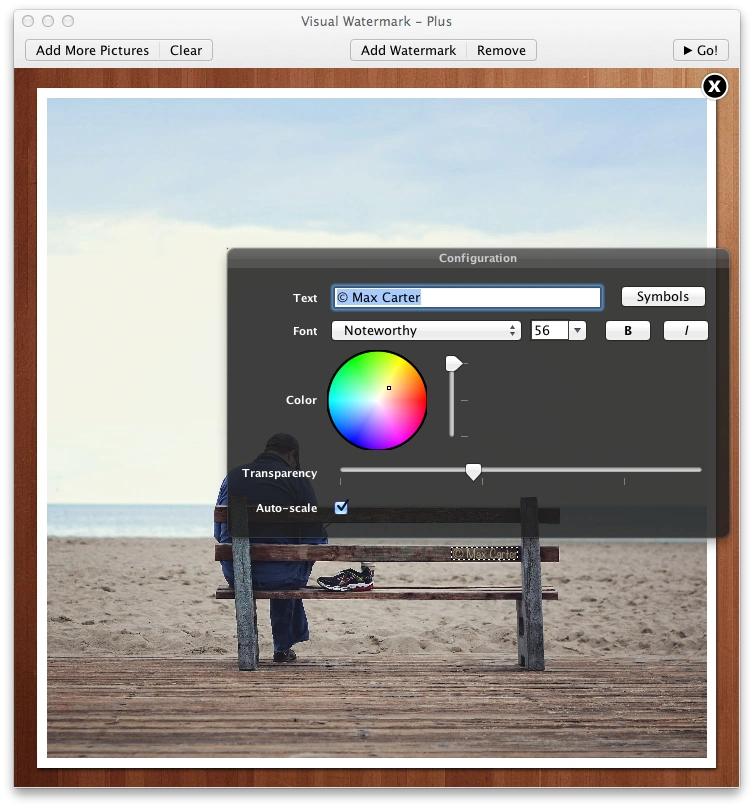
Add and design your watermark. I’ll use a text watermark for this tutorial with a name in it. Mac: Click the Add Watermark – Text menu item. Windows: Click the Add Text button. Enter watermark text, select color and size on the screen appeared.
Finally, blend your watermark with the rest of the photo so that it looks like a part of the photo. I’ll make the watermark partly transparent by setting its opacity to 60% and change its color to be slightly yellowish.
- Windows: Click the Apply button to return to the main screen and then – Watermark button in the bottom-left corner. Mac:* Click the Go button to start watermarking.
And I’m done. I’ve successfully integrated a watermark so that it doesn’t distract from the original photo. Before you create a watermark into your next photo, carefully position and transform it. Stay tuned for more tutorials!
More details - How to watermark photos.