 by
by If you’re like most people, you know it doesn’t take much to wind up with the computer jammed with thousands of photos named IMG_2189.jpg. Picasa is a great one-stop tool that helps you organize and edit your photos fast and easy.
Here is a step by step guide to help you organize and easily edit your photo collections in Picasa:
Step 1: Organize Your Images.
Add photos to Picasa
After downloading Picasa (free) and installing it, it will begin looking for and organizing all the photos and videos on your hard drive. Use Picasa to view photos already on your computer, or to import photos from your camera.
Depending on the number of pictures stored on your computer, the initial scan may take a while to complete. If you really have a ton of photos and want to skip a complete check, you can select which folders you’d like Picasa to scan.
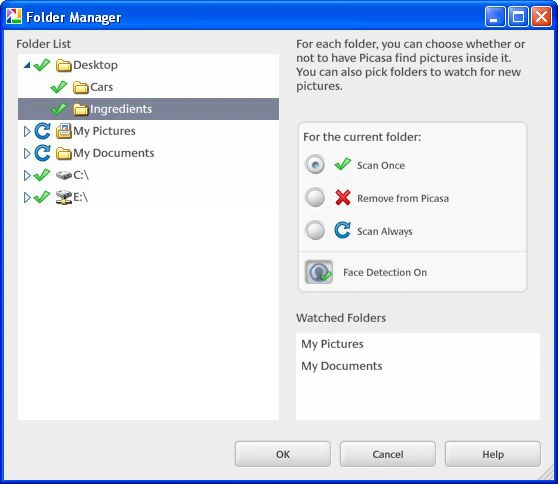
Control the folders that display
If you only want Picasa to display certain folders, go to the Tools tab and select Folder Manager. Choose the folders you want Picasa to display and for more advanced settings, go to the Tools tab again and select Options.
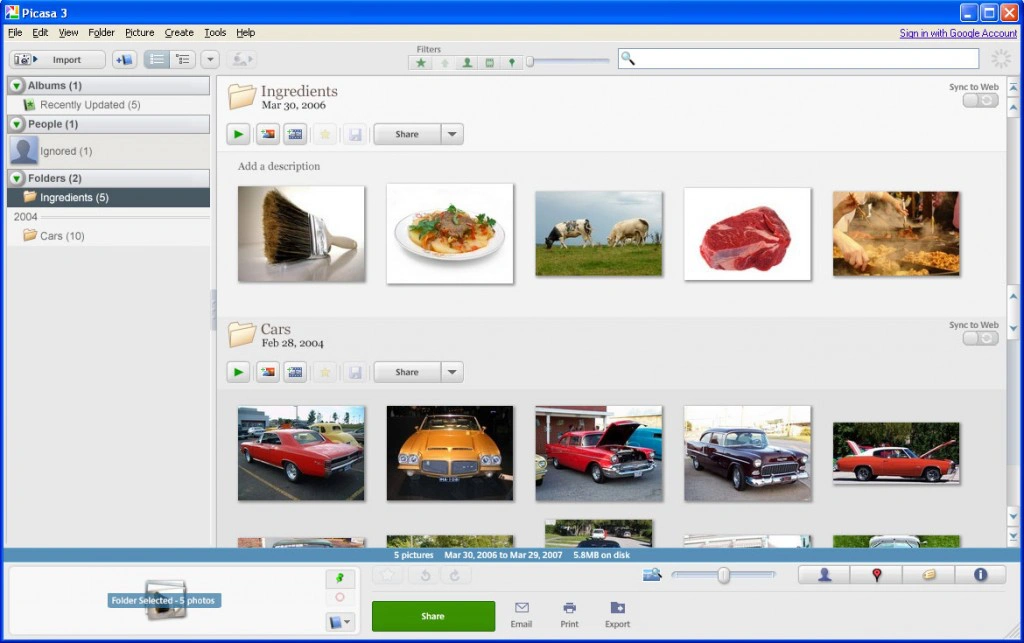
Once Picasa completes the initial scan, you will have all your photo collections at your fingertips. To make it easy to find your photos, here are 2 more tweaks for you:
Rename your photos
After your photos have been uploaded to Picasa, you’ll see that there are a gazillion files that were not intuitively labeled with Picasa, which makes them very difficult to find and use. And the last you’ll want to do is rename those individually. This is where Picasa can help you: batch renaming, or renaming a whole bunch of photos at once.
Here are the steps to do it:
- Locate the folder where the pictures are stored.
- Select the photos you want to rename (use the Shift key to select multiple files).
- Select “File” and “Rename” (use the F2 shortcut).
- Think of a new name for your group of photos.
- Click “Rename” and you’re done.
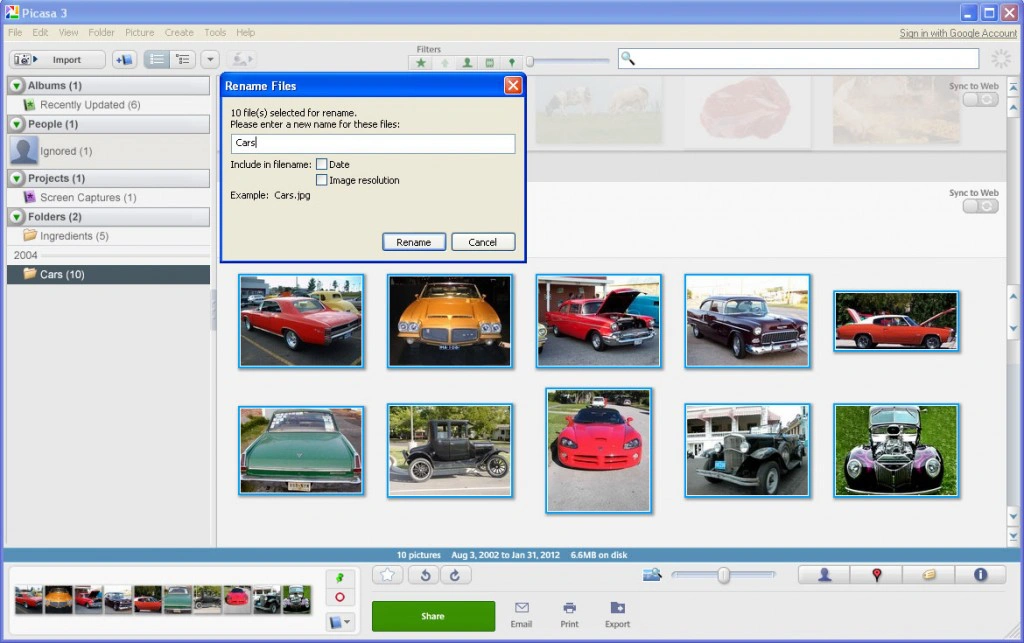
Now, instead of 10 photos labeled helplessly “IMG_2189.jpg” (and so on), you’ll have 10 photos labeled “Thanksgiving Day 2011″.
Here are two more tips to help you further organize your photos within folders:
- When you collections include more and more folders, you have couple of views to choose from. Go to the View tab, select View -> Folder View and choose between Tree View and Flat Folder View (I find this one easier to manage**).
- Once you’ve uploaded your photos to Picasa, do not make any more tweaks and changes to your collections using Windows Explorer. You might lose your edits and you’ll definitely confuse Picasa.
Create your own filing system
Once you get passed the basic folder organization, Picasa enables you to further sort your files with one more option: gold stars.
While you’re organizing your files, you’ll definitely come across a photo you’ll want to be able to find easily later. Just like starring your e-mails, Picasa enables you to also star your favorite photos.
Simply click on the Star button in the Photo Tray (right above the ‘Upload’ button) and that photo will be starred. Later, you can group all the starred photos in one folder. If you want to star more photos at a time, just click on the Shift key and you’re done.
Step 2: Make Your Photos Look Pretty.
If you need a one-click fix to red eye, crooked shots, cropping, color, lightning or zoom, Picasa has everything you need to adjust your photos fast and easy.
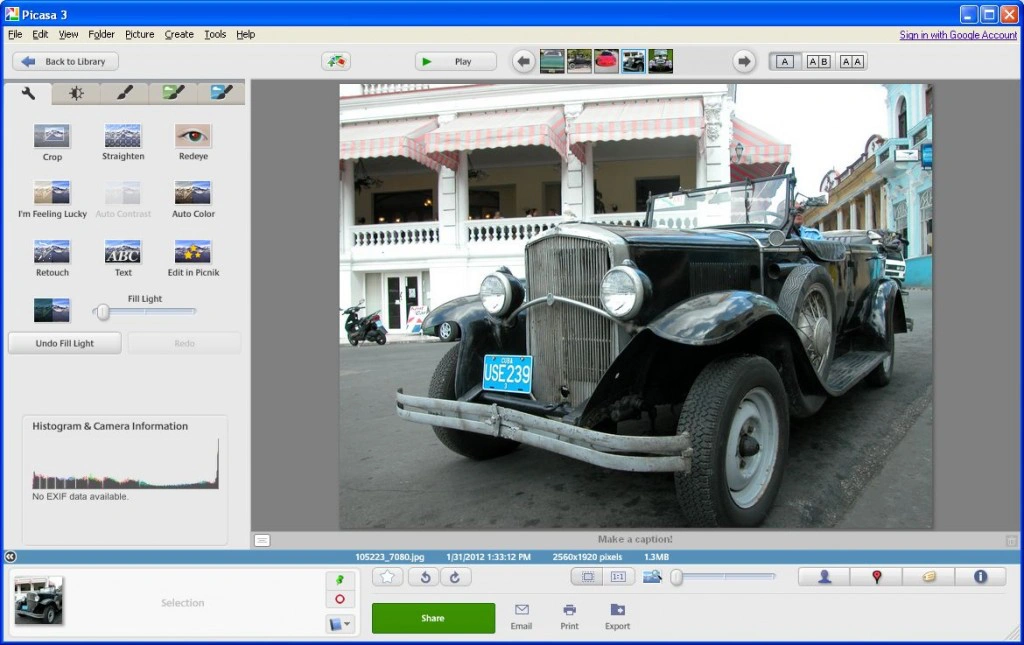
To edit an individual photo, double-click on the thumbnail in the Picasa library and you’re taken to the editing panel. You’ll see the 3 tabs to the left: Basic Fixes, Tuning, and Effects.
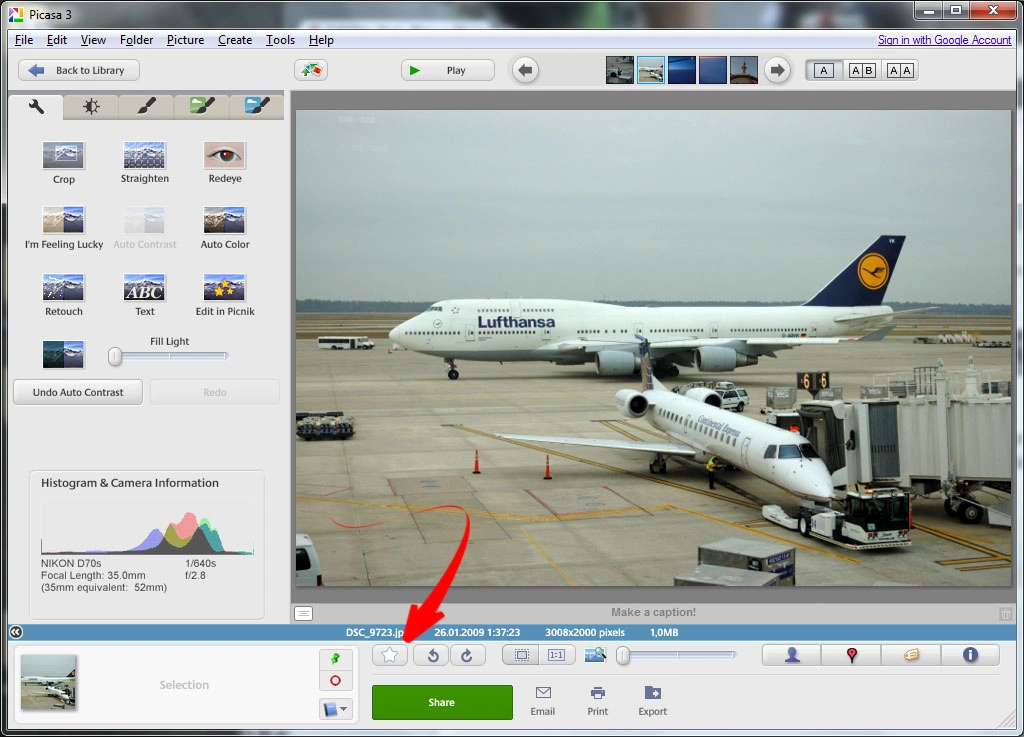
Basic fixes
This is probably where you’ll be spending most of your time. You can crop, fix crooked shots, remove red eye and correct contrast and color. You can also use the “I’m Feeling Lucky” button and let Picasa choose the best tweaks for your image (it usually turns out pretty nice).
Anything you do can be immediately undone with the useful Undo button (also use Ctrl + Z). Anyway, changes are not final until you click on the Save Changes button. Make the changes, click the Back to Library button and press the Save Changes button (the tiny blue button, next to the ‘Share’ button) in the album header.
Now, your changes have been overwritten the original image, but your originals are safely stored for you in a folder called “Originals”.
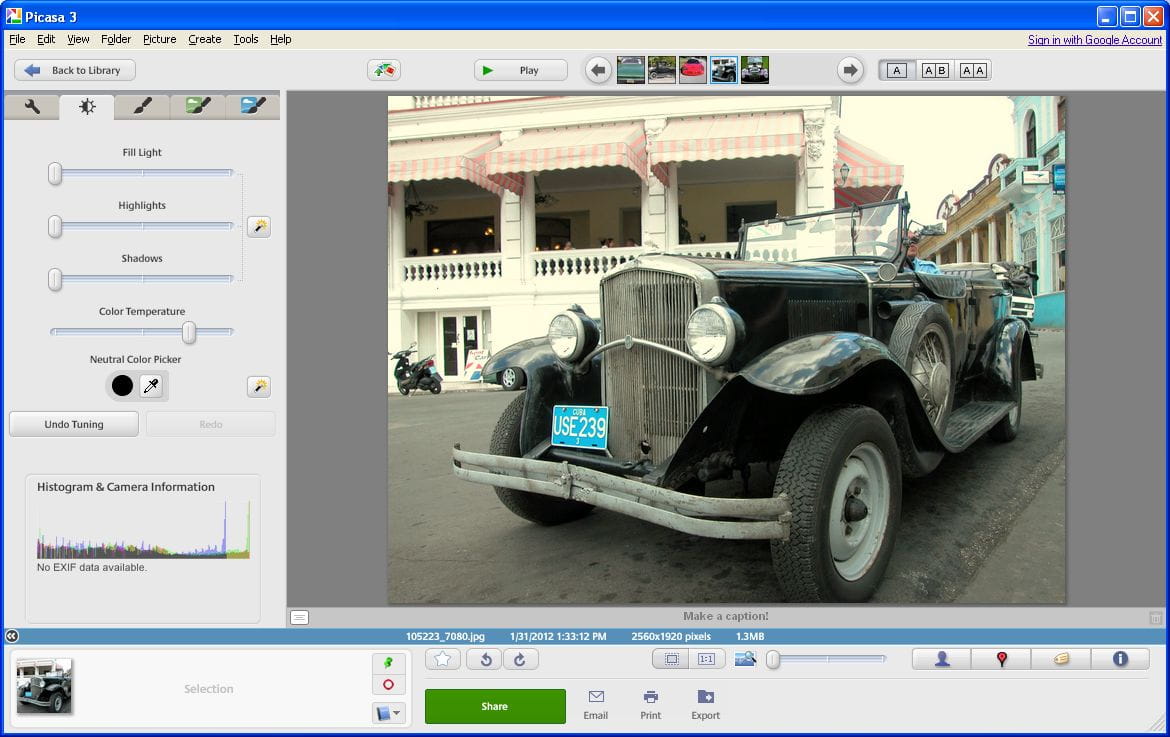
Tuning
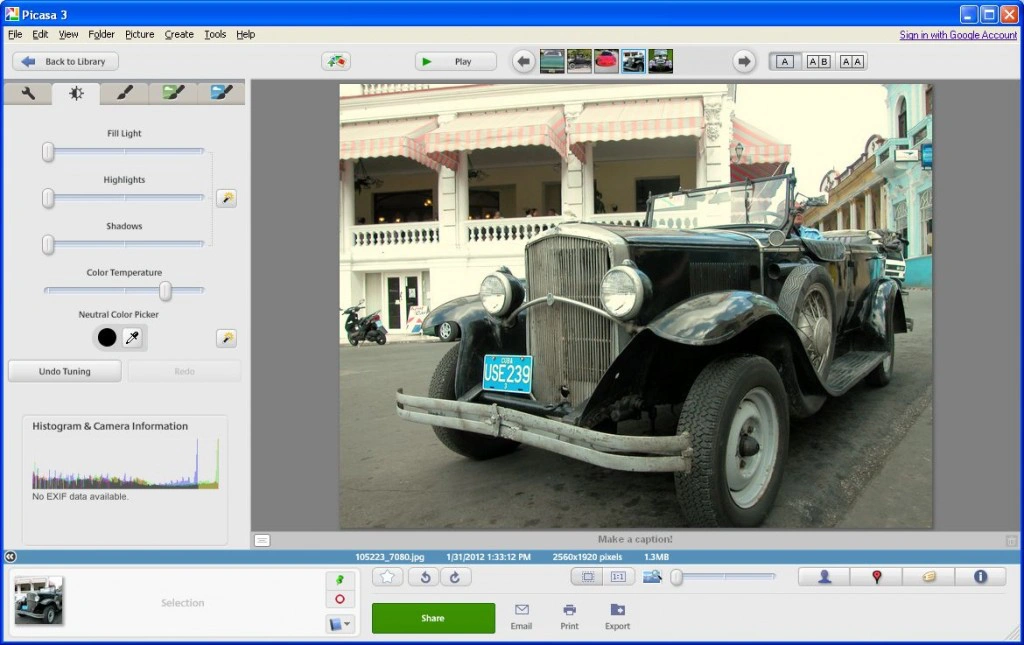
The Tuning tab opens a set of sliders that helps you correct lightning in your photos. Here are the 4 actions:
- Fill light: corrects background lighting while keeping the foreground intactv b
- Highlights: brightens up the entire photo
- Shadows: darkens up the whole picture
- Color temperature: tweaks the colors in your image
You’ll get the best results if you apply these together, not just one at a time. Just like the Basic Fixes tab, you can also ask Picasa to do the work for you.
Effects
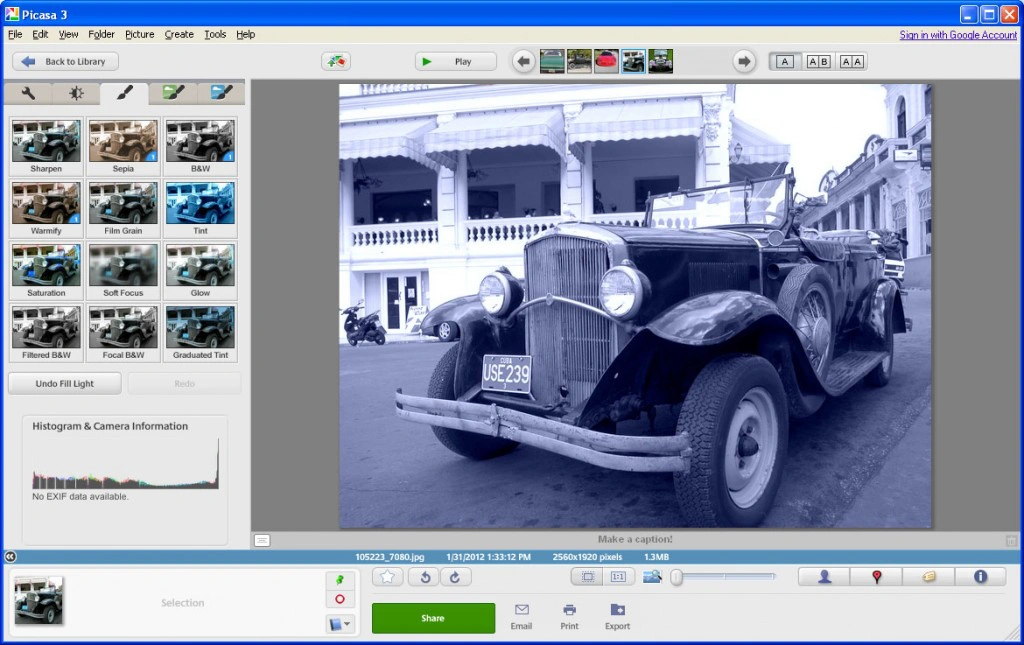
You can apply 12 cool effects, including:
- Warmify: warms up the skin tones and other colors
- Glow: creates a cool fuzzy effect
- Focal Black & White: desaturates your photo around a central point
- Sepia: ages your photo
You also have sliders that allow you to dose the amount of sharpness, blur, saturation, tint and so on. The Cancel button is always at hand to undo your actions.
Alternatives to Picasa
Unfortunately, Google has announced the end of support for Picasa and recommends that everyone switch to their cloud service Google Photos with a paid monthly subscription starting with a certain amount of stored photos. However, there are a number of alternatives to Picasa for desktop computer, including free ones.
Batch editing
You can even edit multiple pictures at once. Select multiple files, go to the Picture tab and select Batch Edit. If you want to pick images from multiple albums, hit the small green Hold button in the Photo Tray (at the bottom of the window) and search for the images you want fixed.
You can also undo multiple edits to multiple pictures by picking the photos using the CTRL key, right-clicking on them and selecting Undo all edits.
Trust me, there are a lot more ways to have fun with Picasa than basic photo editing and organization. This is an amazing tool that allows you to mix your tweaks and get really creative with your photos.
Watermarking
It also makes sense to make a watermark for your pictures before sharing them on Facebook or Twitter. Unfortunately, Picasa doesn’t have watermarking capabilities. However, you can always use our free watermark software - Visual Watermark. Learn more - How to watermark photos.