
 by
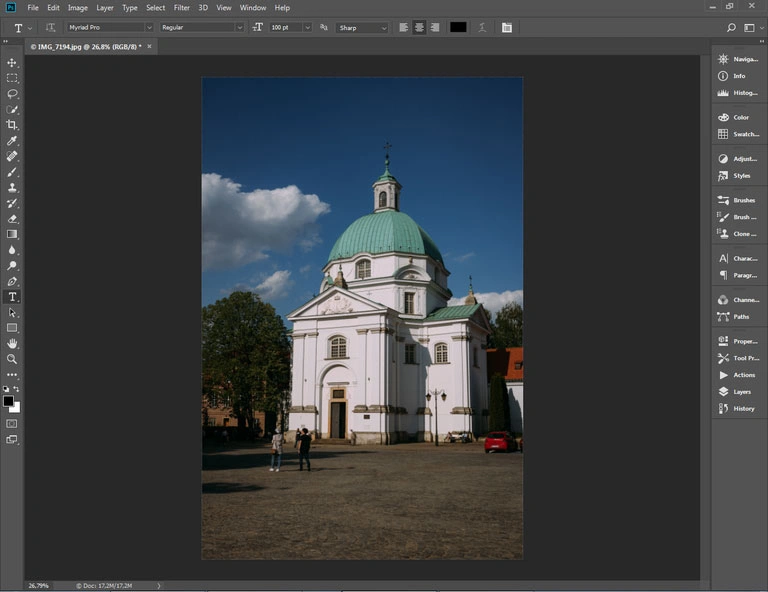
by In this article you will learn how to batch watermark an entire folder of photos with a transparent watermark in a few steps. Don’t worry, it’s easy! The result will look like this:

For those who prefer to watch video we recorded the whole process step-by-step:
Step 1
Find a photo with the smallest resolution in the batch. This is important due to Photoshop’s incapability to scale down your watermark. So if a photo is smaller than the one you used to create a watermark, the watermark is going to look pixelated. Open the photo in Adobe Photoshop.
Step 2
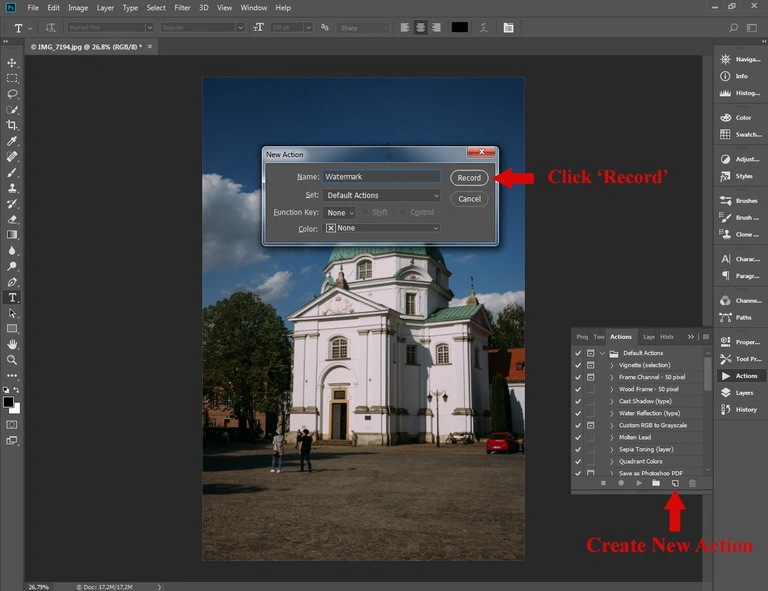
We will need to create an action to perform batch watermarking. Open Actions window. Then click on the “Create new action”button. Enter the action name (e.g. “watermark”) and hit “Record”. Photoshop will start recording all of your actions inside it. You can close the Actions panel to save some space on the screen – Photoshop will continue recording your actions.
Optionally, you may create a group for your own actions using a button on the left of the “Create new action”. This may be useful, if you want to creat a huge amount of actions, not batch watermarking action alone.
What To Do If Your Images Were Stolen
These days, it is super-easy to copy an image from the Internet – just click the image and choose “Save image as”. No need to ask for a permission from the photographer! If your photo was stolen, check our guide on how to take them back. Open Guide
Step 3
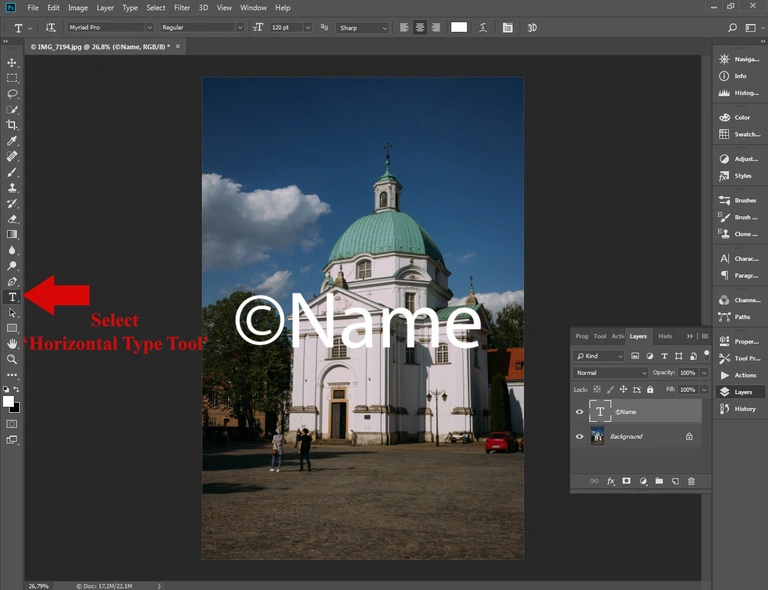
Select theHorizontal Type Tool(shortcut “T”) and click anywhere inside the photo to add a string of text. Type anything you wish. For example, your website address is a good idea because people will be able to find you even if they lost your business card.
You can add a copyright symbol as well. On Windows hold Alt and press numbers 0, 1, 6 and 9. On Mac hold Alt/Option and press g. You can find a video demonstration of typing a copyright symbol in our blog.
Step 4
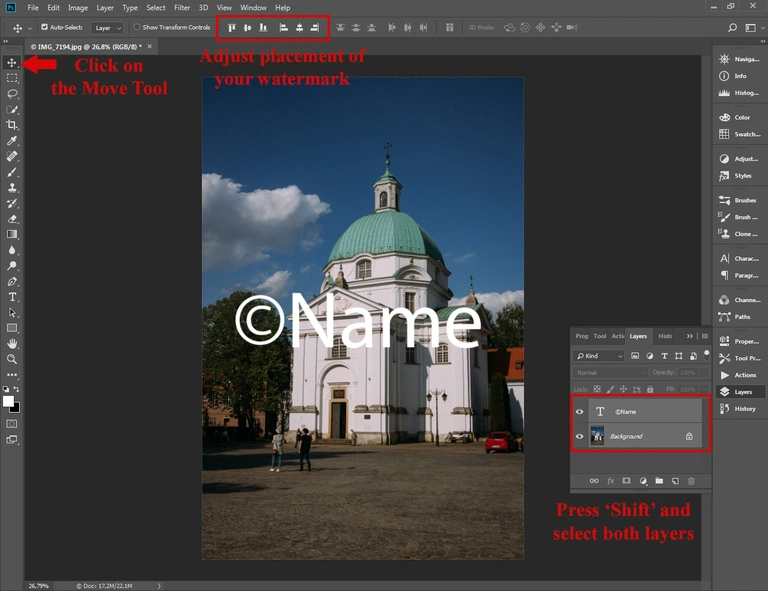
Select Edit – Free Transform in the menu, resize and arrange the text layer. Also, you can select both layers by pressing “Shift” and clicking on the second layer, then choose the Move Tool. Then click the arrange buttons in the main toolbar. I prefer the latter approach because it will center the watermark on every photo in a batch, even if their sizes are different.
As an alternative to selecting two layers, you may select entire picture (Ctrl+A). The arrange buttons will become enabled as well.
This step is very important for batch watermarking in Photoshop because it keeps the watermark position fixed on every photo. Otherwise, Photoshop will put it into different places on different photos.
Step 5
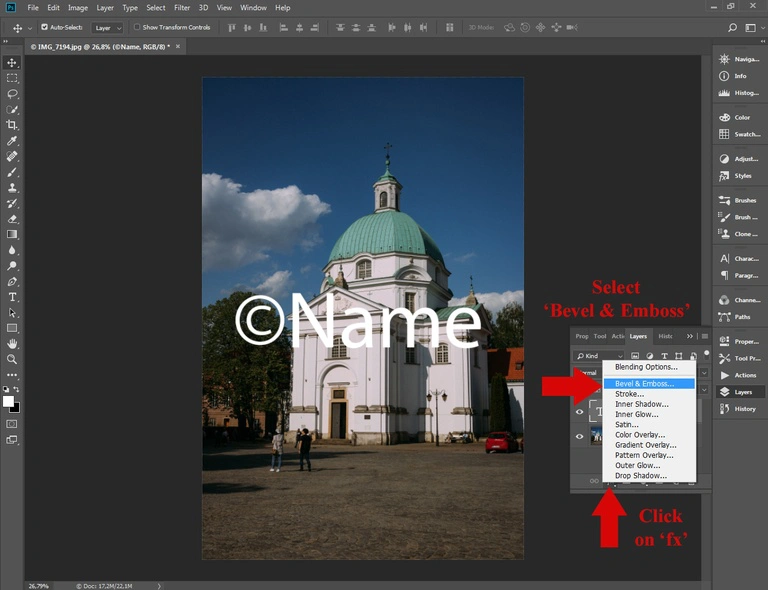
Select the newly created text layer and click Layer – Layer Style – Bevel & Emboss menu item or “fx” button at the bottom of the layers list. Layer Styles dialog will open. Default settings work in most situations, so leave them intact and click “OK”.
Step 6
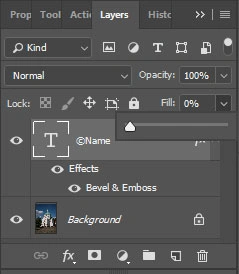
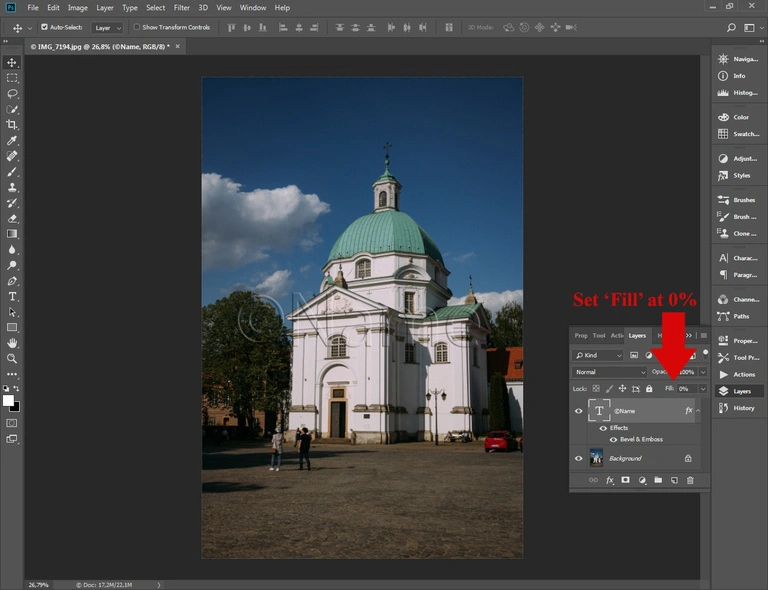
The Fill option on the top of the Layers window sets opacity of the layer itself and doesn’t affect layer styles. Set it to 0 to keep the bevel effect only. This will create a nice glass-like look.
Step 7
Open the Actions panel and click the button with a square on it. This will stop recording. Close the photo: we don’t need it anymore. It is better to discard changes because it will be watermarked anyway. It was a preparation. Now we are ready to start batch watermarking in Photoshop.
Step 8
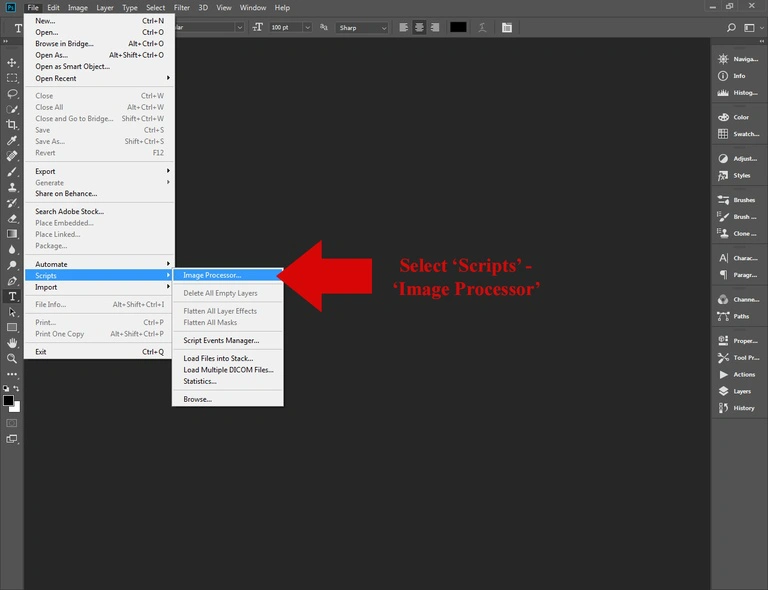
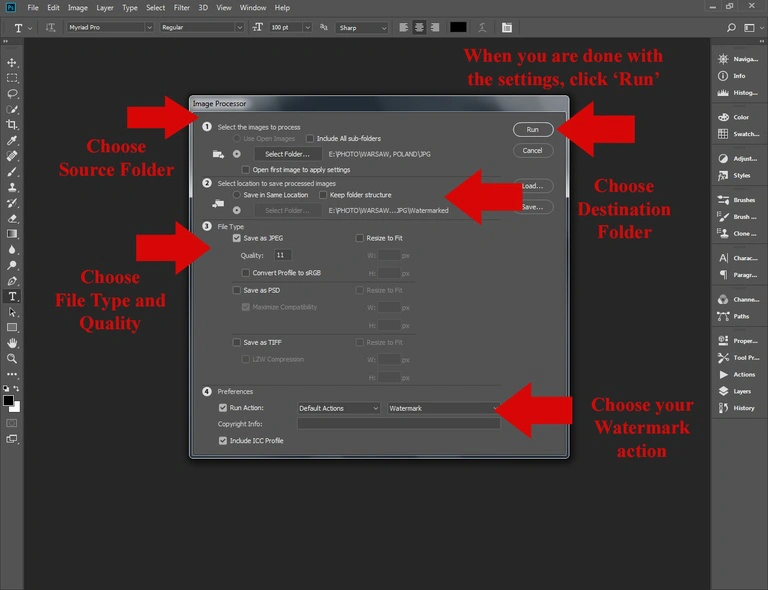
Click the File - Scripts - Image Processor menu item. The dialogue will open. In the first section you need to select folders with images to process - your Source Folder. You can include all sub-folders if you want. In the second section you have to select the location to save processed images - your Destination Folder. You can save your files in the same location, if you want. In the third section you need to choose the File type. We are going to save images in JPG format and set quality to 11. The last section is preferences. Click on “Run Action” and in the second bar, after the Default actions, choose your Watermark action. Once you’re done, click “Run”. Photoshop will quickly start processing your images and you won’t have to worry about a “Save As” dialogue popping up. The program is going to do everything for you.
Alternative Step 8
There is another way to batch process your photos. Click the File – Automate – Batch menu item. Set the watermark group and action. Set the Source to “Folder”. Click the Choose button and select your source folder. Set the Destination to Folder. IMPORTANT: The Save & Close option will overwrite your photos. If you don’t want to lose your photos, don’t choose it. Click the Choose button and select any folder for output files. It must be a different folder, not the source folder! Click “OK” to start batch watermarking. When Photoshop is about to save a photo from the batch, the save as dialogue will open up and you will have to choose JPG in the file type bar. Set a desired quality value and click ‘OK’. Once the batch watermarking is finished, you will find your watermarked photos in the output folder.
Troubleshooting
Watermark isn’t centered on some photos.
Most likely, you have skipped the Step 4 and didn’t center the watermark. Select an entire photo and use the arrange buttons in the Photoshop toolbar.
Watermark is cropped on some photos
Photoshop doesn’t scale watermarks to fit it into the photo. Select the smallest photo in a batch to design the batch watermark or use Visual Watermark – our watermarking app. Here you can find a Visual Watermark vs Photoshop comparison.
This tutorial is for Adobe Photoshop. If you own Photoshop Elements, click here for a tutorial for you.