 by
by Lightroom is a mind-blowingly powerful app that can help you take your photos to the next level. If you have a photo that you consider a failure, don’t rush to discard it – you can fix it here. And if you have amazing RAW images, don’t skip the editing process – you might turn them into true masterpieces with just some tweaks here and there. What’s more, Lightroom is not only powerful, but it’s quite easy to master.
Do you have any doubts about that? Well, you’ve come to the right place. In this detailed guide, you will learn how to edit photos in Lightroom. You’ll see that it’s not as challenging as you think.
Let’s dive in!
How to Upload Photos in Lightroom
So, you opened Lightroom and now you’re wondering how you can upload your images. It’s pretty simple, actually. Click on “Import”, find the necessary folder and select your images, then click on “Import” again.
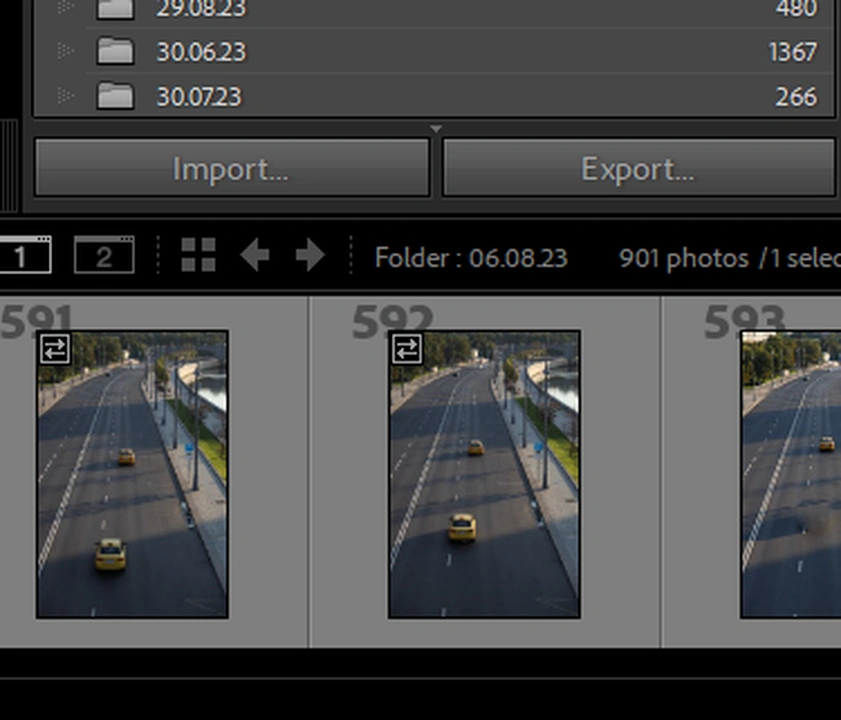
Wait until Lightroom finishes with uploading your images. You will see the Library module first.
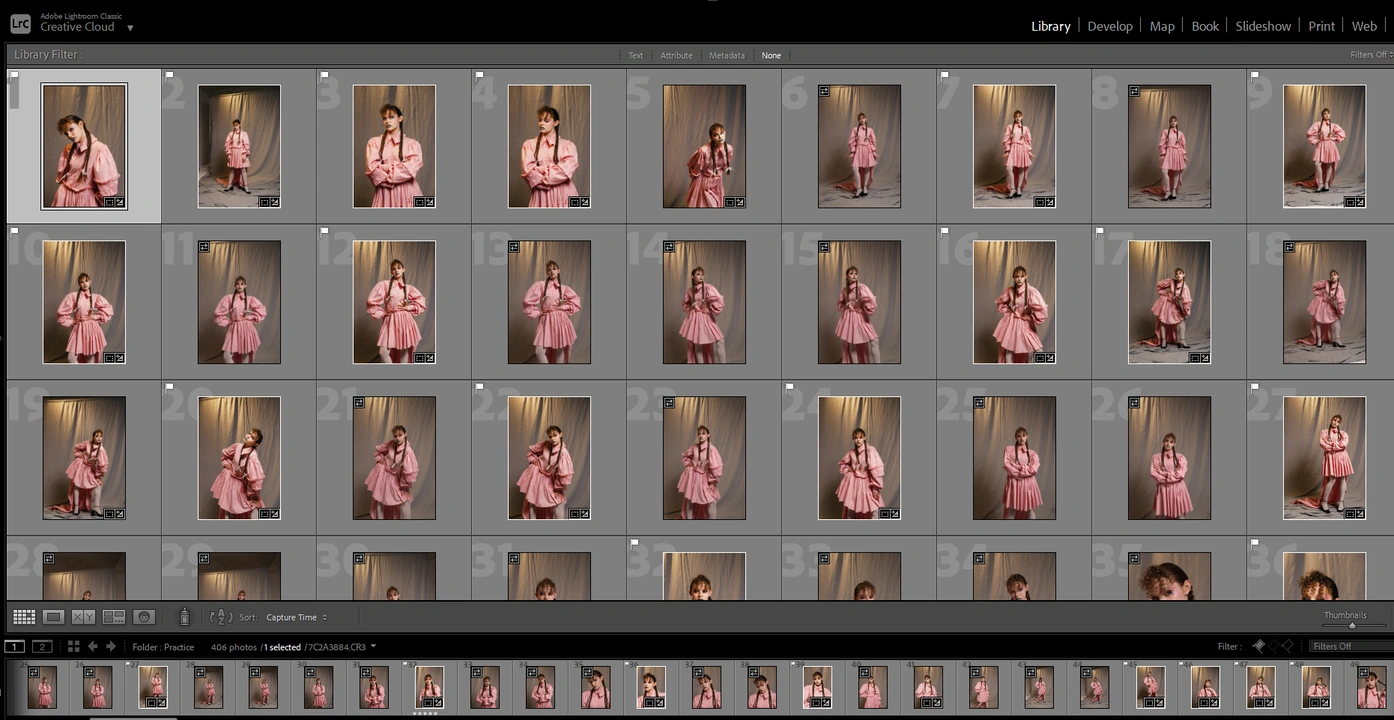
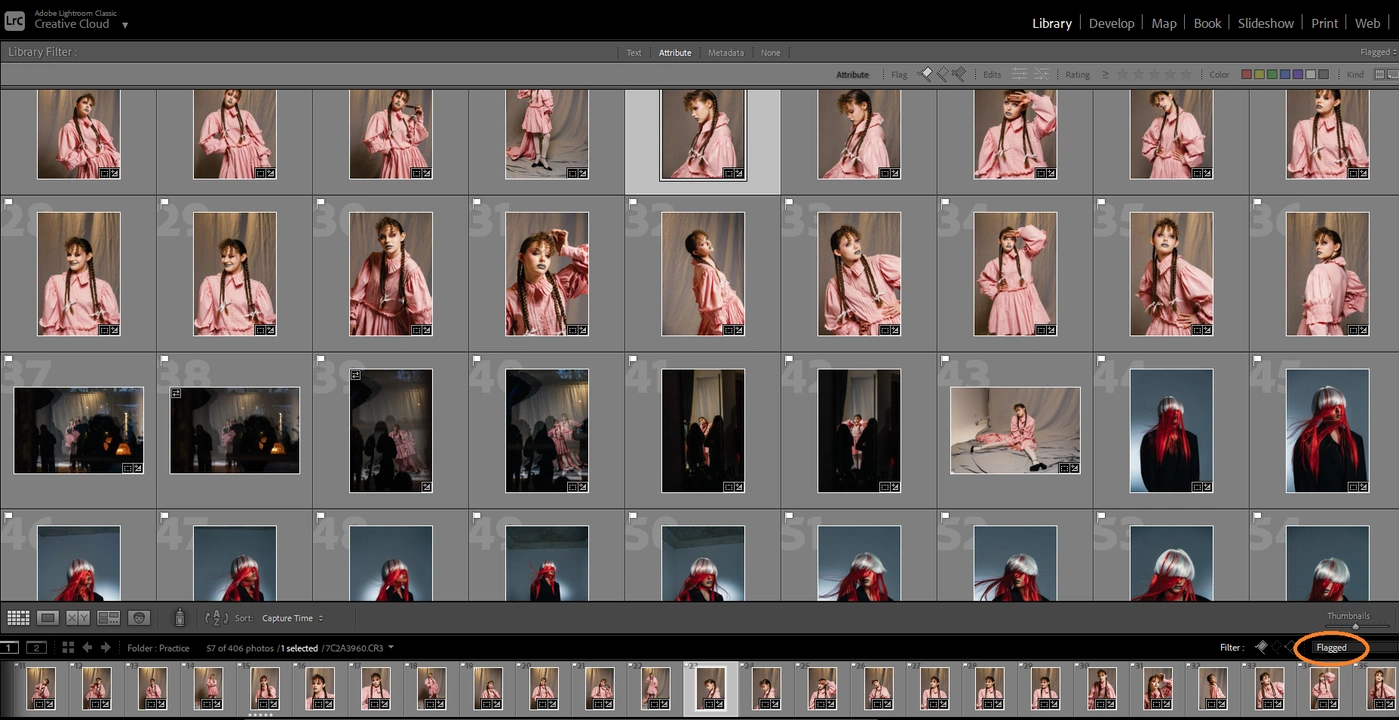
After you import a batch of images into Lightroom, the first thing you want to do is to look through them and pick your favorites.
Press “P” to flag an image that you like.
Press “U” to take the flag off an image.
Another way to mark images as your favorites is by rating them. Press 1, 2, 3, 4 or 5 to set a rating. You will see stars under the rated photos.
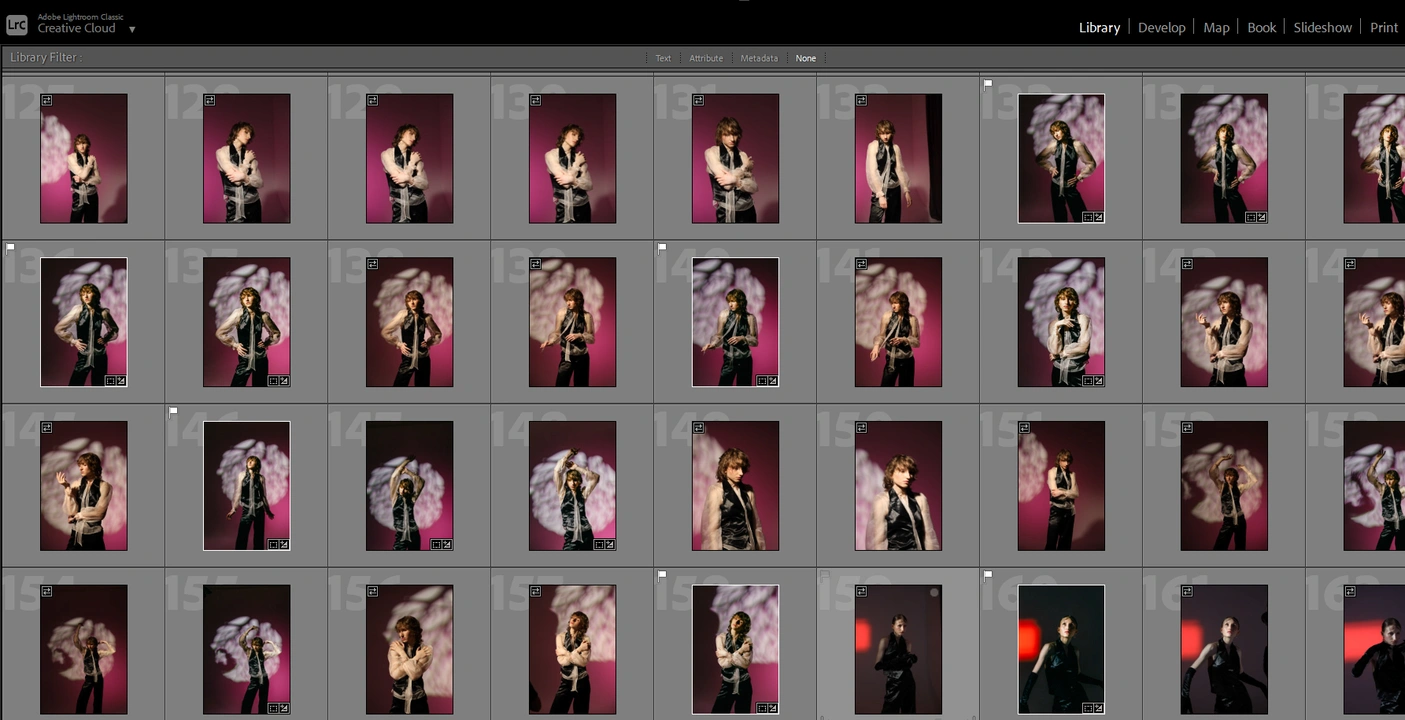
Why do you need to do this? Well, it’s possible to make Lightroom show you only the images you picked as your favorites without deleting the unpicked ones. This is Library with all the filters are off.
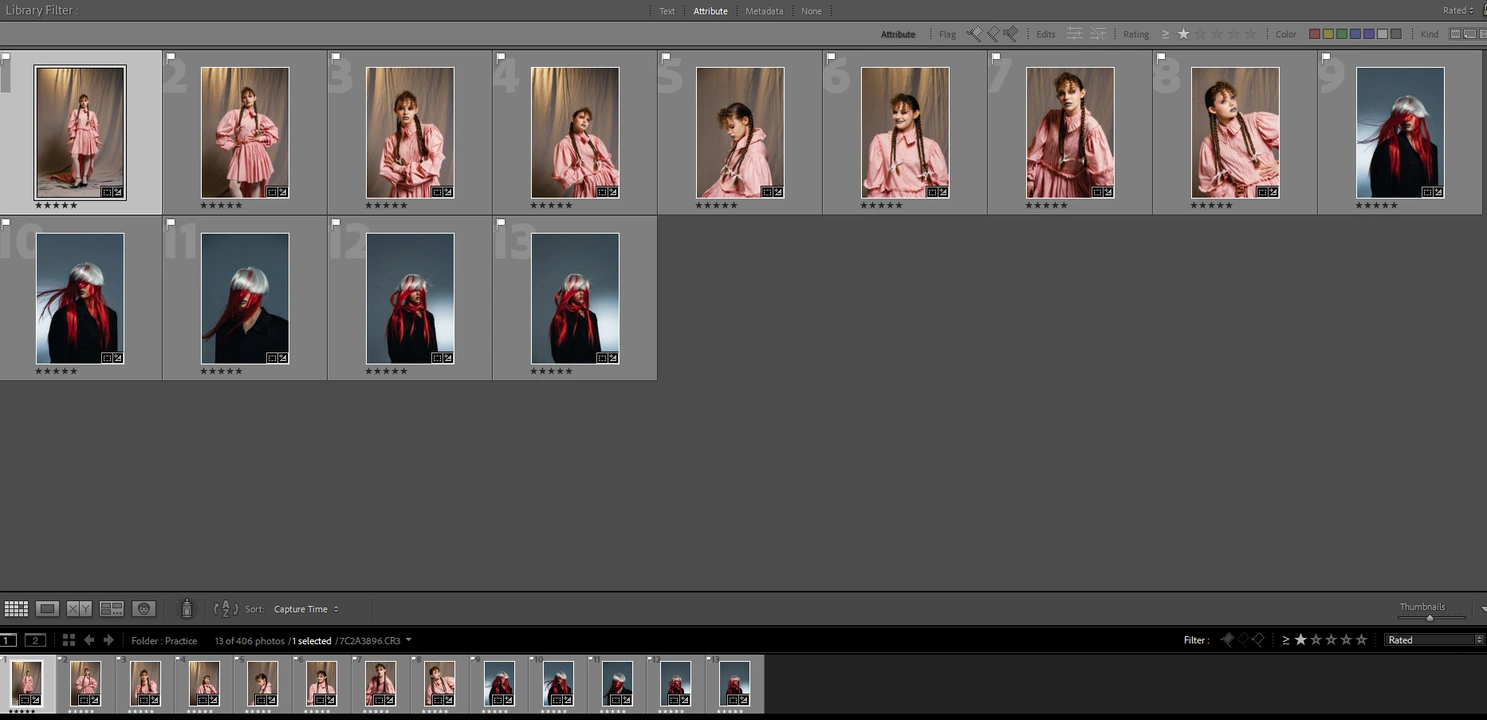
Go to the bottom right corner and set “Flagged” in the small drop-down menu. Now only the flagged images are displayed.
If you set “Rated”, Lightroom will show you only the rated images.
Now that your images are imported and you picked your favorites, you can move on to editing.
How to edit photos in Lightroom
Editing photos in Lightroom is not as difficult and complicated as you might think. You’ll see that it can be quite a fun, creative process.
Here’s something you need to keep in mind, though – there might be some back and forth in your editing.
What this means is that it’s okay to re-adjust the settings in one section after you did some tweaking in another. For instance, you can increase the exposure depending on what you did in the Tone Curve. Another example would be working with Camera Calibration and HSL sections. Maybe you made your yellows a bit too pinkish. What you can do is balance it out in the HSL panel by making the yellows more green. This will result in a more pleasant yellow.
Another tip for you is to experiment.
Don’t be afraid to move different sliders from one end to another – this will give you a better understanding of what each slider can do, how exactly it can affect your image. Try out different things. You can always undo a step or several; it’s possible to start completely from scratch, as well.
Now, let’s get to the instructions on how to edit in Lightroom.
Develop module
First of all, you need to switch to the Develop module. You can do that by clicking on “Develop” or pressing “D” on your keyboard.
If you want to switch back to the Library module, press “G”.
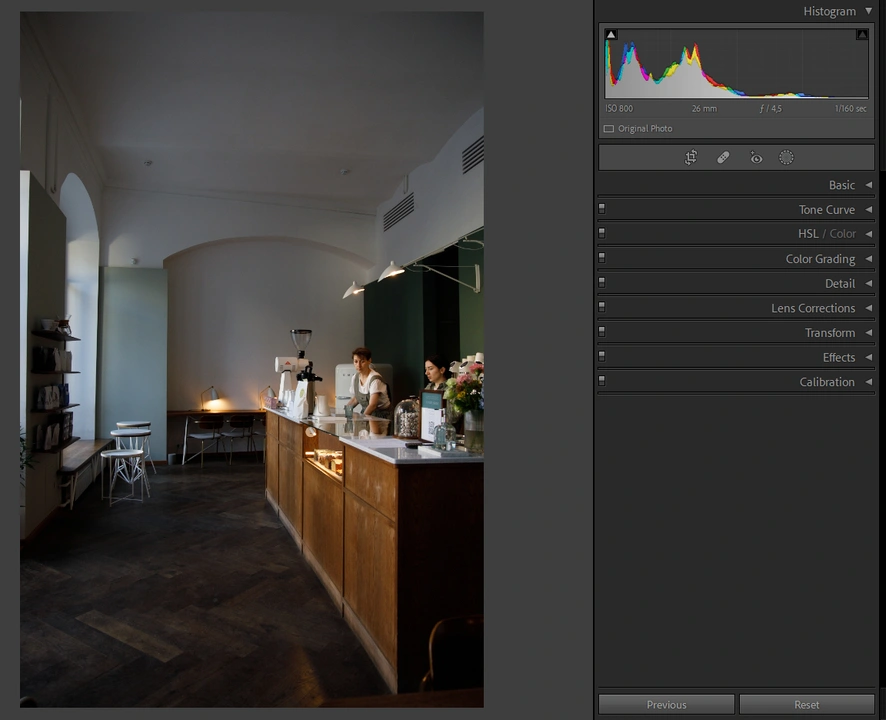
This is what the Develop module looks like.
Lens Corrections
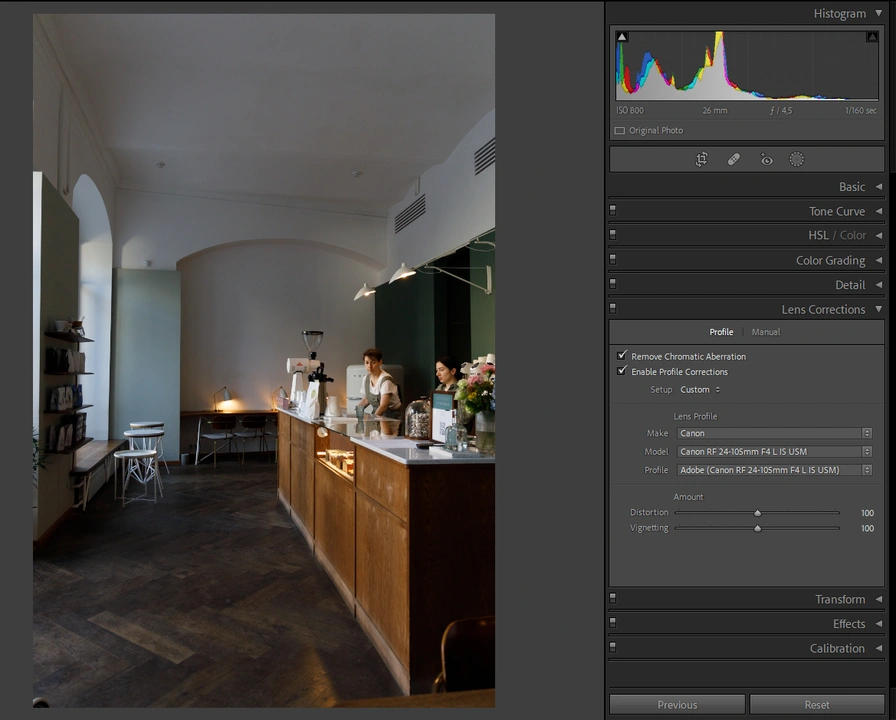
Let’s go to the Lens Corrections first. Here you have two subsections – Profile and Manual, and you can do some adjustments in both at the same time. In the Profile you can enable the “Remove Chromatic Aberration” feature and apply the profile corrections. Pretty much all camera lenses have some kind of distortions, and in this section you can correct them.
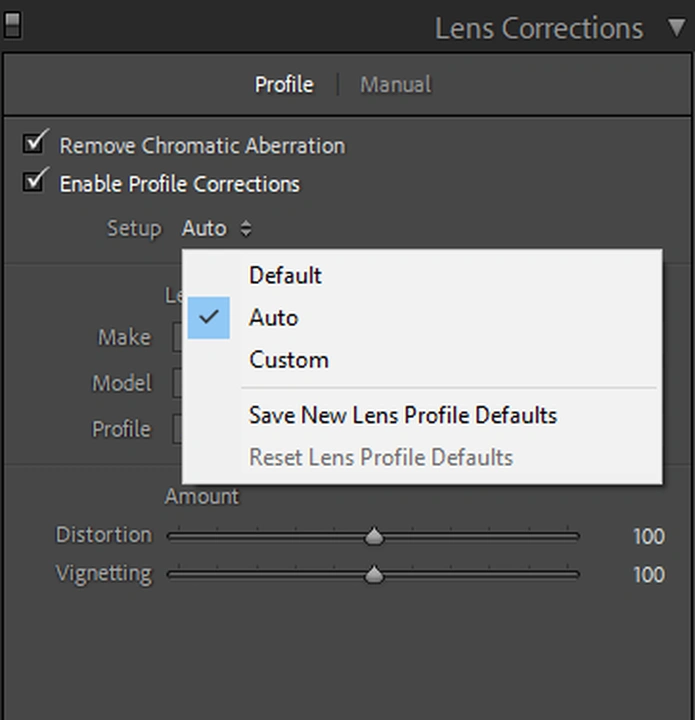
If you put the Setup on “Auto”, Lightroom will automatically detect which lens you used and then apply the corrections. But you can also choose the lens manually and adjust the amount of distortion and vignetting.
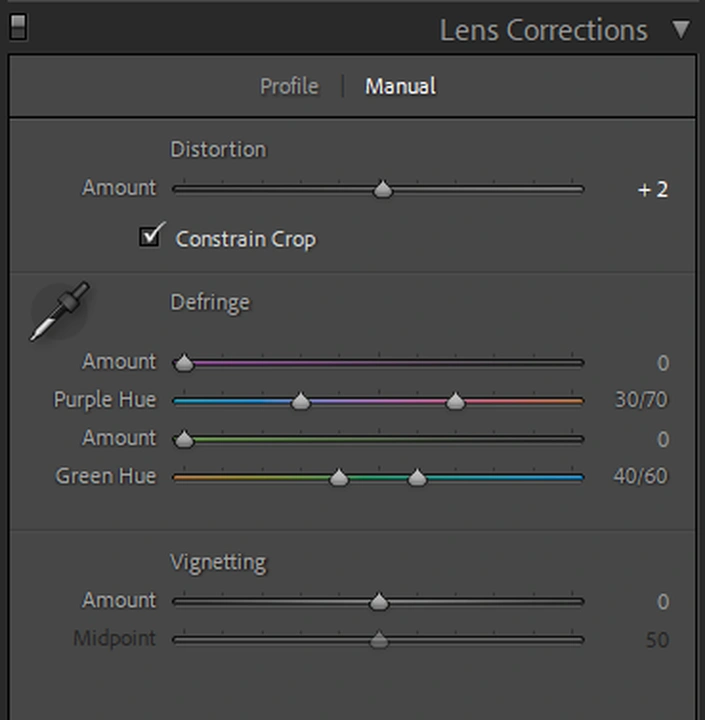
In the Manual subsection you can adjust the amount of distortion, defringe and vignetting manually. If you are doing some tweaks in the manual mode, make sure that “Constant Crop” is enabled.
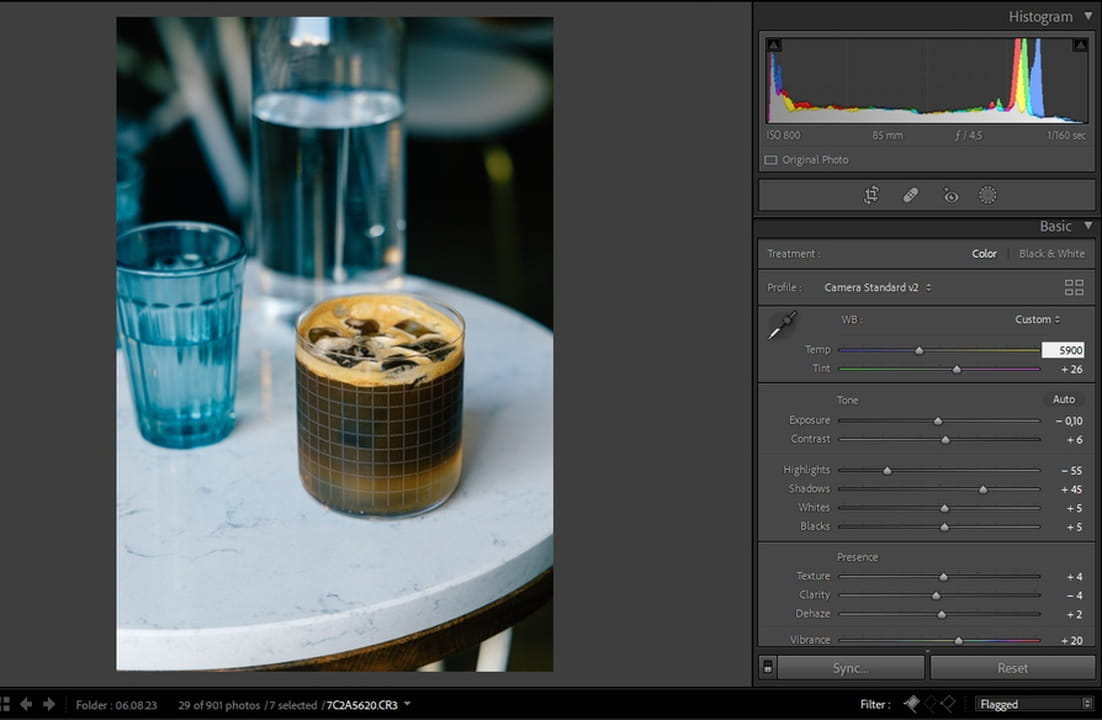
“Basic” panel
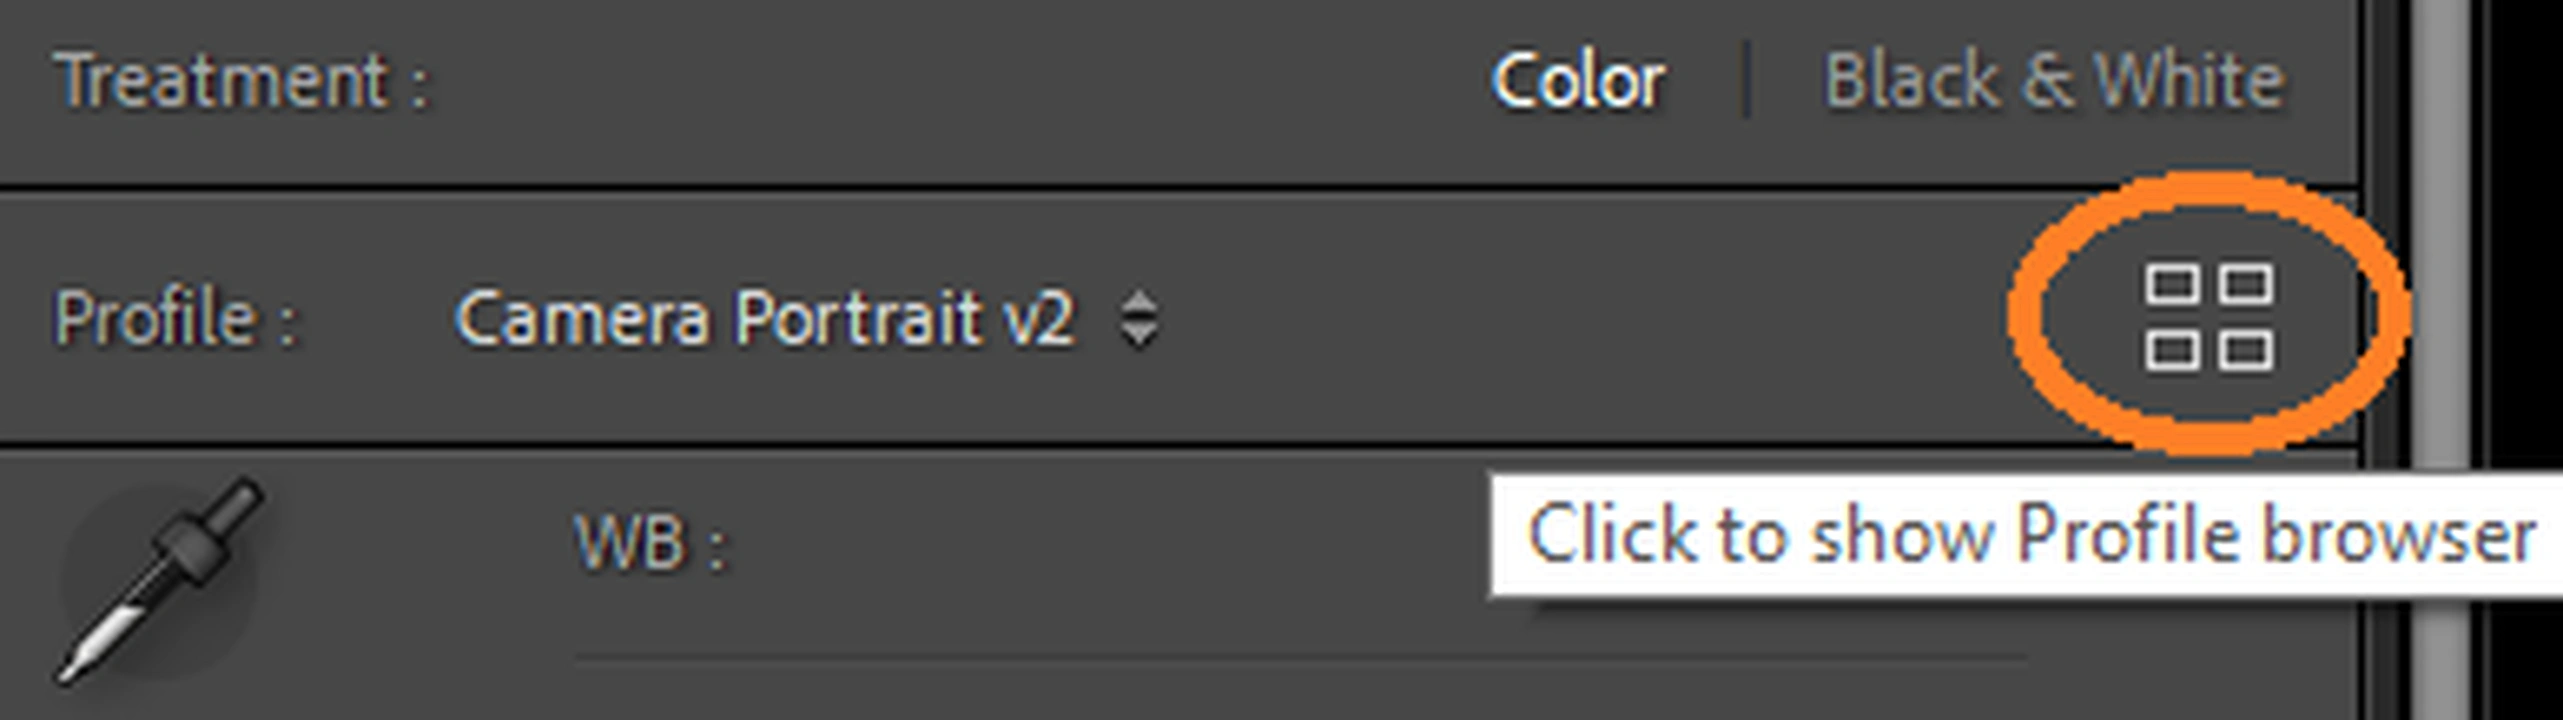
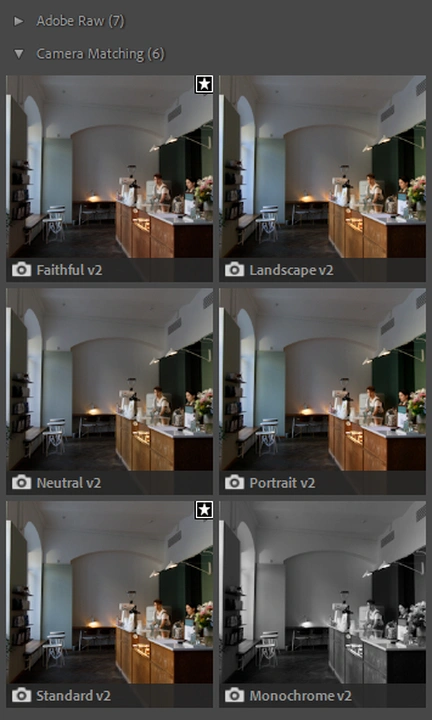
Go to the “Basic” panel. This is where you lay the foundation, so to speak. First of all, choose the Profile that you like. The choice of the profile affects the colors in your image quite substantially. For instance, with Adobe Color, the colors tend to be quite muted and bleak. It’s better to go to the Profile browser and check out all the profiles that Lightroom offers; you can adjust how strong the effect of a profile is, as well.
This section will look different depending on what camera you have.
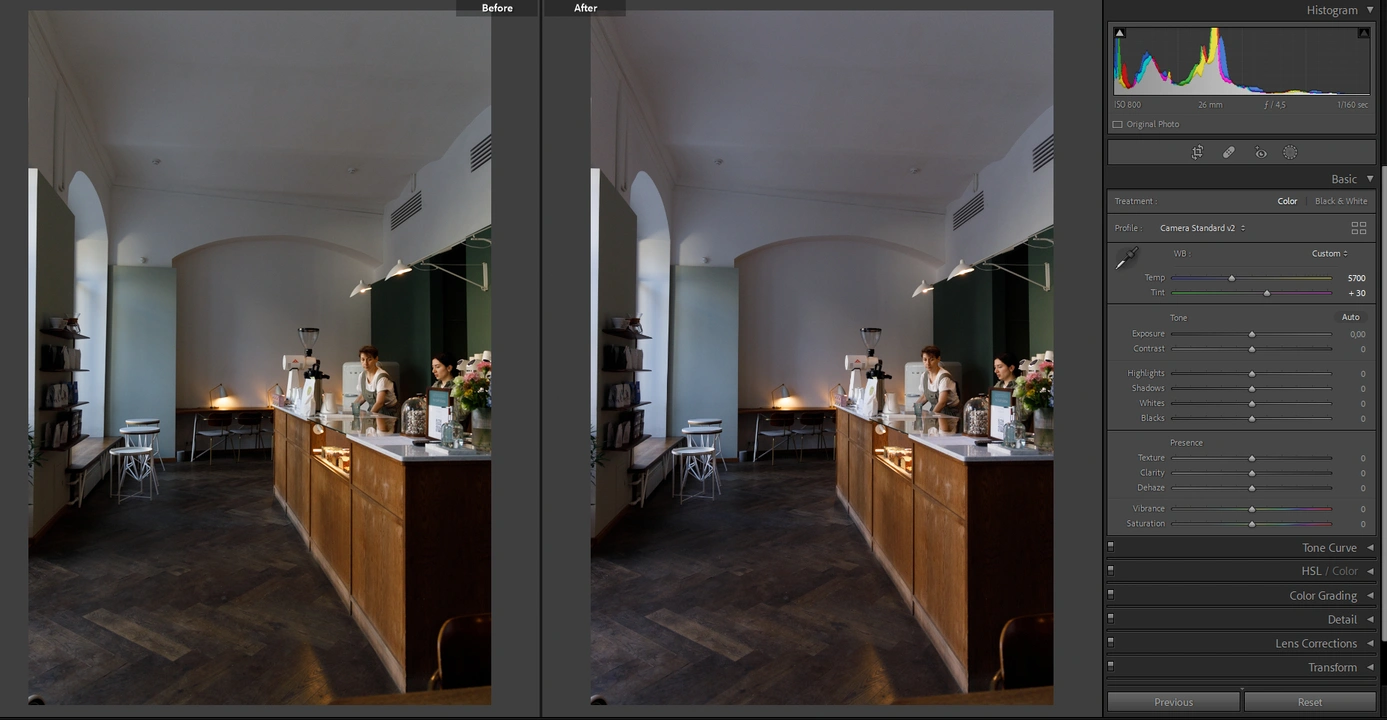
White Balance
The next powerful tool is White Balance. With the help of these two sliders you can make your image warmer or cooler as well as add more green or magenta. Usually, people try to get the white balance right. However, by experimenting with the white balance – making it much cooler or warmer, greener or more magenta – you can change the mood of your shot entirely.
Let’s make our image just a tiny bit cooler and add some magenta tint to it.
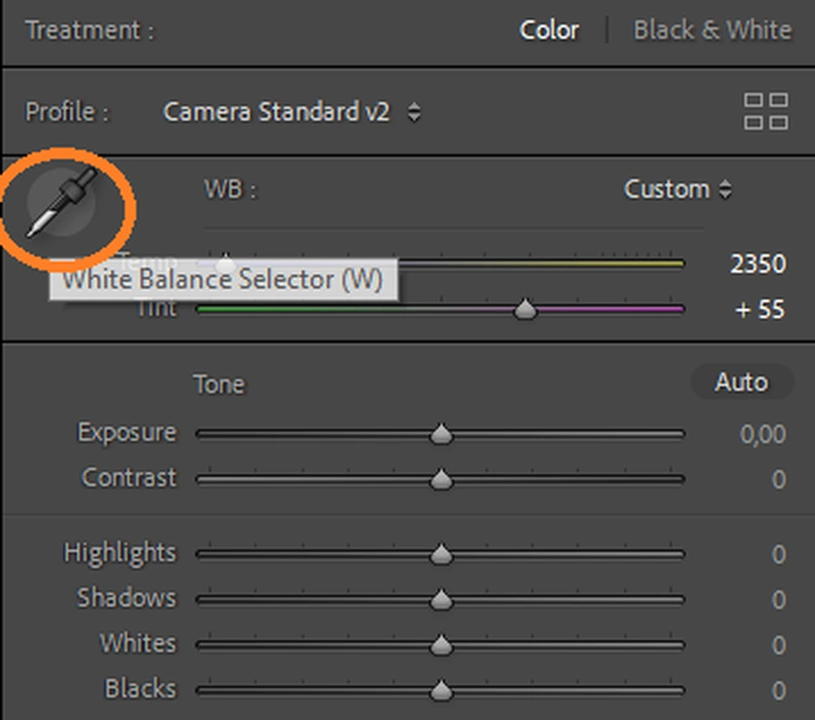
If all you want is a correct white balance – because you or your camera got it wrong – you can select this eye dropper and point it at a white area in your shot. The Lightroom will calculate the correct white balance based on this.
Adjust the exposure
In the Basic section you can adjust the exposure. Make your entire image brighter or darker. Increase or decrease the amount of contrast. Then you can make the highlights and lights brighter or dimmer as well as deepen the shadows and blacks or lift them. This section is especially useful if you have a RAW image that’s under- or over-exposed because you might be able to fix your exposure mistakes.
You will also find sliders called – Texture, Clarity and Dehaze. It’s better to be careful with them as it’s very easy to go overboard and make your image look tacky. With Texture you can add some roughness to your image or make it smoother. Clarity can add crispness or softness, while Dehaze can either make your image hazier or darker.
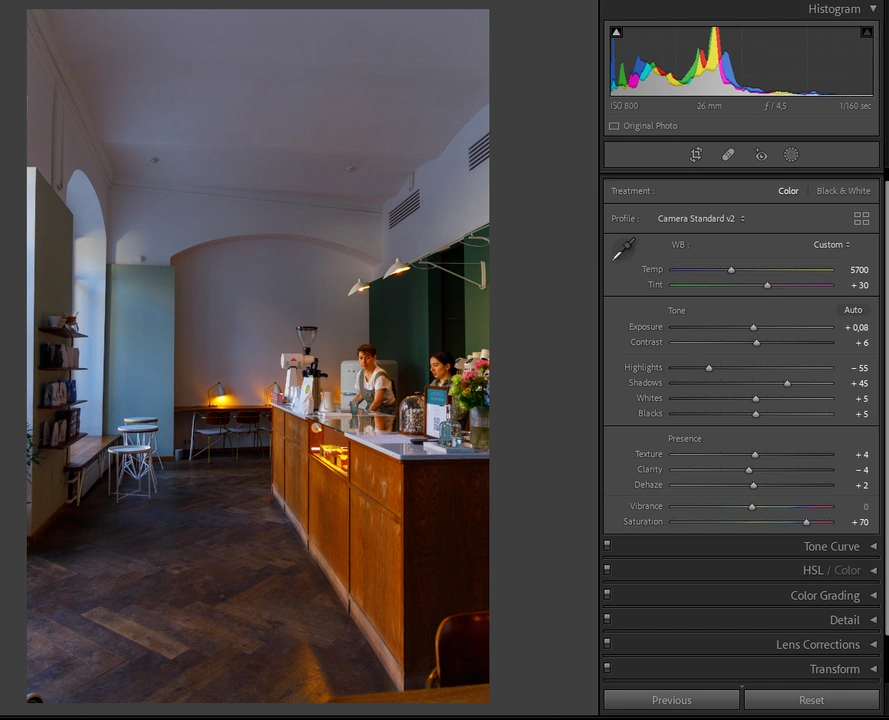
There are two sliders that can be rather useful when you are working with colors – Vibrance and Saturation. As you might have guessed, the Saturation slider will help you make the colors more or less saturated. The downside of this slider, though, is that it’s very easy to go overboard with it. This is why it’s better to use the Vibrance slider instead – it can help you make the colors more saturated, but without producing results that look too gaudy and bizarre. This is especially important if you are working with portraits, because the Saturation slider can make skin look really orange.
This is the Saturation slider at +70.
And this is the Vibrance Slider.
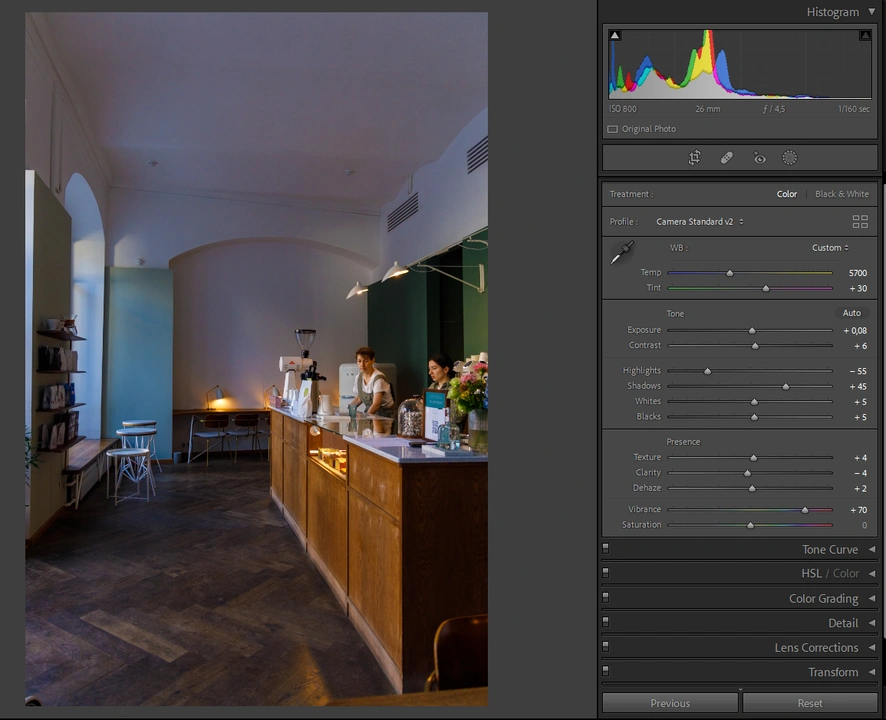
Quite a difference, isn’t it?
Tone Curve
Next is probably the most dreaded, yet the most useful and powerful panel of all – Tone Curve. The Tone Curve represents your image, which is why in the background, you can see the histogram.
Here you have 5 sub-sections:
- Parametric Curve
- Point Curve
- Red Channel
- Green Channel
- Blue Channel
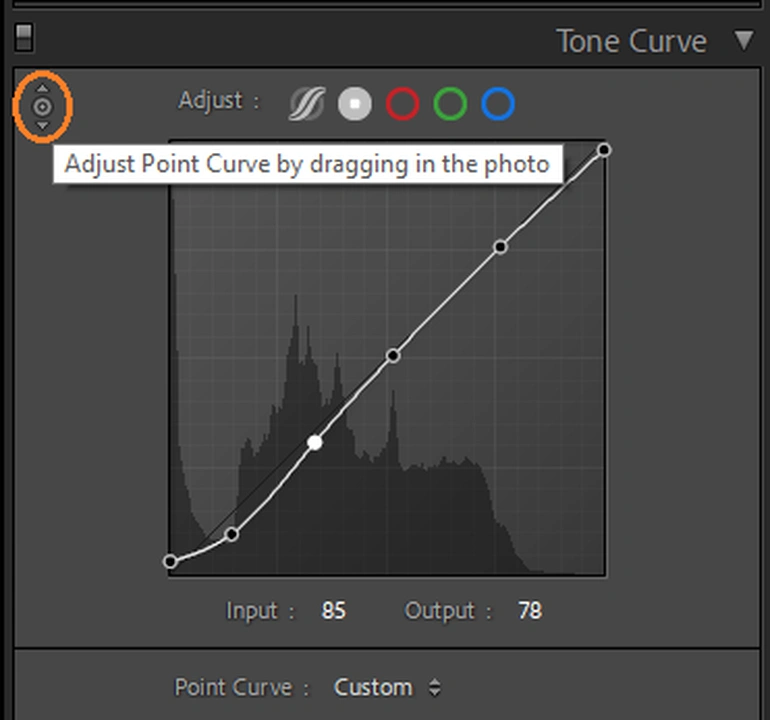
When you are in the Parametric Curve section, you can drag the sliders to make the changes. Meanwhile, on the Point Curve, you actually need to set points and drag them up and down. Here you actually have two built-in presets – Light Contrast and Strong Contrast. If you want a contrasty image, you can use either of them as a base, then do some finetuning. You can hold Alt / Option to move the points on the curve with more subtlety and precision.
Both the Point Curve and the Parametric Curve affect only dark and light parts of your image. With their help, you can increase or decrease contrast.
Also, you can select this little circle, then point anywhere within the image and go up or down. This way you will adjust how light or dark this area is.
The RGB channels are somewhat different. Here you are working with colors within your image as well as light and dark parts. In the Red Channel if you put a point at the bottom and drag it down, you will add cyan into the shadows. But if you drag it up, you’ll add red. If you place the point at the top and drag it down, you’ll add cyan to the highlights; and if you drag it up, you’ll add red. The same principle works in the Green Channel – except you will either add or detract greens and pinks. In the Blue Channel you can add or detract yellows and blues.
Now, let’s add some cyan with the help of the Red Channel, yet keep the Green and the Blue Channels untouched.
If at any point you need to undo a step or several, go to Edit > Undo or press CTRL / Command + Z.
Calibration Panel
Now, let’s jump to the Calibration Panel. This section is highly important as it has the power to completely change the colors within your image and do so in an organic way.
First of all, you can add some green or magenta to your shadows. Then there are six sliders – the Hue and the Saturation for the Red Primary, the Green Primary and the Blue Primary.
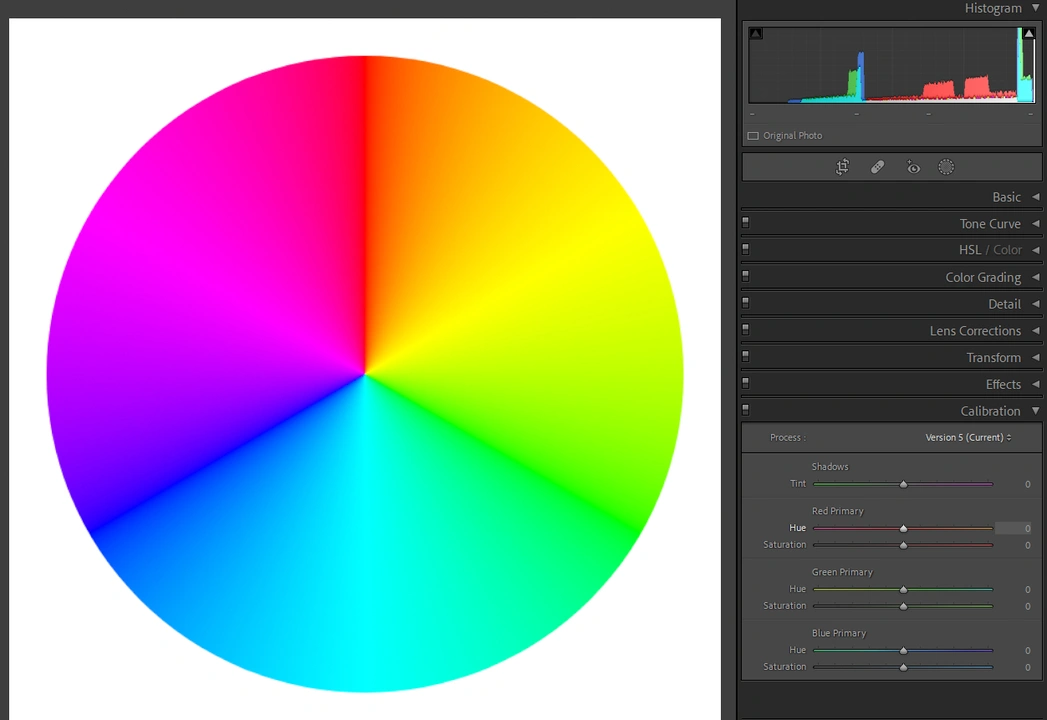
What you need to have in mind is that in the HSL / Color section, the sliders affect only specific colors. Here is an image of a color circle.
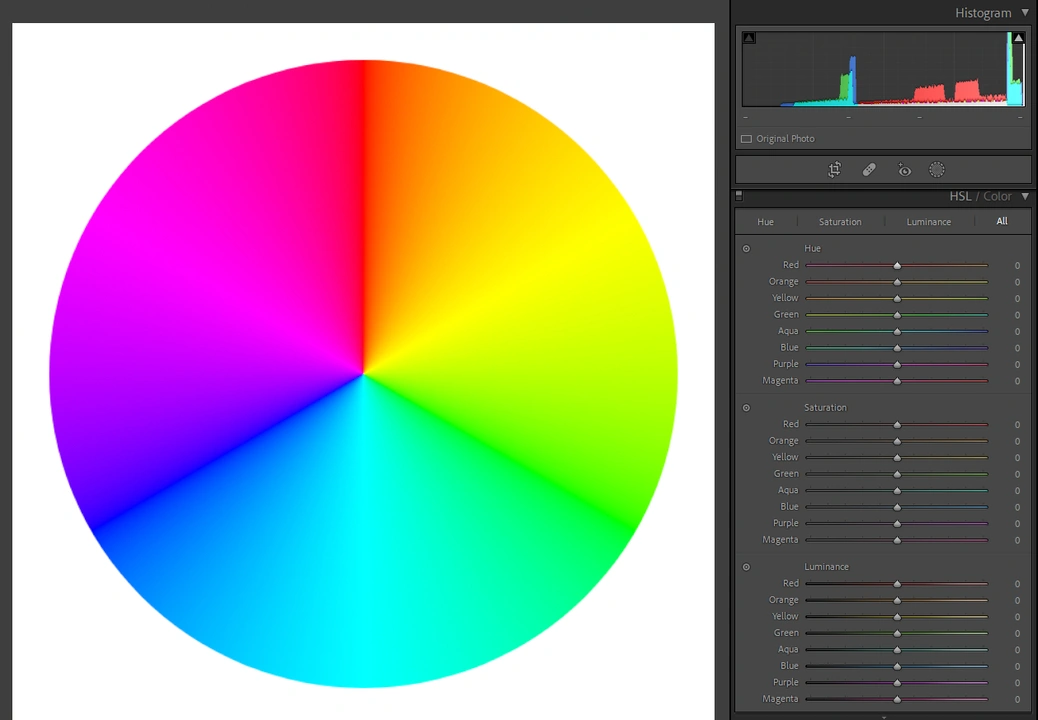
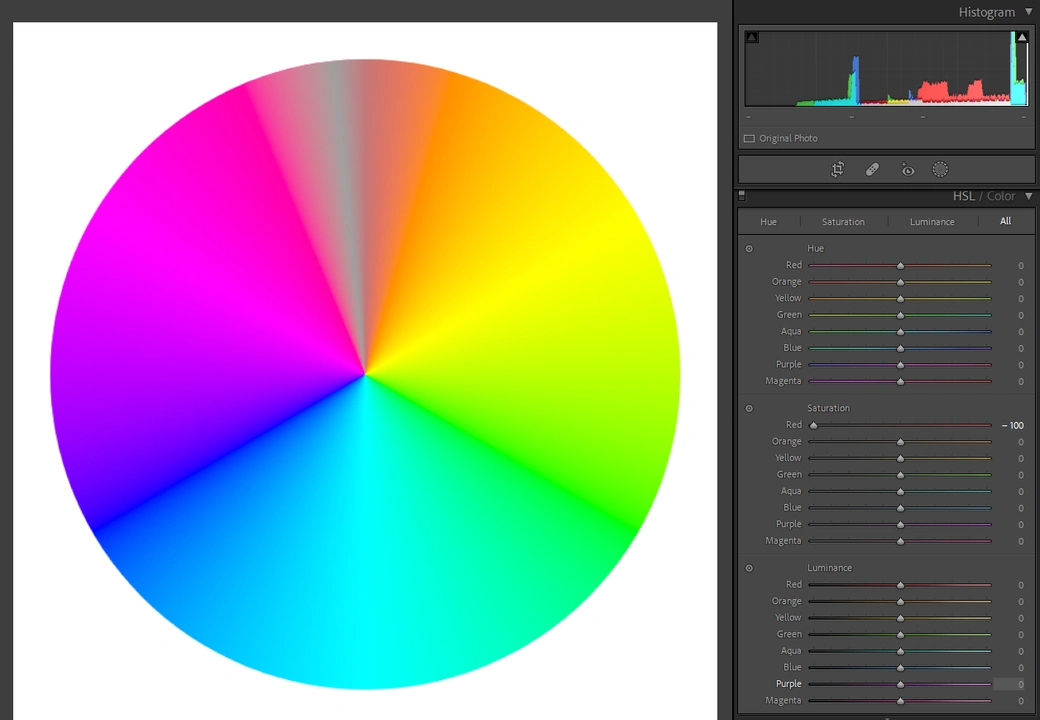
Here, only the red is desaturated.
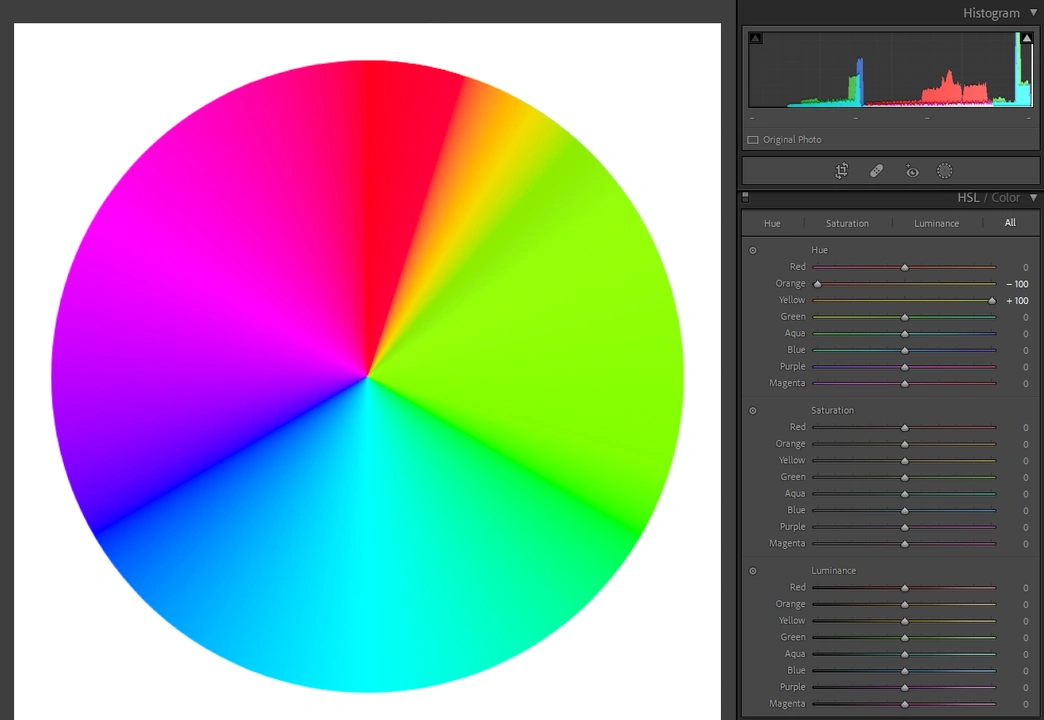
And here the hues of orange and red are changed.
In the Camera Calibration, when you are moving the sliders, all colors are affected. This is what happens when you change the hue in the Red Primary.
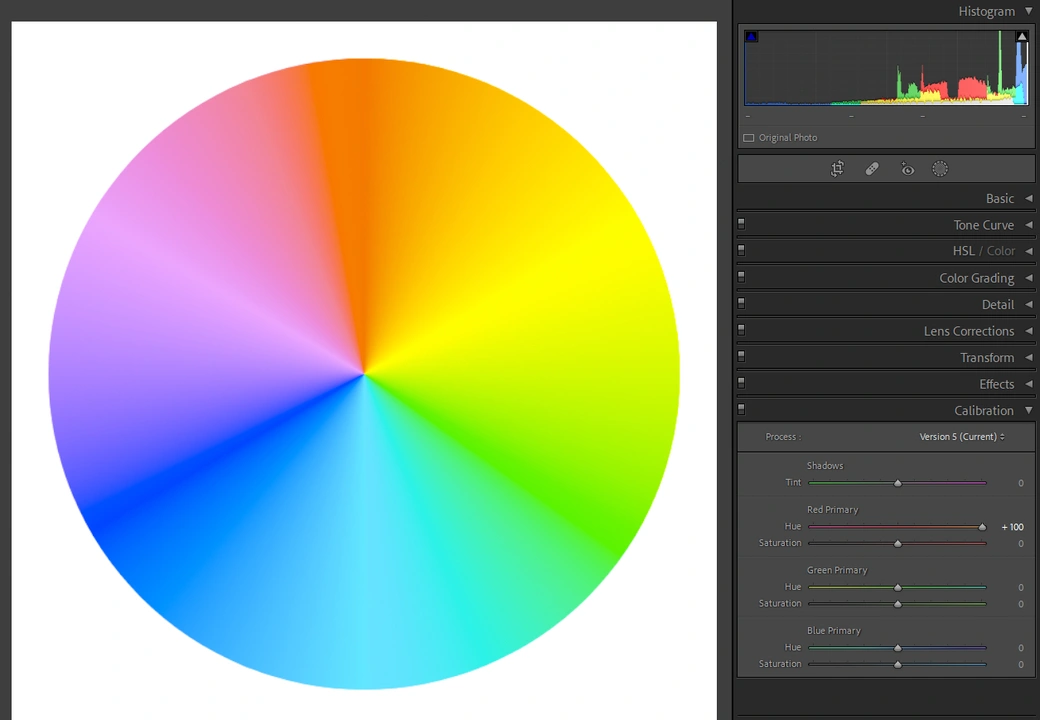
Here’s another example of how drastically you can change the colors using Calibration.
Naturally, with the saturation sliders you can increase or decrease the intensity of the colors in your image. This is why Camera Calibration is such a powerful tool.
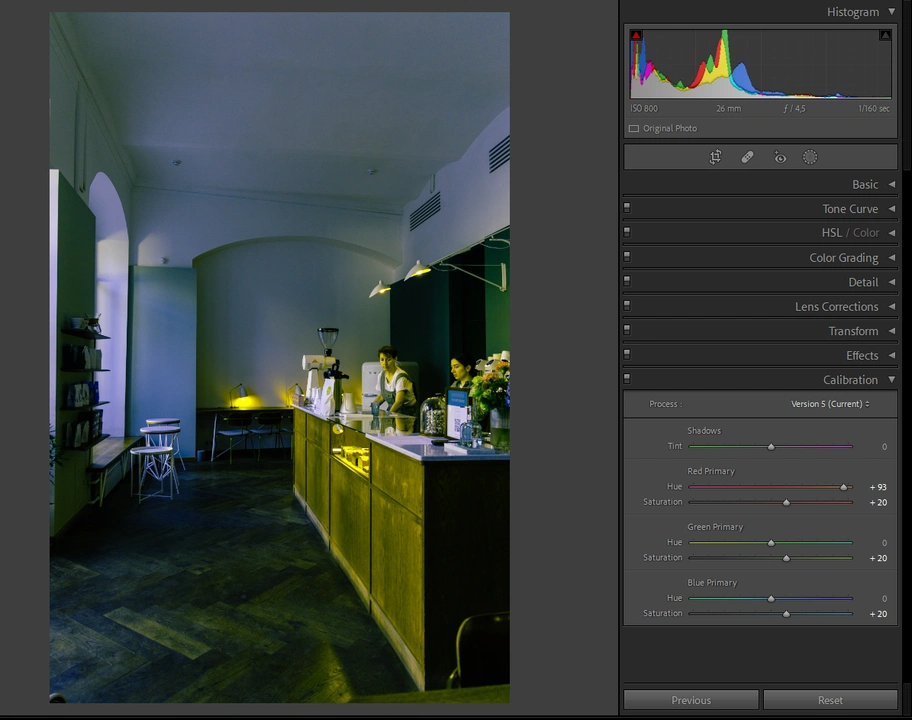
Here’s our image after some tweaking.
It may look weird now, but don’t worry, it’s going to be balanced out in a moment.
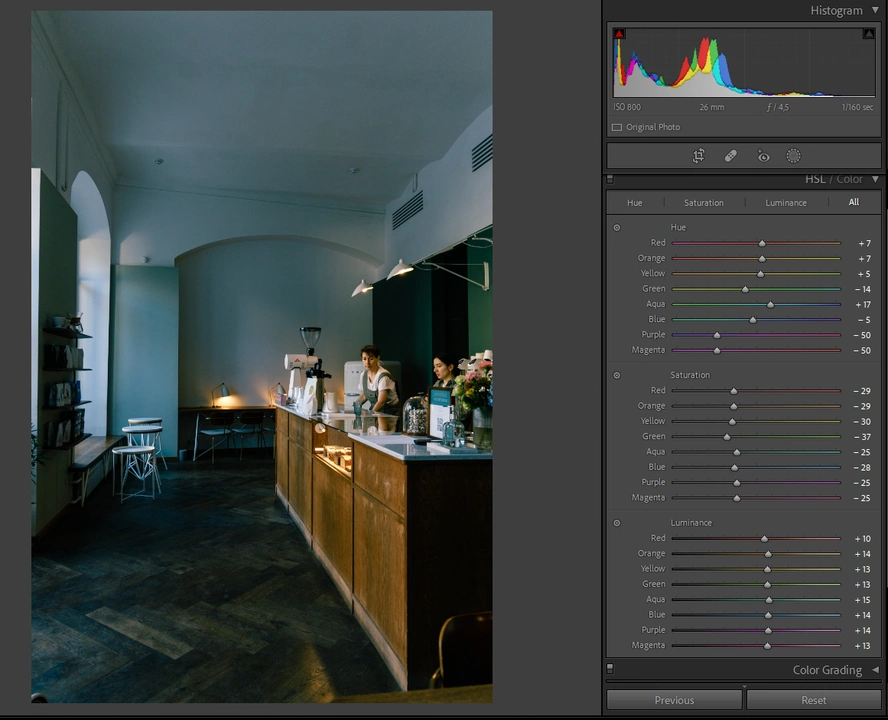
HSL / Color panel
Let’s switch to the HSL / Color panel. There are 3 sub-sections here:
- Hue
- Saturation
- Luminance
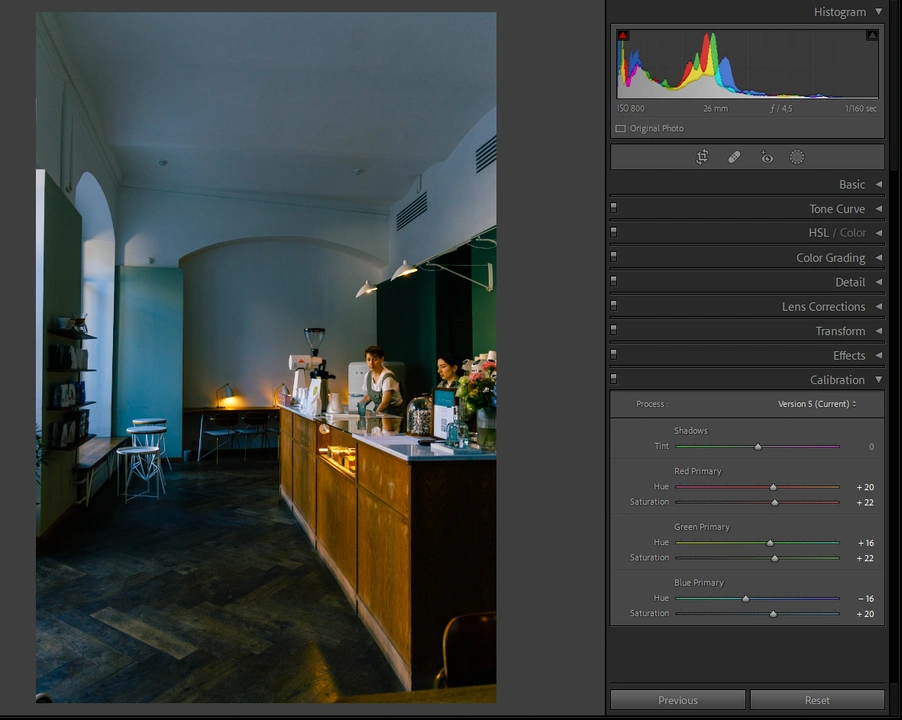
With the help of the sliders in the Hue subsection, you can change the hue of the colors. For instance, you can make orange more red-ish or yellow-ish. In the Saturation subsection, you can tweak how saturated the colors are, while in the Luminance you can adjust their brightness and darkness. In this panel you can balance out some of the changes you’ve made in the Calibration section. This is what our image looks like after all the adjustments in the HSL panel have been made:
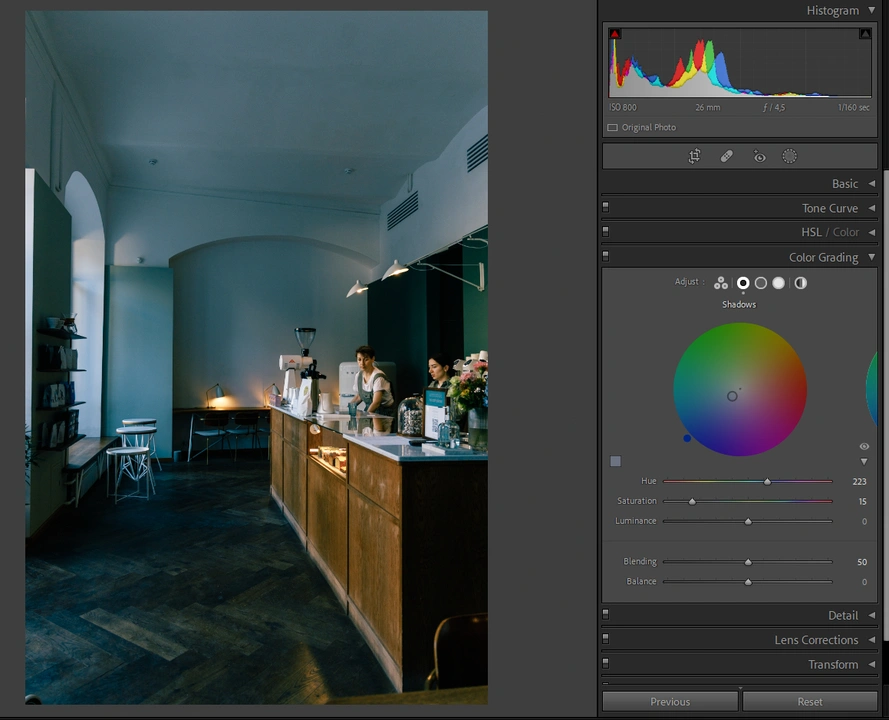
Color Grading
Next is Color Grading. In a way, this section can affect your image in the same way as the RGB channels in the Tone Curve, but you can be a bit more specific with the colors here. Here you have Midtones, Shadows and Highlights. You can pick the colors on the Color wheel or type in the number of the color. Then you can adjust the saturation and the luminance.
Let’s add some blue to the shadow.
And some yellow to the midtones and highlights.

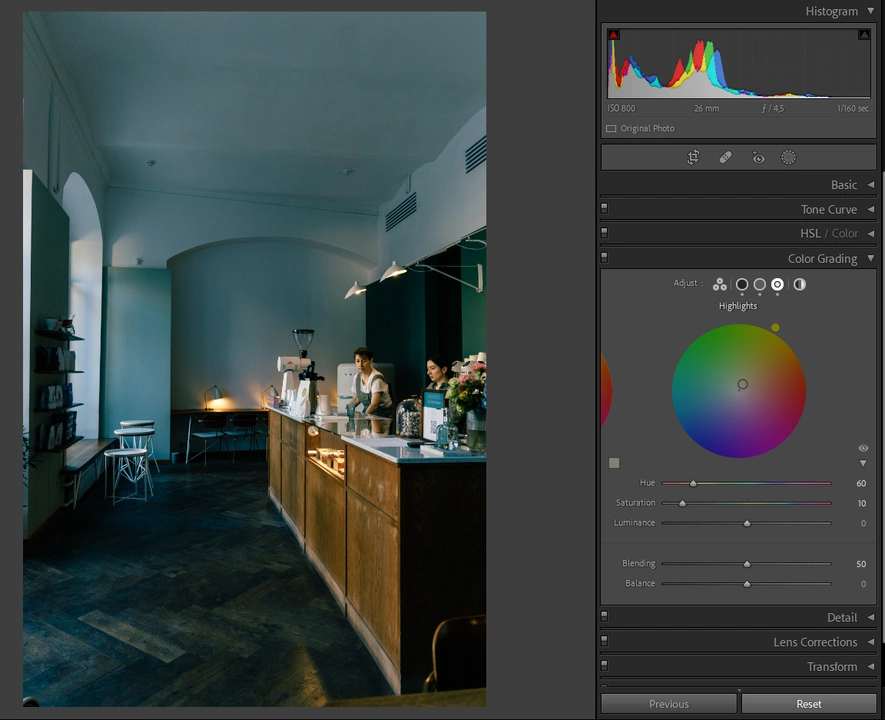
With the Blending and the Balance sliders, you can make the shadows be more affected by the color grading than the highlights and vice versa. Play around with the sliders to find out what works best for your image.
Here’s a tip. You can use the website called Adobe Color to look up color schemes. There are triads, complimentary, split complimentary and a few more. You can pick a color scheme that you like and then try to implement it into your color grading.
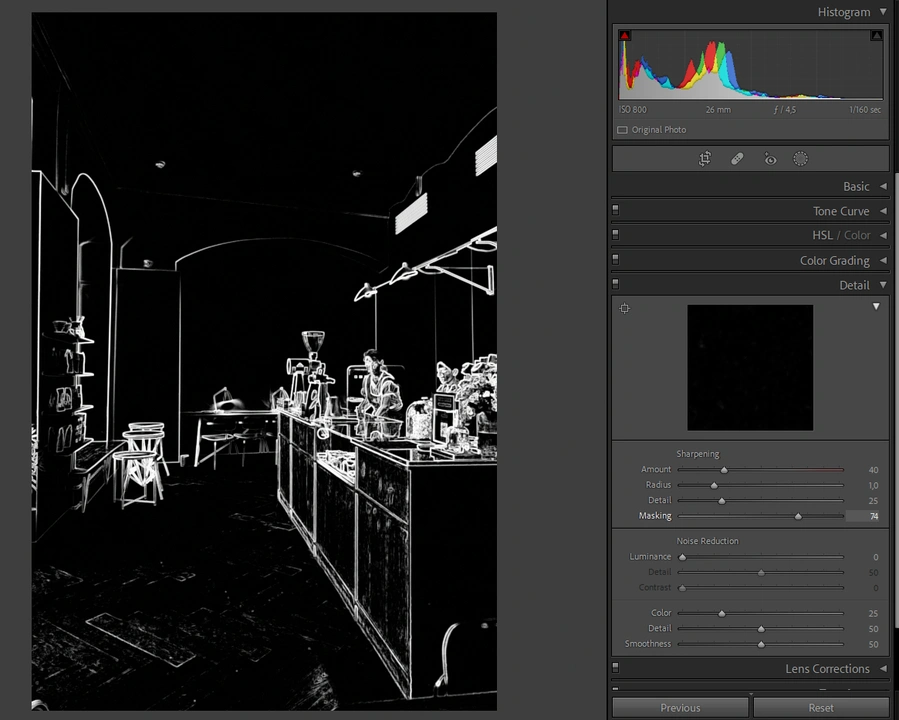
Detail section
In the Detail section you can make your image sharper by increasing the amount of sharpening, the radius and the detail. If you have some noise in your image, you can remove it in this section. Lightroom usually does a pretty good job at it.

If you toggle the Masking slider, while holding Alt / Option, you’ll see which areas of your image are affected by the sharpening. This can help you achieve more subtle and natural-looking results.
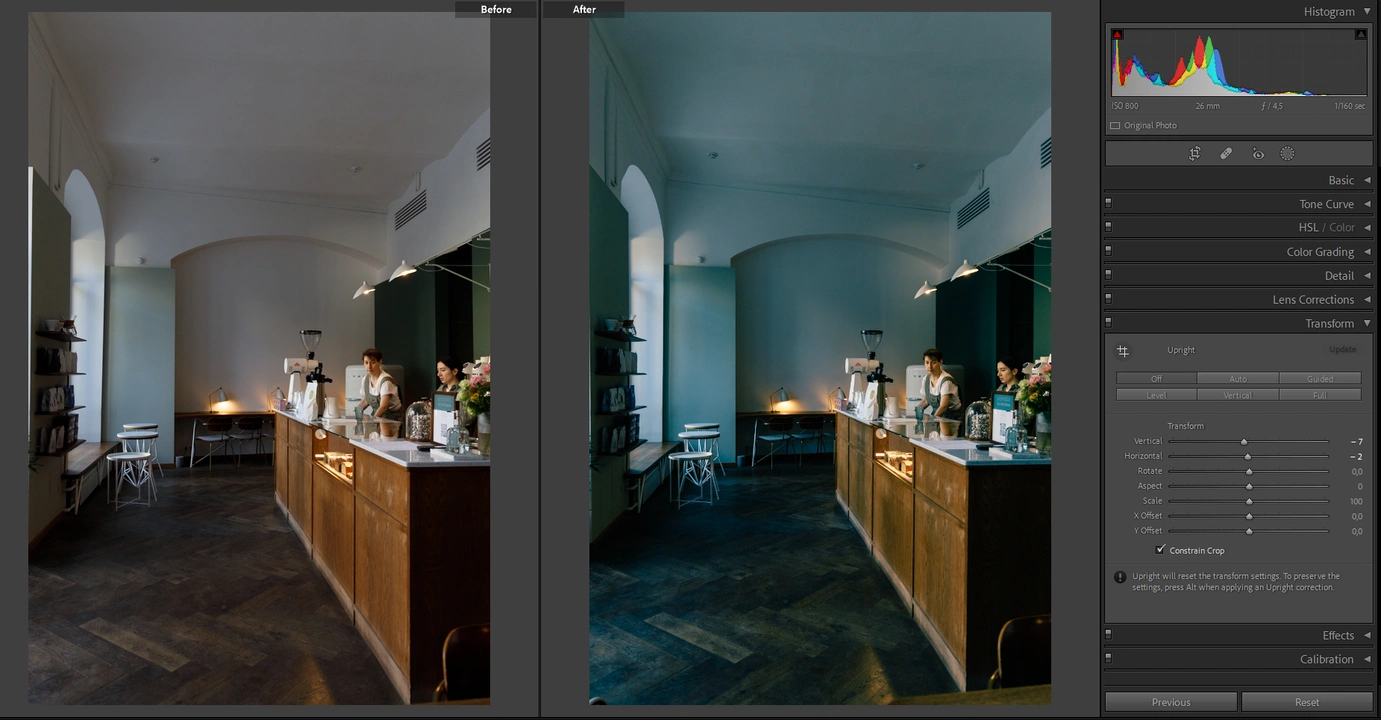
Transform section
The Transform section will come in handy, if you want to transform your entire image. For example, you can tilt your image vertically or horizontally. This can be useful if, say, you took a picture of a window that was somewhat above you, but you want it to look completely straight. You can straighten it out in this very section. What’s more, you can adjust everything manually or use “Auto” or “Guided”.
Crop & Straighten section
Click on this button to go to the Crop Image & Straighten section. Alternatively, you can press “R”.
Here you can keep the original aspect ratio, choose one of the most popular ones or enter your own. Drag the borders with the cursor to make the cropping area bigger or smaller. Don’t forget to tick the “Constrain to Image” option before you make any adjustments.
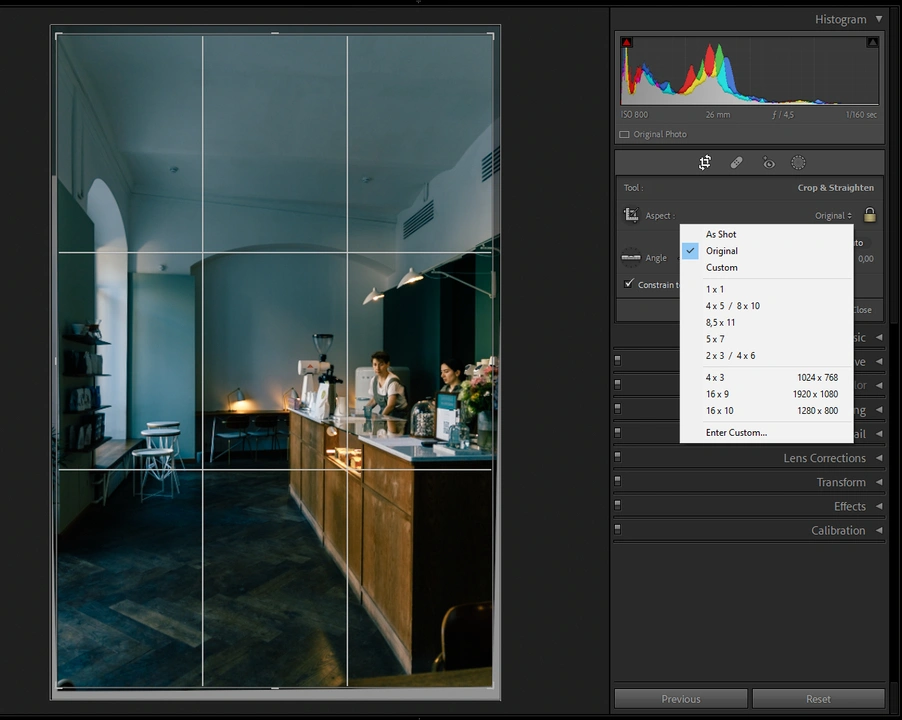
Press “O” to choose a different grid.
It’s possible to rotate your photo here, too. To straighten your image automatically, click on “Auto”.
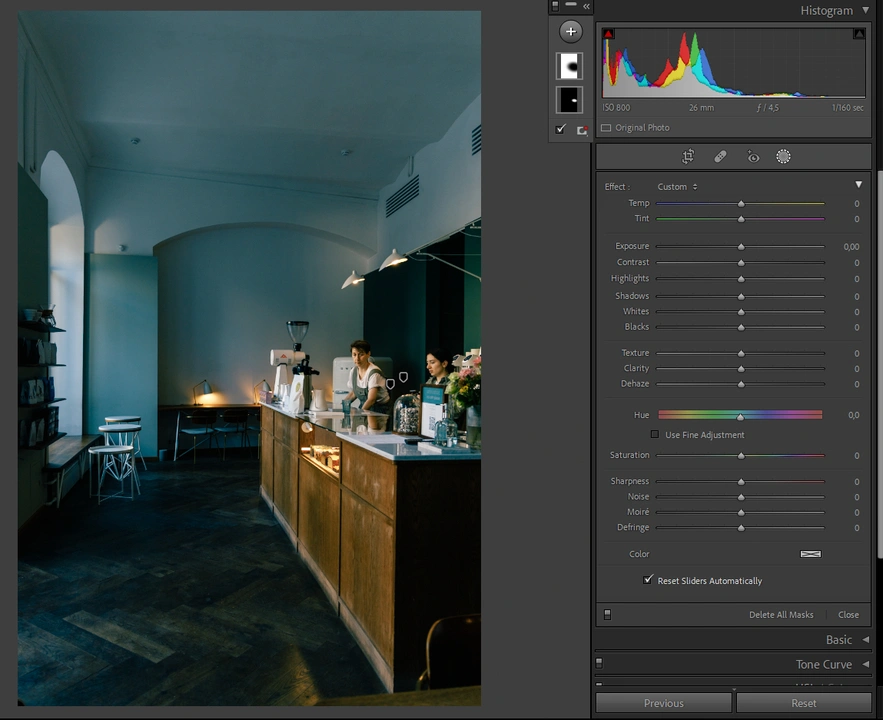
Radial Gradient
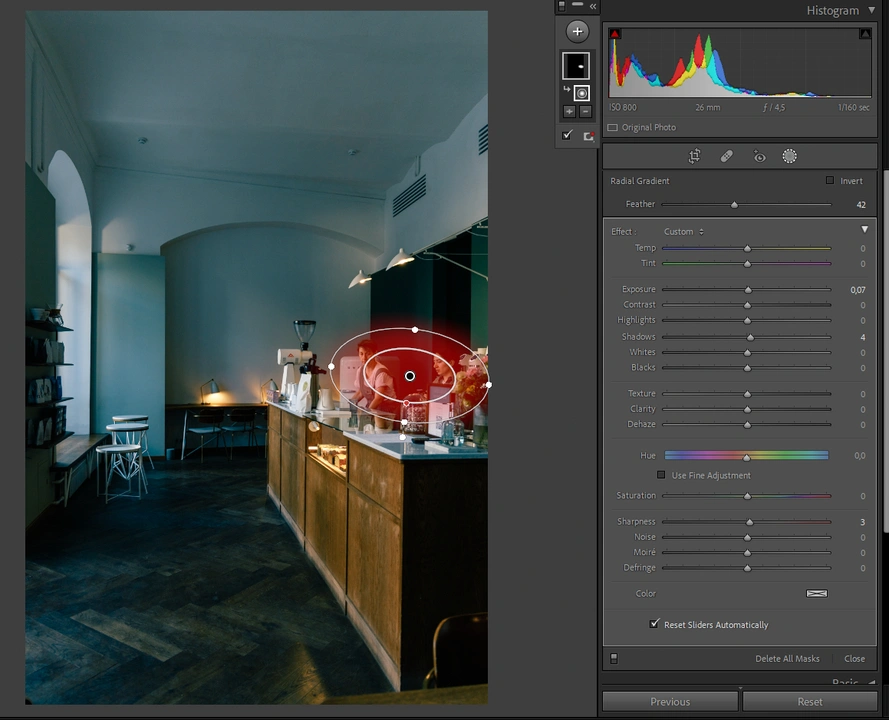
Now click on the circle. This will open the selection of masks.
Select the Radial Gradient and place it over the most important area in your image. You can make the gradient bigger or smaller with the help of the cursor. Slightly up the exposure. Then lift the shadows and add some sharpening – again, only a little.
Then add a second Radial Gradient by clicking on “+” and choosing it.
Place the second gradient around the most important area but make it larger than the first one. Tick the “Invert” option – this will invert your mask. Now, lower the exposure a bit and make the shadows slightly darker.
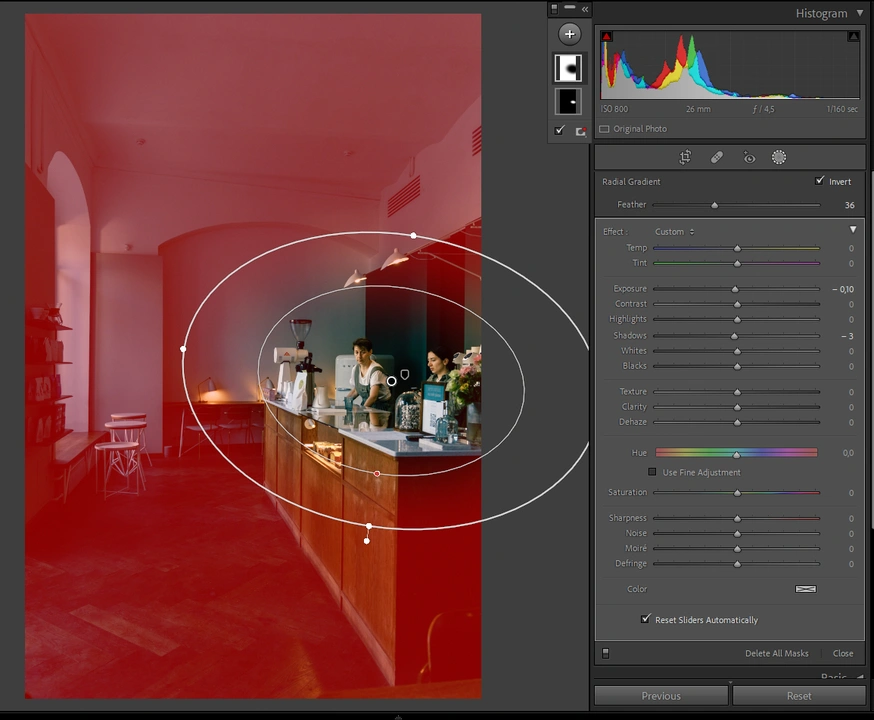
It will create a natural vignette effect and subtly draw the attention to the most important part of your image.
This is with the radial gradients turned off.
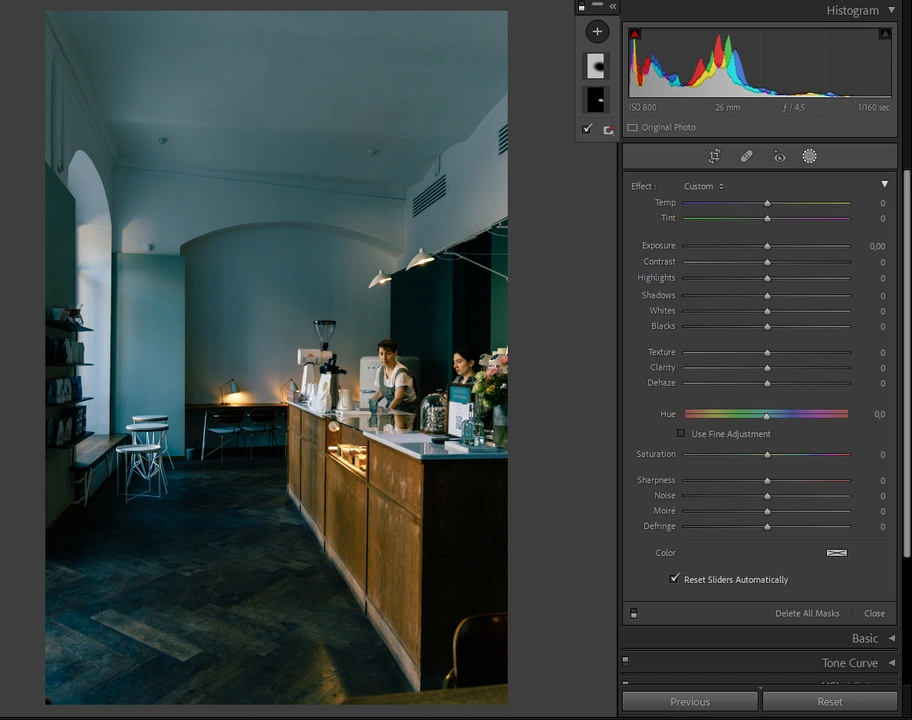
This is with the radial gradients turned on.
Your eyes immediately travel to the counter and the two women, right?
If you want to start over, you can click the “Reset” button. Meanwhile, the “Previous” button will apply the settings from the previously edited photo to the one that is currently selected.
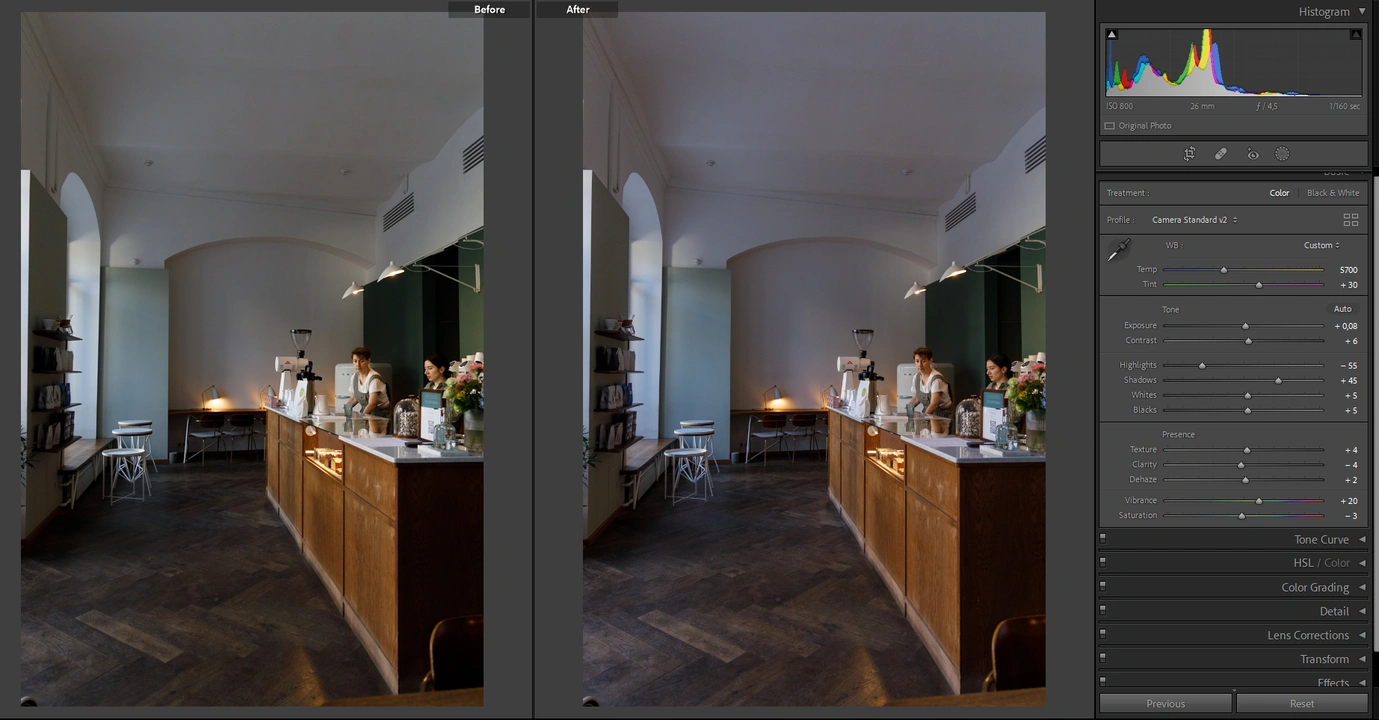
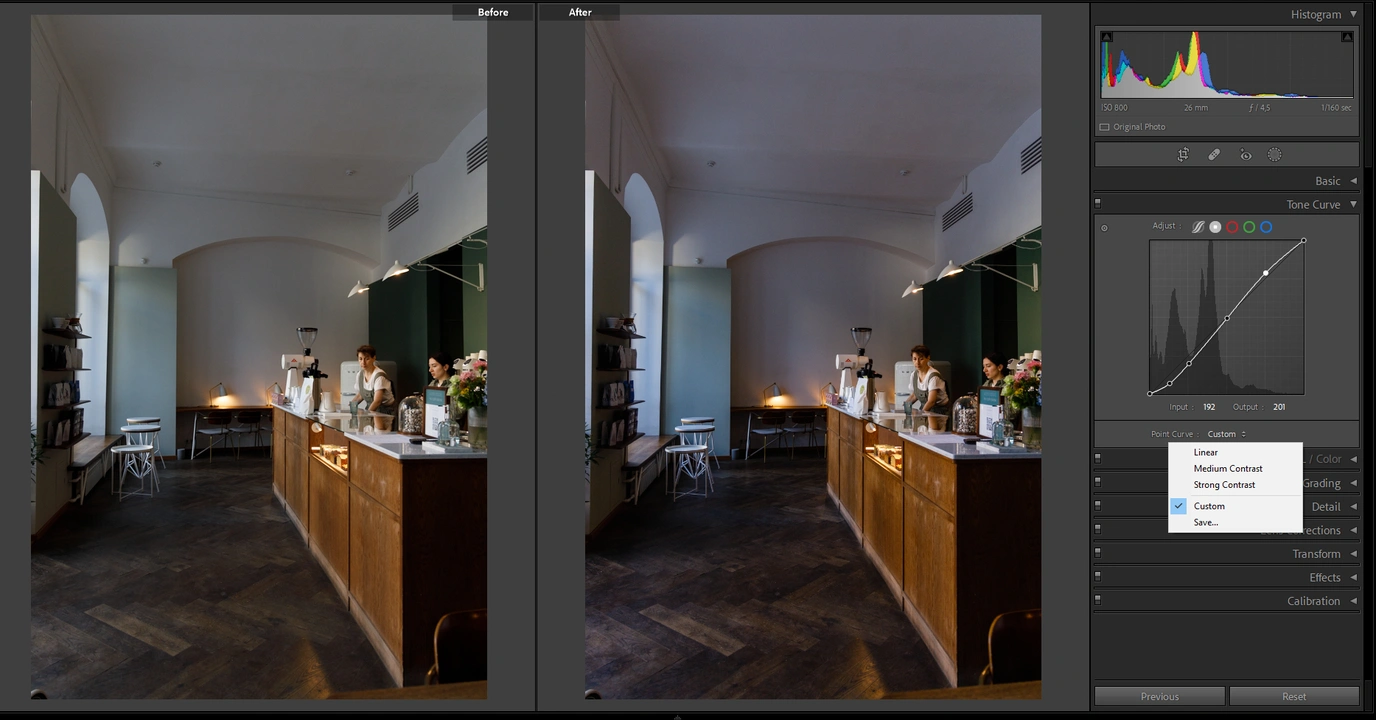
The editing is done! Here’s Before and After.
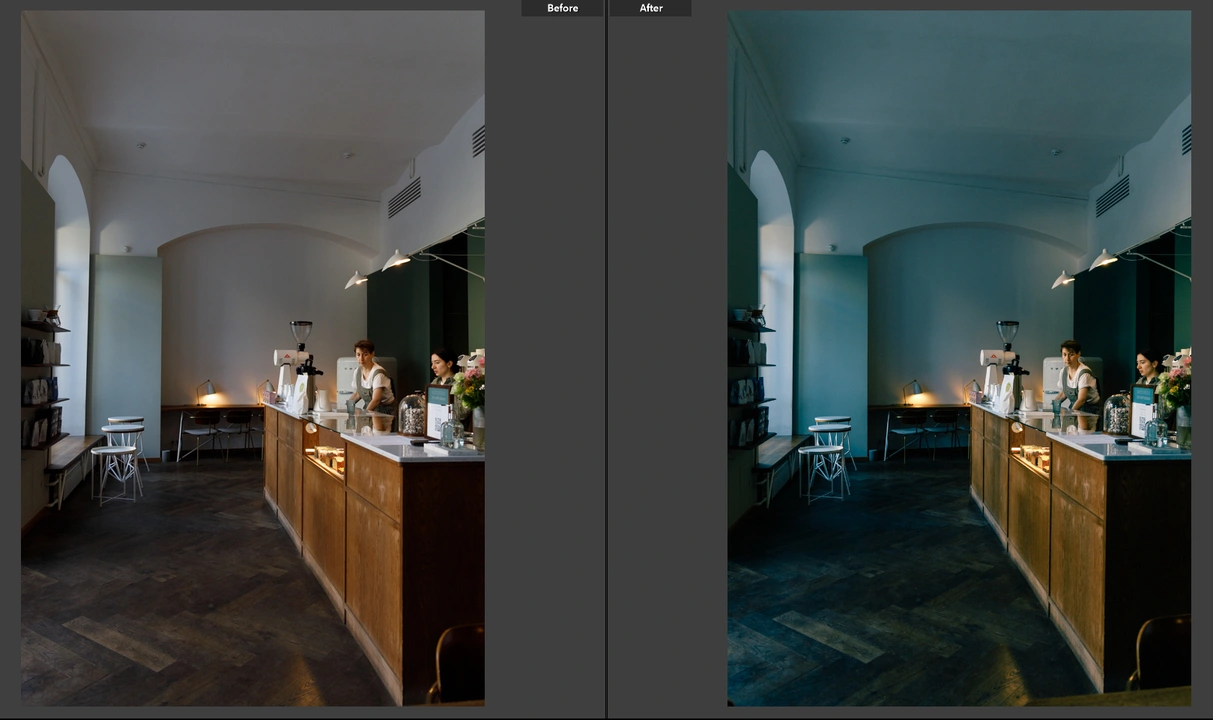
As you can see, the entire process took neither much time nor effort. Now you know how to edit photos in Lightroom!
How to Batch Edit in Lightroom
Editing a batch of photos in Lightroom is unbelievably easy. Here’s how you can do it.
First, you need open the photo that is edited, then select other photos that you want to apply the settings to.
If you want to select several consecutive images, then click on the first photo, hold “Shift” and click on the last photo. All the photos in between will be selected.
If you want to select non-consecutive photos, you need to hold Ctrl / Command, while clicking on the images.
Once your images are selected, you’ll see that the “Previous” button turned into “Sync”. It’s important that the edited photo is currently opened. Click on the “Sync” button.
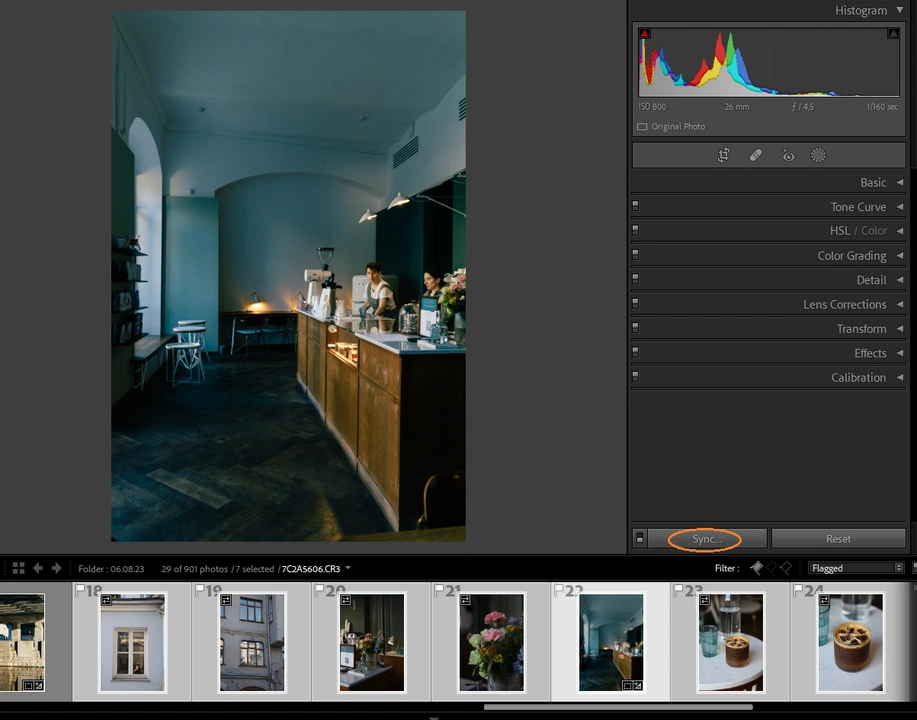
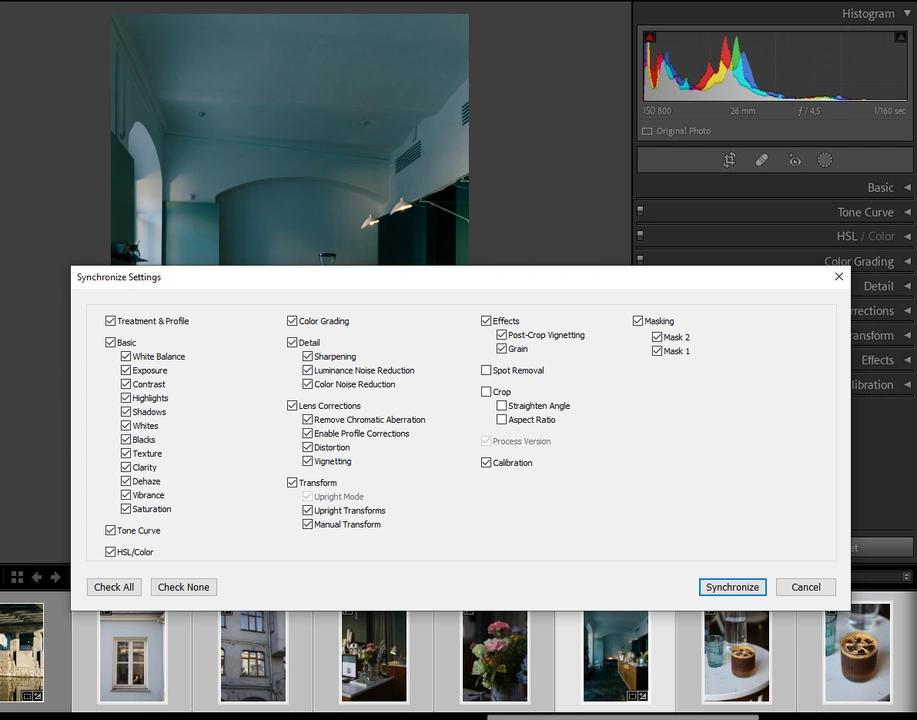
Tick the settings which you want to apply to the other selected photos and click on “Synchronize”.
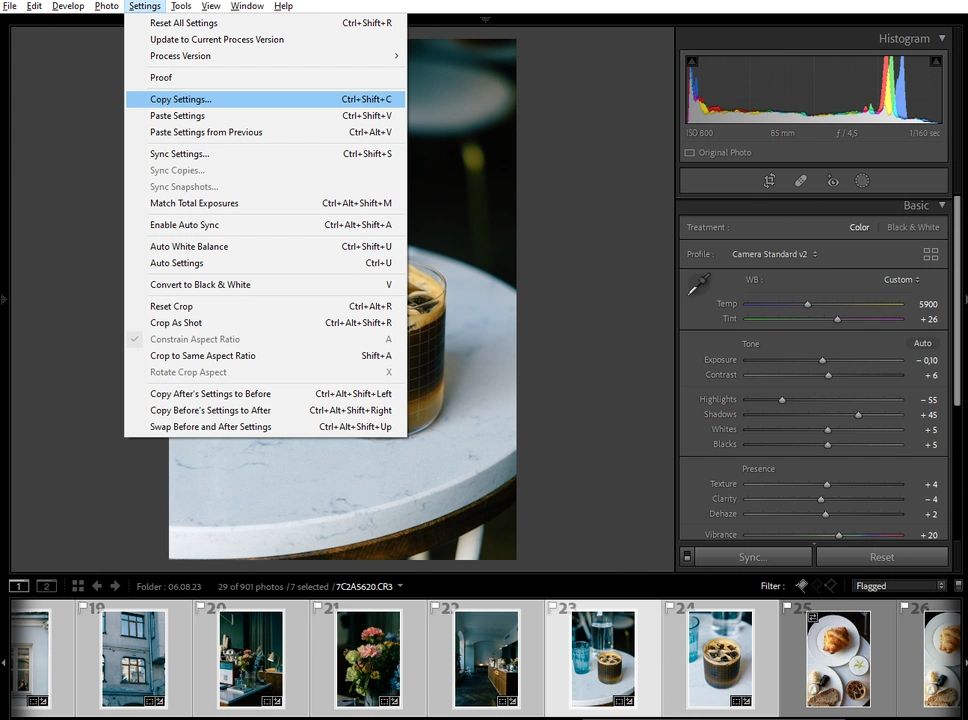
Instead of syncing, you can also copy your settings and paste them into any image you want – even from a different batch of uploaded photos. Go to Settings > Copy Settings for that.
After the settings are synced or pasted, you can do some finetuning. For instance, you might need to adjust the white balance and exposure. If you had radial gradients, you’ll probably need to reposition them. Please note that it’s better to avoid syncing masks like brush or selected sky. Add them to each of your images separately, instead.
If you had no idea how to edit photos in a batch in Lightroom before, now you do!
How to Export photos in Lightroom
When you are done with editing, here’s how you can export your photos.
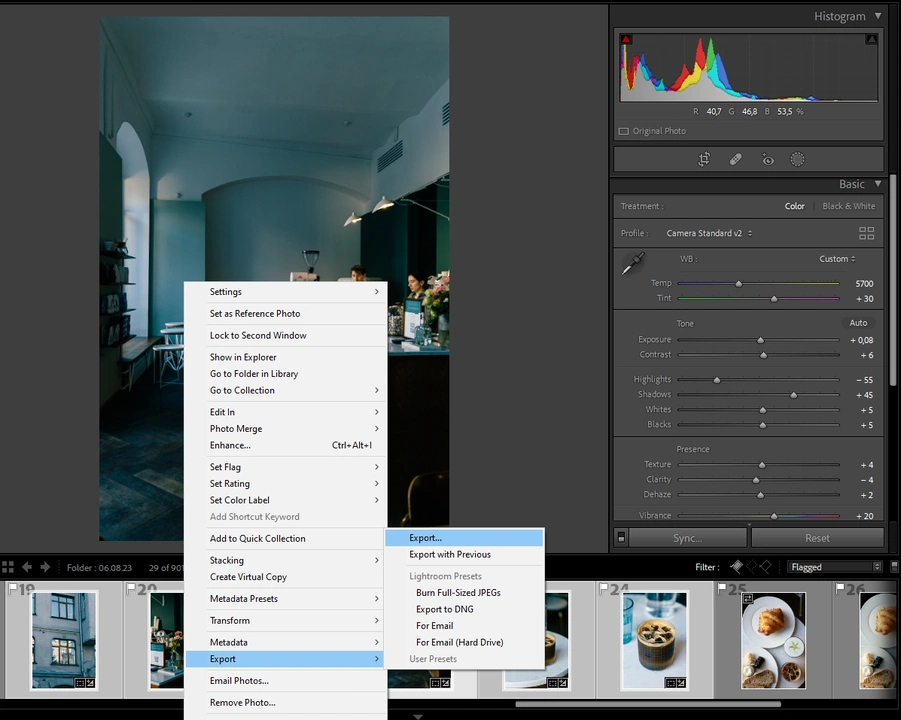
If you want to export just one image, you can right-click on it and select “Export” from the drop-down menu. If you need to export several images, select all the images that you want to export first, then right-click on one of the images and select “Export”.
You can also go to File > Export.
You will see the Export settings. Adjust them to your liking, then click on “Export”.
It might take Lightroom some time to export your images, depending on how large the batch is.
FAQ
How to edit multiple photos in Lightroom?
It’s really simple. First, you need to open the image that is already edited, then you need to select your unedited images. Clicking on the first photo, then holding “Shift” and clicking on the last photo will select subsequent images.
If you need to select non-subsequent images, hold Ctrl / Control and click on the necessary photos. Next, click on the “Sync” button, while your edited photo is open. This will synchronize the settings.
Alternatively, you can copy settings from one edited photo and paste them into several selected images.
How to edit raw photos in Lightroom?
Lightroom supports a whole host of different formats, including RAW ones. There’s no need for you to download any plug-ins to edit raw photos in Lightroom – unlike Photoshop, where you need to download and install Camera Raw.
All you need to do is open Lightroom, click on “Import”, find the necessary folder and select images that you want to edit.
Click on “Import” again and wait for the software to upload your images. Next, switch from Library to Develop by pressing “D” on the keyboard and start editing your images. You can find a step-by-step instruction on how to do that in this article.
Is Lightroom the best software for photo editing?
It is one of the best and most popular software for editing. And it’s quite evident why. It’s powerful, yet not that complicated to use. With the help of Lightroom, you can have some fun and get really creative while editing. It offers an array of different tools, such as:
- masking, which can help you do some local editing;
- watermarking photos, which is a great way to protect them from unauthorized use;
- compressing images, which will reduce their file size dramatically and they won’t take up a lot of memory space;
- resizing images, in case you’ll want to make them smaller or bigger.
Learn more on how to add watermark in Lightroom.
However, Lightroom has some downsides. For instance, the spot removal tool works best only when you want to remove a detail that is against a monochrome background. Maybe there’s a bird in the sky or some other minor distraction. But if you need to remove one or several objects in a detail-heavy area, then Photoshop will be a much better choice.
Generally speaking, you should do all the color editing in Lightroom, then go to Photoshop to do skin-retouching or some other editing process that requires a set of more advanced tools.
Conclusion
Now that you’ve learnt how to edit photos in Lightroom, you know that editing doesn’t need to be tedious and boring. It can be a fun and creative process, too, if you don’t shy away from experimenting. Lightroom has a lot to offer, yet it’s not that hard to master it. Don’t be afraid to drag sliders left and right, try out different combinations of settings. You never know what you can stumble upon.