 by
by This article continues the series on watermarking your digital multimedia content. If you are using or planning to use Picasa to organize, view, edit and share digital photos, read this article for information on how to use this software to make a watermark for your digital images in batch mode.
Get Started Batch Watermarking
Run Picasa 3.9.0. Select the photos you would like to watermark and click Export as shown in the screenshot below:

This invokes the ‘Export to Folder’ dialog:
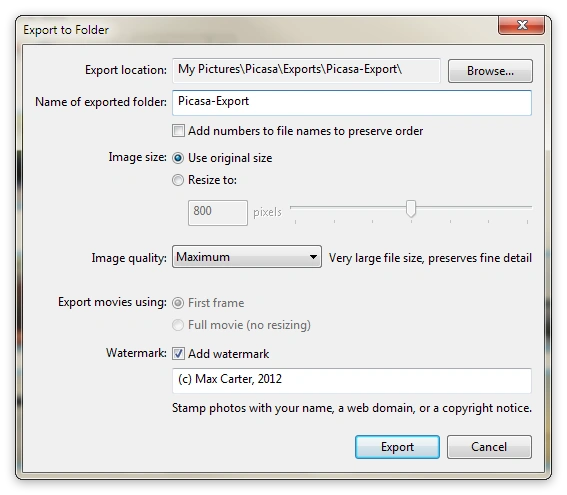
Follow the steps listed below to protect your copyright in a batch:
- Specify the Location folder to which watermarked images will be exported (copied).
- Specify Image Size if required. Leave this option unchanged to use the original size.
- Select an appropriate image quality. Let’s use Maximum.
- Select the Add watermark option and type the text.
- And you are done. Click Export to run the batch watermarking.

Picasa Limitations
- In Picasa, image watermarks are not supported. Only text can be used.
You cannot specify font settings (font name, size, color, etc). In Picasa, a watermark is white text (for dark photos) and black text (for light photos).
- You are not allowed to specify the location at which a watermark should be embedded. In Picasa, a watermark is added to the lower-right corner of photos.
Want to embed images or adjustable strings to the required location?
Performance Measurements
Finally, let’s measure how much time it takes Picasa 3.9.0 to embed a custom string in multiple images. The results are shown in the table below:
Results
Total Files: 442
File Size, Mb: 5.2
Total Processing Time, min: 6:56
Hardware
Processor: Intel Core i7-2630QM CPU 2.00GHz 2.00GHz
RAM: 8.00 GB
System type: 64-bit Operating System
Do you want to watermark much more photos during the same time? Use Visual Watermark - batch watermark software instead